




















GLM23REWAGB General Electric Refrigerator - Instructions
Keep searches simple. Use keywords, e.g. "leaking", "pump", "broken" or "fit".
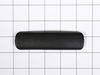
Top portion of refrigerator handle was cracked
The old cap was cracked and fell out easily. The new cap simply snapped into place. The part arrived very quickly and installation was a "snap".
My wife thinks I'm a Hero. I highly recommend PartSelect.com for fast and reliable service.
My wife thinks I'm a Hero. I highly recommend PartSelect.com for fast and reliable service.
Parts Used:
-
Roger from Springfield, IL
-
Difficulty Level:Really Easy
-
Total Repair Time:Less than 15 mins
9 of 18 people
found this instruction helpful.
Was this instruction helpful to you?
Thank you for voting!
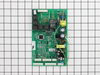
evap fan not working.
first i removed the three screws that covered the circuit board that was bad. then i removed the 6 connectors that went from the refrigerator to the board then popped out the old board , popped in the new board reconnected the circuit connectors covered everything back up and my refrigerator is back on line. this all took about 10 to 15 minutes time ... thank you for your product it really did the job..
Parts Used:
-
louis from floral park, NY
-
Difficulty Level:Really Easy
-
Total Repair Time:Less than 15 mins
-
Tools:Screw drivers
6 of 9 people
found this instruction helpful.
Was this instruction helpful to you?
Thank you for voting!
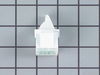
Refrigerator light not coming on
Our daughter spilled juice on the refrigerator light button. It started with the light coming on very slowly and then not at all. We popped off the old button with a flat head screwdriver, plugged in the new one. Works perfect. Can't believe how inexpensive and easy the fix was.
Parts Used:
-
Frances from Beavercreek, OH
-
Difficulty Level:Really Easy
-
Total Repair Time:Less than 15 mins
-
Tools:Screw drivers
5 of 6 people
found this instruction helpful.
Was this instruction helpful to you?
Thank you for voting!
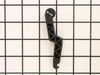
Fresh Food lever, under door, missing roller, make loud sound when closing door.
Removed tension spring, removed old lever, installed spring on lever, inserted lever in hole, re-attached spring to hook under front of refrigerator.
Parts Used:
-
Dennis from AUSTELL, GA
-
Difficulty Level:Really Easy
-
Total Repair Time:Less than 15 mins
-
Tools:Pliers
5 of 6 people
found this instruction helpful.
Was this instruction helpful to you?
Thank you for voting!
Dispenser flap for ice not closing. no water from dispenser was coming out.
Water line 5/16inch was severed, under refrigerator. Used union connector to join line. Dispenser plate removed using allen key to unsnap plate ,from under the plate itself. Removed screws holding solenoid valve and removed the plug from circuit board connected to solenoid. Installed new solenoid valve. Put flapper back in place, and made sure spring on left side of flapper is reattached to the opening on the flapper. This corrected all problems. Caution, keep an eye on spring that it remains in place.
Parts Used:
-
Bart from Whitestone, NY
-
Difficulty Level:A Bit Difficult
-
Total Repair Time:30 - 60 mins
-
Tools:Nutdriver, Screw drivers
8 of 15 people
found this instruction helpful.
Was this instruction helpful to you?
Thank you for voting!
Ice maker door didn't open and close properly
I removed the outer plate by sticking a very small screwdriver in the small holes at the bottom of the plate and pulling the plate toward me.
I then removed the 4 screws from the internal plate and pulled the plate toward me.
Then I romoved the 3 screws holding the old solenoid and unplugged it.
Next I put the new solenoid in place and replaced the three screws.
Finally I plugged in the solenoid and replaced the internal and external plates.
I then removed the 4 screws from the internal plate and pulled the plate toward me.
Then I romoved the 3 screws holding the old solenoid and unplugged it.
Next I put the new solenoid in place and replaced the three screws.
Finally I plugged in the solenoid and replaced the internal and external plates.
Parts Used:
-
M Alan from Lebanon, TN
-
Difficulty Level:Really Easy
-
Total Repair Time:15 - 30 mins
-
Tools:Screw drivers
5 of 6 people
found this instruction helpful.
Was this instruction helpful to you?
Thank you for voting!
Would not cool top or bottom
Everything looked to be working but the compressor. As a pro checked every thing came down to a relay on the main board.
Just removed cover from back top left. marked and removed all wires. removed old board and installed new board very easy. Must read paper sent with it,
you may need to cut wires on some models.
Just removed cover from back top left. marked and removed all wires. removed old board and installed new board very easy. Must read paper sent with it,
you may need to cut wires on some models.
Parts Used:
-
David from White Pine, TN
-
Difficulty Level:Really Easy
-
Total Repair Time:15 - 30 mins
-
Tools:Nutdriver
5 of 6 people
found this instruction helpful.
Was this instruction helpful to you?
Thank you for voting!
Ice Maker would not fill.
Was concerned that new icemaker was quite a bit different than the one we were replacing. Called GE to confirm it was correct.
Went ahead and installed the unit, using the supplied electric cable adapter.
A little difficult to deal with the extra cable, but everything worked OK and it's making ice normally.
Went ahead and installed the unit, using the supplied electric cable adapter.
A little difficult to deal with the extra cable, but everything worked OK and it's making ice normally.
Parts Used:
-
Charles from Keller, TX
-
Difficulty Level:Easy
-
Total Repair Time:15 - 30 mins
-
Tools:Screw drivers
5 of 6 people
found this instruction helpful.
Was this instruction helpful to you?
Thank you for voting!
Water not dispensing
Background: My refrigerator was part of the class action law suit back in 2006. As a result both doors, the auger in the ice maker and a heating element in the freezer were all replaced.
Problem this time: Water was not dispensing.
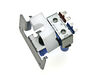
Solution: Replaced the double outlet water valve in the back lower left portion of the refergerator. Water was coming into it from the water filter hose, but not coming out of it when the water dispenser in the front was engaged.
Further, I found that the coils in the back of the freezer were iced up and I therefore defrosted them with a heater. Thus, the original problem encountered with the law suit, did not get fixed by simply replacing the doors. That problem is still there. I think the defroster/heating element in the freezer is again not working.
However, I do now have water flowing again and the installation was, as others have described, very easy. Thanks for the online help.
Problem this time: Water was not dispensing.
Solution: Replaced the double outlet water valve in the back lower left portion of the refergerator. Water was coming into it from the water filter hose, but not coming out of it when the water dispenser in the front was engaged.
Further, I found that the coils in the back of the freezer were iced up and I therefore defrosted them with a heater. Thus, the original problem encountered with the law suit, did not get fixed by simply replacing the doors. That problem is still there. I think the defroster/heating element in the freezer is again not working.
However, I do now have water flowing again and the installation was, as others have described, very easy. Thanks for the online help.
Parts Used:
-
Bob J from Platte City, MO
-
Difficulty Level:Really Easy
-
Total Repair Time:15 - 30 mins
-
Tools:Nutdriver
5 of 6 people
found this instruction helpful.
Was this instruction helpful to you?
Thank you for voting!
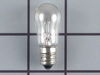
light burned out
-
Gerald from Lincoln, CA
-
Difficulty Level:Really Easy
-
Total Repair Time:Less than 15 mins
10 of 22 people
found this instruction helpful.
Was this instruction helpful to you?
Thank you for voting!
The Icemaker failed to make ice
I pulled the refrigerator away from the wall and turned off the water to the refrigerator and unplugged it from the wall. After removing the icebucket from the freezer I located the mounting screws, loosened them, unplugged the electrical connection below the icemaker and carefully removed it from the freezer. I unpacked the replacement icemaker, matched it against the original and attached the electrical connection adapter. Using the slots provided on the new icemaker I placed it over the mounting screws after aligning the water inlet pipe properly. I tightened the mounting screws while maintaining the icemaker in a level position. I plugged in the electrical connector. Then I replaced the icebucket, plugged in the refigerator back into the 110VAC outlet, turned on the water and repositioned the refrigerator in it's normal position.
Parts Used:
-
Dean from Folsom, CA
-
Difficulty Level:Really Easy
-
Total Repair Time:15 - 30 mins
-
Tools:Screw drivers
8 of 16 people
found this instruction helpful.
Was this instruction helpful to you?
Thank you for voting!
Water not dispensing
Moved refrigerator forward, this allowed me to work on the back panel. Unplugged the refrigerator power cord. Released all 6 screws, removed panel then release an additional screw that was holding the water valve and the two (red & blue) connectors. Then installed the new part in reverse steps. Plug the unit and job well done. I had purchase the water filter already after several minutes push for water from the dispensing front part of the refrigerator and good to go, later in the evening we notice the ice maker working fine and producing ice. Thank you parts select.
Parts Used:
-
Alex from Tampa, FL
-
Difficulty Level:Really Easy
-
Total Repair Time:15 - 30 mins
-
Tools:Nutdriver, Wrench (Adjustable)
4 of 4 people
found this instruction helpful.
Was this instruction helpful to you?
Thank you for voting!
The water dispenser was not working, then the tank was leaking
The water dispenser was not working, but when I pressed the lever I could hear it attempt to disperse water. But when looking inside I could see that when I pressed the lever it was spewing water from the tank. I was not certain why it was not dispersing water, but I knew I had to replace the leaking tank. I found several YouTube videos that described in detail how to replace the tank (and I highly recommend doing that). The removal and replacement was very straight-forward and that part took only about 30 minutes. But the time-consuming part was cleaning behind the refrigerator and cleaning the inside as well (since I already had most of the shelves out). Then once I got it all back together I tested the water dispenser and still nothing. So I disconnected the line coming out of the tank going up into the door and then tried again. This time water was coming out of the line. So at that point I was fairly confident that the problem was a frozen line somewhere in the door. After leaving it unplugged for a while and also heating the door with a hair dryer, I connected the line again and got water dispensed.
Parts Used:
-
Steve from AUBURN, IL
-
Difficulty Level:Really Easy
-
Total Repair Time:30 - 60 mins
-
Tools:Nutdriver, Pliers, Screw drivers
4 of 4 people
found this instruction helpful.
Was this instruction helpful to you?
Thank you for voting!
The Ground wires wasn't in same location on board
i had to improvise And relocate ground wire to get a proper ground .. That's all , the video was a GREAT HELP...
Parts Used:
-
Johnnie from KANSAS CITY, MO
-
Difficulty Level:Easy
-
Total Repair Time:30 - 60 mins
4 of 4 people
found this instruction helpful.
Was this instruction helpful to you?
Thank you for voting!
freezer drop temp to 12 degrees.recommended temp zero.
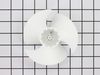
Replace the motor fan on condenser and clean the condenser
Parts Used:
-
clyde from RIALTO, CA
-
Difficulty Level:Difficult
-
Total Repair Time:30 - 60 mins
-
Tools:Nutdriver, Screw drivers
4 of 4 people
found this instruction helpful.
Was this instruction helpful to you?
Thank you for voting!