




















GHDT168V50SS General Electric Dishwasher - Instructions
Keep searches simple. Use keywords, e.g. "leaking", "pump", "broken" or "fit".
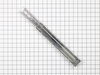
An old inner rail fell apart and needed replacing
I repaired by replacing both inner rails.
I found that removing an inner rail from the rack is difficult. It can be done with strong fingers separating the tabs of a front Y hook after releasing the rear hook so the rack can slide off the horizontal locator rods. It helps to apply liquid soap to the old inner rails Y clips to reduce friction.
Clean the outer rails thoroughly with a brush and liquid cleaner so the rails can engage
Inserting the inner rails into the outer rails is difficult when they are already attached to the rack. It's much easier to insert the rails independently of the rack. Push the outer rails into the inner rails while applying force to keep them engaged
Attach the rack to the rails by inserting the long rear horizontal rods of the rack into the rear clips of the rail.
Assure the tabs in the rear clips are locked
Again, it helps to apply liquid soap to the new inner rail Y clips to reduce friction
Hold the rails in place and pull the rack forward to engage the front rails with Y clips to the shorter front horizontal rods of the rack.
Force them together to spread the Y clips and lock the rails into them.
I found that removing an inner rail from the rack is difficult. It can be done with strong fingers separating the tabs of a front Y hook after releasing the rear hook so the rack can slide off the horizontal locator rods. It helps to apply liquid soap to the old inner rails Y clips to reduce friction.
Clean the outer rails thoroughly with a brush and liquid cleaner so the rails can engage
Inserting the inner rails into the outer rails is difficult when they are already attached to the rack. It's much easier to insert the rails independently of the rack. Push the outer rails into the inner rails while applying force to keep them engaged
Attach the rack to the rails by inserting the long rear horizontal rods of the rack into the rear clips of the rail.
Assure the tabs in the rear clips are locked
Again, it helps to apply liquid soap to the new inner rail Y clips to reduce friction
Hold the rails in place and pull the rack forward to engage the front rails with Y clips to the shorter front horizontal rods of the rack.
Force them together to spread the Y clips and lock the rails into them.
Parts Used:
-
Virgil from NAPERVILLE, IL
-
Difficulty Level:Difficult
-
Total Repair Time:More than 2 hours
1 person
found this instruction helpful.
Was this instruction helpful to you?
Thank you for voting!
Detergent dispenser did not work
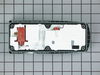
Followed the instruction video on your website. It was accurate and valid. The repair should have taken 15 mins., instead one of the screws holding the dispenser was frozen. Tried DW-40, and liquid wrench. Neither worked because the screw was in plastic.Finally got out the Dremel and cutting wheels. Had to cut away enough of the unit until I could get at the screw (it was the center bottom one). Sliced through some more of the housing, then cut a notch in the screw head deep enough so I could apply enough pressure with a flat blade screwdriver to open it. After that things went as smoothly as could be expected.A bad design and cheap materials.
Parts Used:
-
ARTHUR from OAK PARK, IL
-
Difficulty Level:Very Difficult
-
Total Repair Time:More than 2 hours
-
Tools:Pliers, Screw drivers
1 person
found this instruction helpful.
Was this instruction helpful to you?
Thank you for voting!
Missing silverware basket

-
Thomas from Lancaster, CA
-
Difficulty Level:Really Easy
-
Total Repair Time:Less than 15 mins
1 of 2 people
found this instruction helpful.
Was this instruction helpful to you?
Thank you for voting!
detergent cup latch broke
Very easy - remove the screws around the inside of the door. 6 screws and 2 plugs to remove the assembly. Just be careful not the strip the sheetmetal screws when putting it back together. No screwguns...
Parts Used:
-
Steven from Delanco, NJ
-
Difficulty Level:Really Easy
-
Total Repair Time:Less than 15 mins
-
Tools:Screw drivers
1 of 2 people
found this instruction helpful.
Was this instruction helpful to you?
Thank you for voting!
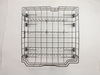
bottom rack was rusted out
I took out the old rack and rolled in the new. I thought I was going to have to take the rollers off the old one and put them on the new, but they were already on the new rack. The hardest part was getting into the box. I am an 80 year old female.
Parts Used:
-
Isabel from Louisville, KY
-
Difficulty Level:Really Easy
-
Total Repair Time:Less than 15 mins
1 of 2 people
found this instruction helpful.
Was this instruction helpful to you?
Thank you for voting!
The clip that holds the soap dispenser shut broke.
Took screws out that hold front panel on, unplugged wiring, changed soap dispenser, and put everything back together. Not a bad repair at all.
Parts Used:
-
curt from sandy lake, PA
-
Difficulty Level:Easy
-
Total Repair Time:15 - 30 mins
-
Tools:Screw drivers
1 of 2 people
found this instruction helpful.
Was this instruction helpful to you?
Thank you for voting!
Lower rack was bent, didn't like rolling out of the dishwasher anymore
I removed the old rack and saved the flatware container. Then I put the new rack in.
The difference between the old one and the new one is that between a busted grocery cart with one wheel that always wants to return to the parking lot, and a well-trained dog that does exactly what I ask it to. The new rack was worth the $95 I spent to get it.
The new rack came with wheels and axles, so I didn't need to order more.
The difference between the old one and the new one is that between a busted grocery cart with one wheel that always wants to return to the parking lot, and a well-trained dog that does exactly what I ask it to. The new rack was worth the $95 I spent to get it.
The new rack came with wheels and axles, so I didn't need to order more.
Parts Used:
-
Joe from WYNNEWOOD, PA
-
Difficulty Level:Really Easy
-
Total Repair Time:Less than 15 mins
1 of 2 people
found this instruction helpful.
Was this instruction helpful to you?
Thank you for voting!
Had a water leak in bottom of dishwasher.
I simply removed the bad part and reversed the process. It was very easy and a 12 year old could do it. Thanks for the online tips and recommendations. You saved me over 400.00 which is what a new unit would run. Plus installation. Many Thanks.
Parts Used:
-
Russell from MADISONVILLE, LA
-
Difficulty Level:Very Easy
-
Total Repair Time:15 - 30 mins
-
Tools:Nutdriver, Pliers, Screw drivers, Socket set
1 of 2 people
found this instruction helpful.
Was this instruction helpful to you?
Thank you for voting!
Missing drain hose
-
Edward from Bloomingdale, GA
-
Difficulty Level:Really Easy
-
Total Repair Time:15 - 30 mins
-
Tools:Screw drivers
1 of 3 people
found this instruction helpful.
Was this instruction helpful to you?
Thank you for voting!
Recived used without drain hose
It was an install. My problem is that the drain tube is not standard to other dishwashers,so I could not get it at either of the local home improvement centers. The good news is that it is larger than the standard, and offers better discharge.
Parts Used:
-
Richard from Venice, FL
-
Difficulty Level:Really Easy
-
Total Repair Time:15 - 30 mins
-
Tools:Nutdriver, Screw drivers
1 of 3 people
found this instruction helpful.
Was this instruction helpful to you?
Thank you for voting!
Silverware Basket broke
I loved the service I received. The site pulled up the correct make and model basket I need for my dishwasher and gave me several options. I order with ease and it arrived within a couple of days. No tools required.
Parts Used:
-
Myra from Las Vegas, NV
-
Difficulty Level:Really Easy
-
Total Repair Time:Less than 15 mins
1 of 3 people
found this instruction helpful.
Was this instruction helpful to you?
Thank you for voting!
Tray rollers had broken off.
Replaced the original roller connectors with newly designed connectors. Works much better.
Parts Used:

-
Lawrence from Smithtown, NY
-
Difficulty Level:Really Easy
-
Total Repair Time:Less than 15 mins
-
Tools:Screw drivers
1 of 3 people
found this instruction helpful.
Was this instruction helpful to you?
Thank you for voting!
bottom rack had bad design on wheels and kept falling off making the dishwasher unuseable
I ordered wheels on this wonderful site that looked like they made more sense and replaced all eight on my dishwasher and FINALLY the dishwasher isn't the nightmare it has been. It took seconds to pop in the clip to the roller and pop it on the rack. Thank you PartsSelect
Parts Used:
-
Lucille from North Babylon, NY
-
Difficulty Level:Really Easy
-
Total Repair Time:Less than 15 mins
0 of 1 people
found this instruction helpful.
Was this instruction helpful to you?
Thank you for voting!
Lower rack wouldn't roll because axles were broken
Unsnapped the wheel axle from the rack. Separated the axle from the wheel. Attached the new axle to the wheel. Snapped the new axle on the rack. Repeated for all 8 wheels. Solid.
Parts Used:
-
Kenneth from Bothell, WA
-
Difficulty Level:Really Easy
-
Total Repair Time:Less than 15 mins
0 of 1 people
found this instruction helpful.
Was this instruction helpful to you?
Thank you for voting!
wheel axles broke off from lower basket--deteriorated from age and almost daily use of dishwasher
old axles were removed by pulling wheel assembly from lower basket pins. squeezed old axle with needle nose pliers and discarded broken wheel axle. snapped wheels in place on new wheel axle and snapped wheel assembly into place on the basket. i replaced only two axles since the remaining ones were still intact. actual repair time was under three minutes. if all eight wheels would have to be replaced, i'm positive it would have taken no more than five to six minutes. in fact, the new wheel axle is a much better design than the original.
Parts Used:
-
harry from west seneca, NY
-
Difficulty Level:Really Easy
-
Total Repair Time:Less than 15 mins
-
Tools:Pliers
0 of 1 people
found this instruction helpful.
Was this instruction helpful to you?
Thank you for voting!