




















GGG390LXQ01 Whirlpool Range - Instructions
Keep searches simple. Use keywords, e.g. "leaking", "pump", "broken" or "fit".
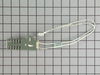
Igniters were working very slowly.
This is a double oven unit. Both the upper and lower igniters are easy to get to, with just a few screws to remove. However in order to reach the quick disconnects, the back of the oven needs to be removed. So there are a bunch of screws to take off and the oven needs to be moved away from the wall. Pulling out the igniter wires and putting the new ones back in, is easy. Then put all the screws back on and move the oven back to the wall. Don't forget to disconnect the power when you do all this.
Parts Used:
-
Stephen G from KEANSBURG, NJ
-
Difficulty Level:Really Easy
-
Total Repair Time:30 - 60 mins
-
Tools:Screw drivers
1 person
found this instruction helpful.
Was this instruction helpful to you?
Thank you for voting!
My original back leg broke because the floor is uneven. Had to pull it out several times.
Put the back of stove on blocks of wood to get high enough to screw the new leg in.
Parts Used:

-
Phyllis from BROWNVILLE, NY
-
Difficulty Level:Really Easy
-
Total Repair Time:Less than 15 mins
-
Tools:Wrench (Adjustable)
1 person
found this instruction helpful.
Was this instruction helpful to you?
Thank you for voting!
broken igniters
The steel mounting screw tends to seize in the aluminum burner head. It is not easy to extract, or to drill out and rethread. My advice is to replace the burner head at the same time.
Parts Used:

-
John from BERKELEY, CA
-
Difficulty Level:Easy
-
Total Repair Time:30 - 60 mins
-
Tools:Screw drivers
1 person
found this instruction helpful.
Was this instruction helpful to you?
Thank you for voting!
Burner control valve seized up
Disassembly took the most time. After the gas was shut off all the burner heads were removed. Then all the control knobs. Then the front panel. Then the manifold mounting brackets. Then the range top. After all that, it was easy to unbolt the seized-up valve and install the replacement. After tightening down the new valve, be sure to leak-test! Re-installing the range top was tricky as it was difficult to align properly while getting all the burner bases in place. About 1 hour start-to-finish.
Parts Used:
-
Paul from Greenfield, WI
-
Difficulty Level:Really Easy
-
Total Repair Time:30 - 60 mins
-
Tools:Screw drivers, Wrench set
1 person
found this instruction helpful.
Was this instruction helpful to you?
Thank you for voting!
Bake ignitor did not work
I determined the bake igniter was not working. If the bake ignitor does not work, the sensing unit to turn on the gas does not activate. I examined the bake igniter it was blacked significantly in one spot. There were no apperant cracks in it. I did a web search for the part and ordered it. Three days later it was delivered. Take pictures of each step if you fell the need. Pull stove away from wall turn off the gas, unplug power cord, remove panel in back of stove that covers the electrical, unplug the ignitor/element. Move to the front of the range and remove the oven rack. Remove the cover over burner tubes, it secured with several screws. Remove wing nuts for heat shield. Carefully remove burner tubes along with the attached ignitor/element. You will have to carefully guide the ignitor wires out with the burner tubes. Unscrew ignitor from the burner tube, attach new ignitor/element. Reverse the steps.
Parts Used:
-
Daniel from Colgate, WI
-
Difficulty Level:Easy
-
Total Repair Time:30 - 60 mins
-
Tools:Screw drivers
1 of 2 people
found this instruction helpful.
Was this instruction helpful to you?
Thank you for voting!
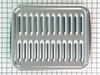
broiler pan missing
-
RAYMOND from JACKSONVILLE, FL
-
Difficulty Level:Really Easy
-
Total Repair Time:Less than 15 mins
1 of 2 people
found this instruction helpful.
Was this instruction helpful to you?
Thank you for voting!
Broken oven knob

-
Wintford from Pearland, TX
-
Difficulty Level:Really Easy
-
Total Repair Time:Less than 15 mins
1 of 3 people
found this instruction helpful.
Was this instruction helpful to you?
Thank you for voting!
stove would not turn on
unscrewed screws in the back of the stove. inside the stove, replaced the old bake igniter with the new one and connected the electrical wire in the back of the stove.
Parts Used:
-
Fernanda from Fall River, MA
-
Difficulty Level:Really Easy
-
Total Repair Time:15 - 30 mins
-
Tools:Screw drivers
0 of 1 people
found this instruction helpful.
Was this instruction helpful to you?
Thank you for voting!
spill on broiler insert pan would not come off
Just replaced insert pan - was able to identify it on the internet web site by inserting model number. Ordered part on line and got it within a week! Easy peasy!
Parts Used:

-
Stacie from Davidson, NC
-
Difficulty Level:Easy
-
Total Repair Time:Less than 15 mins
0 of 3 people
found this instruction helpful.
Was this instruction helpful to you?
Thank you for voting!
Both outside door handles turned very beige
Everything worked perfectly---thanks to the suggestion of your call center agent. She suggested that since the replacement door handles were no longer available, I should consider repainting them--it worked like a charm. Please tell her she was a life saver. We rent that house in Fl and my returning tenants had complained about the discoloring refer handles. Thank you
Parts Used:
-
Howard from Boynton Beach, FL
-
Difficulty Level:Easy
-
Total Repair Time:30 - 60 mins
-
Tools:Nutdriver
23 of 72 people
found this instruction helpful.
Was this instruction helpful to you?
Thank you for voting!
Lower oven wouln't come up to preset temperatur
1. Opened oven door and removed bottom covers plates to expose igniter and removed it. 2. Located hole in oven rear where the igniter connector and leads went through. 3. Pulled oven forward to allow access to rear bottom left cover plate where leads came through and removed plate to obtain access. 4. Installed replacement igniter in place of old iginter and ran its leads and connector through the oven hole. 5. Since the new igniter connector was unlike the old one, I had to replace the new igniter connector with the old one. Allowing sufficient lengths to properly make splices, I cut the igniter connectors off so that I could eventually match the mating connecter to the oven control circuit. I used a wire striper and pliers to make good splices. I covered the splices with plastic wire nuts normally used for insulating splices. I left the splices and the igniter connector outside the oven back for protection from the heat inside the oven. 6. After ensuring that oven insulation material was positioned to essentially cover the hole where the connector wires go through, I replaced the cover plate at rear of the oven and the cover plates inside the oven. 7. I checked oven for proper operation and found it now to be OK. Range was returned to normal position..problem corrected.
Parts Used:
-
William from Viera, FL
-
Difficulty Level:A Bit Difficult
-
Total Repair Time:30 - 60 mins
-
Tools:Pliers, Screw drivers
Was this instruction helpful to you?
Thank you for voting!
leg was bent, also metal receiving bracket bent
Removed stove from slot in wall. Bent rear left leg would not unscrew due to bent metal bracket. Used hacksaw to cut out leg, then straightened metal bracket with small hammer and was able to screw new leg in and adjust height by using level on stove before reinserting stove its slot. Recheck level after pushing back in place and adjust front legs if necessary. If not for bent metal receiving bracket, would have taken much less time. Still easy tho. R'cvd part in two days. Very quick.
Parts Used:
-
Virginia from Oceanside, CA
-
Difficulty Level:Really Easy
-
Total Repair Time:30 - 60 mins
-
Tools:Wrench (Adjustable)
Was this instruction helpful to you?
Thank you for voting!
upper oven won't ignite
Remove the big back panel (5 phillips screws). Confirm voltage is present when attempting to start the oven by unplugging the PROPER ignitor. I say proper because initially I thought that the broil ignitor was the culprit. Very upper ignitor is the broiler ignitor and the next one down is the ignitor for the upper oven. You will notice that the ignitor plugs differ between broiler and oven. New ignitor should have a male end. Once I confirmed that voltage was present when attempting to turn on the upper oven and probing the ignitor terminal plug, I proceeded to remove the lower cover inside the oven (2 screws very front side) and remove the burner assembly. (First you'll need to remove the oven door, easy, just tilt out part way and slide it up and off of the rails). The ignitor is mounted to the burner assembly. It's inevitable, the 5/16 hex screws (x2) will absolutely strip out so make sure you have some extras on hand. Replace the ignitor, reinstall and you should be good to go! I've read that you shouldn't touch the element with your fingers as this will compromise the life of the ignitor. Good luck!
Parts Used:
-
Jason from Carey, OH
-
Difficulty Level:Easy
-
Total Repair Time:30 - 60 mins
-
Tools:Nutdriver, Pliers, Screw drivers
Was this instruction helpful to you?
Thank you for voting!
Broken leveling leg.
This is a no brainer. I am only doing this because you asked. Pull out the stove, tilt it back, remove broken leg, install new leg.
Parts Used:
-
Don from Crestwood, MO
-
Difficulty Level:Really Easy
-
Total Repair Time:Less than 15 mins
-
Tools:Pliers
Was this instruction helpful to you?
Thank you for voting!
Erratic oven temperature, would not hold a setting or would get to that setting and then loose it shortly afterward.
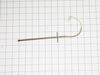
Removed two screws on sensor in the oven. Pulled out stove and after unplugging same removed the back panel. Sensor has an electric connection on the rear of the oven with a connection that is easily separated. Threaded new sensor electrical connection through inside of oven and connected on the back of stove. Pushed insulation back around the wire were in goes through to the oven. Replaced back on stove and screwed in two screws which hold sensor inside the oven. Replaced back cover on stove, plugged it in and pushed it back in place. Did the trick for me..
Parts Used:
-
Lance from Northfield, IL
-
Difficulty Level:Really Easy
-
Total Repair Time:Less than 15 mins
-
Tools:Screw drivers
Was this instruction helpful to you?
Thank you for voting!