




















GFS207/MN01 Caloric Refrigerator - Instructions
Keep searches simple. Use keywords, e.g. "leaking", "pump", "broken" or "fit".
condenser motor broke
opened box,read directions,took out bad motor,installed new one.PRESTO CHANGO way to go.
Parts Used:

-
patrick from livonia, MI
-
Difficulty Level:Easy
-
Total Repair Time:15 - 30 mins
-
Tools:Nutdriver, Pliers, Screw drivers
Was this instruction helpful to you?
Thank you for voting!
Condensor fan motor quit working
Pulled the fridge out, Took bottom panel off. Removed 3 screws holding motor. Unplugged connector, cut wires, attached old connector on new motor. put blade on new motor.installed in fridge, put cover back on.
Parts Used:
-
David from New Albany, IN
-
Difficulty Level:Easy
-
Total Repair Time:15 - 30 mins
-
Tools:Nutdriver, Screw drivers
Was this instruction helpful to you?
Thank you for voting!
Both the freezer and bottom of refrig too hot
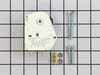
Was very simple once I found out where the defrost timer was located. I had a friend walking me through trying to find the location on the phone. Not all models have them in the same place. Once the part was located all I had to do was remove the cover, unplug the old one and plug the new one in just the way the old one came off. The black wire was easy to locate on the old and just matched it up. Put the cover back on and plugged it in. It was no time till I started feeling it cool. Checked both top and bottom with thermomater and it was where it should be within 12 hours. I am happy and using it again. Was almost ready to throw it out. Did not know it was so cheap to fix one. Nothing anyone can't handle. If this woman can do it anyone can.
Parts Used:
-
Marcia from Kansas, OK
-
Difficulty Level:Easy
-
Total Repair Time:15 - 30 mins
-
Tools:Nutdriver, Screw drivers
Was this instruction helpful to you?
Thank you for voting!
Repalce evaporator fan
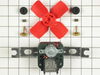
The evaporator fan is located in the freezer behind the back wall. If you have the ice maker remove it first then remove the screws on the top of the panel. You will notice the side brackets for the top shelf will make it hard to remve the panal but by slitly binding the center the panal came right out. The fan is held in a bracke tha comes right out. The wire unplu right from the fan so do not try to unplg the seal plug to the left side. Swap the fan with the new one useing the new rubber monts re-connect the wires and reasymble. Put the bottom of the back panal in first then work each side in past the shelf bracket binding the center slightly.
Parts Used:
-
William from Ledyard, CT
-
Difficulty Level:Easy
-
Total Repair Time:15 - 30 mins
-
Tools:Nutdriver, Screw drivers
Was this instruction helpful to you?
Thank you for voting!
Evaporator motor squeal.
After finding an almost obsolete part( thanks PartSelect!) the installation was rather easy. Remove the back panel of the freezer and vent with a screwdriver and a nut driver. Disconnect the three wires, green, white and red.Remove motor from mounting and replace with new motor. I had to make a slight adjustment to the ground wire on the new motor that required adjusting the position of the contact-no big deal. The motor fit perfectly. Popped fan on and assembled. 20 minutes max.
Parts Used:
-
Steven from Hilliard, OH
-
Difficulty Level:Easy
-
Total Repair Time:15 - 30 mins
-
Tools:Nutdriver, Screw drivers
Was this instruction helpful to you?
Thank you for voting!
Recent move and movers broke the light switch on refrigerator side.
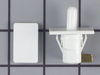
Unplugged the refrigerator then removed two vertical screws on the very back back of the control panel (the ones with the washers). Do not remove the four other vertical screws in the panel. The front plastic plate on control panel snaps off and there are two horizontal screws under the plate. Remove them and the control panel will drop down allowing access to the light switch. Unplug the two wires (one black and one white) from the old switch. Discard the old switch, snap the new one into place and reconnect the two wires. Snap the front plastic plate back into place, plug in the refrigerator and you are done! Problem solved with a new $16.00 switch and saved at least $75.00 or more from an appliance repair call. Thanks Part Select!
Parts Used:
-
Carl from Warsaw, MO
-
Difficulty Level:Easy
-
Total Repair Time:15 - 30 mins
-
Tools:Screw drivers
Was this instruction helpful to you?
Thank you for voting!
refridgerator was not cooling to the proper temps and finally would not cool at all
Pulled refridgerator forward away from the wall. Remove the cardboard back behind the appliance.I saw that the condenser fan motor was not working. Unplugged the appliance from the electrical outlet. Removed a 3 wire plug from the condenser fan motor. Remove 3 screws (with a nut driver) which held the condenser fan motor in place. Remove the condenser fan motor from the appliance. Looked up the part needed for repair using the appliance model number. Found which part was applicable for the appliance. Placed the order from Price Select on a Monday morning and recieved the part 2 days later on Wednesday via FedEx. The item shipped was a 2 wire condenser fan motor. Read the instructions that came with the part. Using wire cutters, cut the old 3 wire plug. The center wire is a green and yellow striped wire. Use the same colored wire that is also shipped in the box and has connectors on both ends. Cut one of the connectors off and use the wire strippers to remove plastic wire coating. Connect both ends from the appliance and the green and yellow wire that was shipped. Use a wire nut (also shipped in the box) to connect the wires. You will have 2 black wires left on the new condenser fan motor that need to be connected to the appliance. You should have an orange colored wire and another wire that is black with a white stripe. Connect one wire from the new fan motor to the orange wire and use a wire nut to attach both wires together. Use the other black wire from the new fan motor to the black/white striped wire from the appliance. Use the wire nut to attach both those wires. Place the new condenser fan motor back in the appliance using the screws that come with the motor. Attach the green and white wire with the connector on the end to one of the 3 screws that hold the motor in place and secure the screws. Use the electical tape to hold the wires all together and away from the fan motor. Plug the appliance into the outlet. You can see the condenser fan motor working properly. Note that when connecting the 2 black wires from the new condenser fan motor to the orange and the black/white wire from the appliance, for my appliance, it did not matter which wires were connected as the fan motor was a clockwise motor. Place the cardboard appliance backing, back on to the appliance and push the refridgerator back in place. Allow about 5-6 hours to get the freezer to between 0-5 degrees. The refidgerator should be between 34-38 degrees and will take a little longer to get to that projected temp.
Parts Used:
-
John from LAS CRUCES, NM
-
Difficulty Level:Easy
-
Total Repair Time:15 - 30 mins
-
Tools:Nutdriver, Screw drivers
Was this instruction helpful to you?
Thank you for voting!
The original door gasket(seal) was cracked and leaked
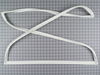
I used a socket and ratchet to back out part way the screws holding the seal. There are 4 pieces of metal strips that the screws go through to hold the seal on. Don't remove the screws completely or the plastic panel of the door will fall or come off. Take the new door seal and power it with baby power. This will help make the seal not hang up when you close the door. Now, shake off excess powder outside and then begin to install the seal. Start at the top left or right corner and work across pushing the lip of the seal into the recess of the metal strip. You will want to tighten some of the screws as you go but leave enough looseness to push the seal into the strip's recess. Proceed down each side and the bottom last. I should note that you could remove the door first and you wouldn't have to stand on your head to screw in the bottom of the seal.
Parts Used:
-
John from Brooport, IL
-
Difficulty Level:Easy
-
Total Repair Time:15 - 30 mins
-
Tools:Socket set
Was this instruction helpful to you?
Thank you for voting!
Refrigerator not cooling
Exactly how the part select video described it. Threw a little curve ball figuring out which timer setting to set it to. But the instructions provided with defrost timer walked me right through it. No problem. After installing part nothing happened for about ten minutes, which had me second guessing each and every step. Then, like magic, cold air began blowing. What a relief. Thanks so much, love this site. Refrigerator works like new!
Parts Used:
-
Bryan from Midland, NC
-
Difficulty Level:Easy
-
Total Repair Time:15 - 30 mins
-
Tools:Nutdriver, Pliers, Screw drivers
Was this instruction helpful to you?
Thank you for voting!
noisey circulating fan in the freezer
Emptied the freezer. Removed the back panel. (six screws)Removed the fan cover.(4 screws) Unplugged the power. Unplugged three wires from the motor. (hot-neutral-ground)Removed the fan. (2 screws) Installed the new fan and centered for clearance. Reversed the prior instructions.
Parts Used:
-
Lee from Arvada, CO
-
Difficulty Level:Really Easy
-
Total Repair Time:30 - 60 mins
-
Tools:Nutdriver, Screw drivers
Was this instruction helpful to you?
Thank you for voting!
Fan was making noise, Freezer temperature was erratic
First, watched video on Part Select Website. Very good. Pulled Appliance out from wall, Pulled the power plug, and removed the back shield covering the working parts of the unit. Found the fan and it was almost the same setup as on the video except that I could not get to one of the screws holding the motor in place so had to remove the entire bracket with the fan. Not too hard. Cleaned away dust and gunk around the site and noticed that the fan pulled air through a tunnel-like condenser coil that was packed with gunky lint...this is what probably killed the motor. I cleaned out the tunnel with the bottle brushes and vacuum and installed the new motor / bracket assembly. Then replaced the shielding around the fan and the back cover .panel. This is important because these form the channel that guides air flow throughout the condenser coils. This particular refrigerator has a barrier underneath which guides air flow from the front left to the condenser, through the fan, over the evaporator drip pan and out the right front. I cleaned all the lint and gunk from this area as well. I also made an air filter (cut from a furnace filter) and wedged it in front of the air entry section. This should keep the condenser coil cleaner over time but you have to remember to change the filter once a year. Probably should clean the condenser coil every 5 years as well. This unit has been very reliable over 20 years and may well go for another 20. Good luck with your repair.
Parts Used:
-
Dik from Quincy, MA
-
Difficulty Level:A Bit Difficult
-
Total Repair Time:1- 2 hours
-
Tools:Nutdriver, Screw drivers
Was this instruction helpful to you?
Thank you for voting!
blower motor was going out
just had to remove the fan motor the hard thing is getting down to it
Parts Used:
-
Robert from Batavia, OH
-
Difficulty Level:A Bit Difficult
-
Total Repair Time:1- 2 hours
-
Tools:Pliers, Screw drivers
Was this instruction helpful to you?
Thank you for voting!
Evaporator fan motor stopped working
Remove back cover of freezer compartment; Remove old fan assembly, new fan terminals did not exactly match old one so I had to remove one of the terminals from old fan and attach it to new fan/ then install new assembly and repaced freezer cover
Parts Used:
-
Kurt from Baltimore, MD
-
Difficulty Level:Difficult
-
Total Repair Time:1- 2 hours
-
Tools:Nutdriver, Screw drivers, Wrench set
Was this instruction helpful to you?
Thank you for voting!
Fan motor worn out
My Son who is not an appliance repairman did it for me. He had some difficulty getting the nuts and bolts loose mainly. Sorry I'm not much help other than that! I would like to compliment you on your fast service, first time ordering from you and it was for an older model refrigerator that my repairman said he couldn't find. It's working fine now and I'm a satisfied customer!
Parts Used:
-
Myrna from Decatur, IL
-
Difficulty Level:Difficult
-
Total Repair Time:1- 2 hours
Was this instruction helpful to you?
Thank you for voting!
wouldn't make ice, door seal was hot to touch, warm in fridge.
I folded in half twice! and took the back off the fridge(cardboard) and took one brace off and just took the screws off the fan from the other two braces. Turned the fan enough to get at the wires for the fan and cut them off an inch from the old fan, stripped the insulation and wire nutted them to new fan. Make sure they don't interfere with the new fan and put the new fan in place put the screws in and we're making ice and cold fridge again.
Parts Used:
-
Dale from Sterling, AK
-
Difficulty Level:A Bit Difficult
-
Total Repair Time:1- 2 hours
-
Tools:Nutdriver, Socket set
Was this instruction helpful to you?
Thank you for voting!