




















GFE26GSKKSS General Electric Refrigerator - Instructions
Keep searches simple. Use keywords, e.g. "leaking", "pump", "broken" or "fit".
Door alarm going off even with the doors closed.
Pulled the instructions up on U-tube and followed them. With the socket removed 5 small bolts. Took the old switches ( I replaced both switches being I had it apart), put the new switches in and then put the 5 bolts back in.
Parts Used:

-
KENNETH from BRANDON, SD
-
Difficulty Level:Really Easy
-
Total Repair Time:15 - 30 mins
-
Tools:Socket set
2 of 2 people
found this instruction helpful.
Was this instruction helpful to you?
Thank you for voting!
broken door shelf

-
James from SUN LAKES, AZ
-
Difficulty Level:Really Easy
-
Total Repair Time:Less than 15 mins
2 of 2 people
found this instruction helpful.
Was this instruction helpful to you?
Thank you for voting!
The Refridgerator and Freezer were not cooling.
-
Frank from VERO BEACH, FL
-
Difficulty Level:Really Easy
-
Total Repair Time:15 - 30 mins
-
Tools:Pliers, Screw drivers
2 of 2 people
found this instruction helpful.
Was this instruction helpful to you?
Thank you for voting!
both freezer and refigerator were warm.
I watched the video online and it said there were three sensors in the refrigerator, two in the freezer and one in the refrigerator. I only ordered one sensor and was going to try the one in the refrigerator first. He said the upper one in the freezer is the most difficult, but is usually the problem. So, I replaced the upper sensor and tried restarting the unit. Everything went well and it fixed the problem.
Parts Used:
-
Harry from DURYEA, PA
-
Difficulty Level:Easy
-
Total Repair Time:15 - 30 mins
-
Tools:Nutdriver
2 of 2 people
found this instruction helpful.
Was this instruction helpful to you?
Thank you for voting!
Water and ice did not work when pressing on bar. Auto fill water would work.
Used a vidieofrom utube that described a similar situation.
https://youtu.be/VhVVK1pnupc
The only difference from this video was that my unit did not have the 2 screws that this video shows to remove.
I used the plastic knife to pry open the cover of the unit from that point everything internally was about the same.
https://youtu.be/VhVVK1pnupc
The only difference from this video was that my unit did not have the 2 screws that this video shows to remove.
I used the plastic knife to pry open the cover of the unit from that point everything internally was about the same.
Parts Used:
-
Bryant from NYACK, NY
-
Difficulty Level:A Bit Difficult
-
Total Repair Time:30 - 60 mins
-
Tools:Pliers, Screw drivers
2 of 2 people
found this instruction helpful.
Was this instruction helpful to you?
Thank you for voting!
switch went bad
just removed the old switch and replaced it with the new one
Parts Used:
-
donald from FAIRVIEW, MI
-
Difficulty Level:Easy
-
Total Repair Time:15 - 30 mins
-
Tools:Screw drivers
3 of 6 people
found this instruction helpful.
Was this instruction helpful to you?
Thank you for voting!
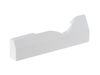
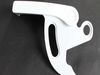
COVER LATCH BROKEN
I recieved the package with the correct part number but the wrong part inside. The item in the package does not even resemble the part on the GE parts website. Tried to contact parts select but no luck.
Parts Used:
-
Steven from NORMAN, OK
-
Difficulty Level:Really Easy
-
Total Repair Time:30 - 60 mins
2 of 3 people
found this instruction helpful.
Was this instruction helpful to you?
Thank you for voting!
Refrigerator not defrosting, ice tray clogging up in ice tray, refrigerator making loud humming noise, and compressed running all the time.
First, turn off power - since I did not want to pull the refrigerator out on my wood floor I tripped the circuit breaker to that circuit and opened door to make sure interior light was off (ensuring power was off). This unit has a bottom freezer, I took out all shelves, ice maker and all parts in the way of accessing back of interior of freezer section. Removed back plastic section by removing one screw in middle top of back panel and prying it out. This was a bit difficult as it was in there a bit tight but once the plastic warmed up it pulled out ok. This revealed the compressor section and temp sensor that was attached to the copper coils with of all things - a zip tie! In pictures of this that I looked at on various web sites the sensor was on a metal bracket attached to the coil so it made me wonder if tf the factory took a shortcut? I cut the old sensor wire, stripped the two wires 1/2", and connected them to the new sensor wire with butt connectors, I put some silicone into the ends of the butt connectors to prevent moisture from entering into connectors and wrapped the connection in black electrical tape. I then "attached" the sensor to the coil using a zip tie, put the plastic back piece back on, inserted everything I took out and put power back to refrigerator. It's been 3 days and temp of refrigerator is stable, ice maker not clogging up, and compressor not running all the time! So far so good.
Parts Used:
-
Mark from ROSEMOUNT, MN
-
Difficulty Level:A Bit Difficult
-
Total Repair Time:30 - 60 mins
-
Tools:Screw drivers
2 of 3 people
found this instruction helpful.
Was this instruction helpful to you?
Thank you for voting!
left glide was broken
Left side was broken for about 8 years. Back of glide would fall down about every 4 months. This time the upper basket jammed up on the glide and the freezer drawer would not close. Had to break it to remove the upper basket.
From the time the parts were delivered and installed two Glide Supports, it took a total of 30 minutes. If that long. Before I ordered the part, I made sure I had the socket to fit the nut and that I was able to remove it. I removed the broken one after ordering.
PartSelect was the only website that I could find that carried the part.
From the time the parts were delivered and installed two Glide Supports, it took a total of 30 minutes. If that long. Before I ordered the part, I made sure I had the socket to fit the nut and that I was able to remove it. I removed the broken one after ordering.
PartSelect was the only website that I could find that carried the part.
Parts Used:

-
Michael from JACKSONVILLE, FL
-
Difficulty Level:Very Easy
-
Total Repair Time:30 - 60 mins
-
Tools:Socket set
1 person
found this instruction helpful.
Was this instruction helpful to you?
Thank you for voting!
Refrigerator not getting cold
-
Dan from COLUMBIA, SC
-
Difficulty Level:Really Easy
-
Total Repair Time:15 - 30 mins
-
Tools:Pliers, Socket set
1 person
found this instruction helpful.
Was this instruction helpful to you?
Thank you for voting!
The Freezer has a slide out shelf. It kept coming off the glide support and the support actually broke!
I looked online and it said GE does not make the support for my model Refrigerator/freezer. I looked the picture for this part and it looked like the same one so I bought it (very inexpensive) and an extra one just in case.
I took out most of the items on that sliding shelf and pulled it out. Found the correct socket for the nut and removed the remaining piece. Then just used the same nuts and new Glide support, tightened it up (but not too much, and tried the shelf.
It worked !!! I added the frozen foods and I was done. It was very fast. And by the way, I am not a big home repair person. EASY.
I took out most of the items on that sliding shelf and pulled it out. Found the correct socket for the nut and removed the remaining piece. Then just used the same nuts and new Glide support, tightened it up (but not too much, and tried the shelf.
It worked !!! I added the frozen foods and I was done. It was very fast. And by the way, I am not a big home repair person. EASY.
Parts Used:
-
Matthew from ROCKVILLE, MD
-
Difficulty Level:Really Easy
-
Total Repair Time:Less than 15 mins
-
Tools:Socket set
1 person
found this instruction helpful.
Was this instruction helpful to you?
Thank you for voting!
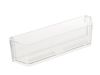
I dropped The top left bin and it cracked
-
Karen from Salisbury, NC
-
Difficulty Level:Very Easy
-
Total Repair Time:Less than 15 mins
1 person
found this instruction helpful.
Was this instruction helpful to you?
Thank you for voting!
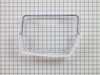
Broken door shelf
-
Richard J from BRANFORD, CT
-
Difficulty Level:Really Easy
-
Total Repair Time:15 - 30 mins
1 person
found this instruction helpful.
Was this instruction helpful to you?
Thank you for voting!
Broken handle
Super fast shipping saved your company for the next time I need appliance repair parts, perfect fit
Parts Used:

-
William from CENTRAL ISLIP, NY
-
Difficulty Level:Really Easy
-
Total Repair Time:15 - 30 mins
-
Tools:Socket set
1 person
found this instruction helpful.
Was this instruction helpful to you?
Thank you for voting!
The ice maker worked great and the crushed ice dispenser worked fine but the cubed ice dispenser sounded like it had a stripped gear.
Once I opened the left hand door and removed the ice bucket, I simply removed the 3 small screws and removed the old part and replaced it with the new part.
Parts Used:
-
Tommy G from Matthews, NC
-
Difficulty Level:Really Easy
-
Total Repair Time:Less than 15 mins
-
Tools:Nutdriver
1 person
found this instruction helpful.
Was this instruction helpful to you?
Thank you for voting!