




















GDF630PMM0ES General Electric Dishwasher - Instructions
Keep searches simple. Use keywords, e.g. "leaking", "pump", "broken" or "fit".
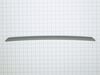
Door gasket at bottom of door was falling apart and leaking
1. Shut off circuit breaker power
2. remove toekick
3 .disconnect door wire harness at bottom of main control board
4. release 2 wire ties securing harness to tub using long nose pliers
5. remove 2- 1/4 in. hex head screws from bottom of door
6. insert 5/32 in Allen wrench through existing holes in front leg and hinge arm when door is partially opened.(about 1/4 of the way)
7. repeat step 6 on both sides (this locks door partially open)
8. lift door up about 3 in. then tilt door in and remove door completely
9. slide old gasket out and replace with new gasket
9. reassemble door
2. remove toekick
3 .disconnect door wire harness at bottom of main control board
4. release 2 wire ties securing harness to tub using long nose pliers
5. remove 2- 1/4 in. hex head screws from bottom of door
6. insert 5/32 in Allen wrench through existing holes in front leg and hinge arm when door is partially opened.(about 1/4 of the way)
7. repeat step 6 on both sides (this locks door partially open)
8. lift door up about 3 in. then tilt door in and remove door completely
9. slide old gasket out and replace with new gasket
9. reassemble door
Parts Used:
-
Alvin from SCHENECTADY, NY
-
Difficulty Level:Easy
-
Total Repair Time:30 - 60 mins
-
Tools:Nutdriver, Pliers
2 of 3 people
found this instruction helpful.
Was this instruction helpful to you?
Thank you for voting!
Lower try rusting out
Part was incorrect Compare that to GE site saying number on both ports to different parts try to return was half the course of what I paid ridiculous So apparently I'm stuck with it Check GE site you'll see the port is different from what your sound but the numbers are exactly the same No clips to support the utensil tray
Parts Used:

-
Ronald from cherry hill, NJ
-
Difficulty Level:Really Easy
-
Total Repair Time:30 - 60 mins
1 person
found this instruction helpful.
Was this instruction helpful to you?
Thank you for voting!
Dishwasher would not know door was closed
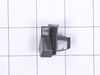
Parts diagram shows Striker can be popped out with screwdriver. Not true. It has a screw bolting it internally. Impossible to get to unless you disassemble the entire door. We took a power drill and small drill bit and bore it out like a cavity in a tooth. Needle nose pliers to extract the screw. Pretend your a dentist. Fixed it in 5 minutes. Replacement fit tight. A+
Parts Used:
-
Lesa from BETHALTO, IL
-
Difficulty Level:Very Difficult
-
Total Repair Time:30 - 60 mins
-
Tools:Pliers
1 person
found this instruction helpful.
Was this instruction helpful to you?
Thank you for voting!
Water would not drain
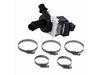
The repair was just like the video that the agent sent me. And while I had the unit out of the cabinet I installed a part I have had for months which I ordered before I realized I had to take the unit out of the cabinet: the part was the seal for the bottom of the door. I recommend if you are ordering a pump order this part too an it is easy to install if you already have the dishwasher out of the cabinet.
Parts Used:
-
Ruth from TOPOCK, AZ
-
Difficulty Level:Really Easy
-
Total Repair Time:30 - 60 mins
-
Tools:Nutdriver, Pliers, Socket set
1 person
found this instruction helpful.
Was this instruction helpful to you?
Thank you for voting!
The original rack was deteriorated and staining dishes.
-
john from FT WASHINGTON, MD
-
Difficulty Level:Very Easy
-
Total Repair Time:Less than 15 mins
1 person
found this instruction helpful.
Was this instruction helpful to you?
Thank you for voting!
Door would not shut, machine would not run.
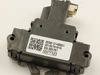
Took out 2 screws that held machine in cabinet. Pulled out dishwasher about 4 inches. removed old latch and disconnected electric connection. Put in new latch, reconnected electric connection, replaced screws, pushed machine back in cabinet, replaced 2 screws that hold machine in place. Works like new!
Parts Used:
-
Deborah from BRADENTON, FL
-
Difficulty Level:Really Easy
-
Total Repair Time:Less than 15 mins
-
Tools:Screw drivers
1 person
found this instruction helpful.
Was this instruction helpful to you?
Thank you for voting!
Dishwasher made rhythmic, thumping sound during wash cycle
This was so easy! Our 4 year-old dishwasher began making a repetitive, clunking noise during wash cycle, and I deducted that it was the spray arms. I tried to rinse out old
spray arms, checked for clogs, and made sure they were installed correctly. The sound persisted, so I ordered replacement part (wash arm kit). I removed old spray arms and attached new ones. Problem solved and dishwasher is quiet again!
spray arms, checked for clogs, and made sure they were installed correctly. The sound persisted, so I ordered replacement part (wash arm kit). I removed old spray arms and attached new ones. Problem solved and dishwasher is quiet again!
Parts Used:
-
Carrie from OAK RIDGE, NC
-
Difficulty Level:Very Easy
-
Total Repair Time:Less than 15 mins
1 person
found this instruction helpful.
Was this instruction helpful to you?
Thank you for voting!
Dishwasher stopped draining.
We I installed a new dishwasher pump. It was simple and easy. I did it myself. My husband removed the clamps holding the dishwasher in the cabinet. Then he turned it in it's side and I replaced the old pump for an identical one that I ordered from this site. Easy peasy, took all of 15 minutes. You've got this. Don't call a repair man and pay $300 or buy a new dishwasher and pay $800. This repair was $63. If I can do it, you can!!!
Parts Used:
-
Michelle from ASHEVILLE, NC
-
Difficulty Level:Really Easy
-
Total Repair Time:15 - 30 mins
-
Tools:Screw drivers, Socket set
1 person
found this instruction helpful.
Was this instruction helpful to you?
Thank you for voting!
Replace the middle flatware basket
So easy, even I was able to do it. Slide tabs back on defective basket and remove both sides, then slide the tabs onto new basket and place in dishwasher. All Done!
Parts Used:

-
Marc from Brambleton, VA
-
Difficulty Level:Really Easy
-
Total Repair Time:30 - 60 mins
1 person
found this instruction helpful.
Was this instruction helpful to you?
Thank you for voting!
Heating element broke off and burned a hole in rubber tube, leaking water.
Replaced the dishwasher with a new one! used the same brand (GE) but different model to make the job a little easier, first cut power to the outlet, disconnected electrically from dishwasher, cut off water source from dishwasher, and disconnected hose from garbage disposal, removed old dishwasher put new one in, connected electrical wires (color coded), connected water supply with pliers, and connect your hose to your disposal and level your new disposal with leveling screws that comes with the new dishwasher. Put front cover plate on with screws provided with a screwdriver and that's it.
Parts Used:
-
Mario from CHESAPEAKE, VA
-
Difficulty Level:Easy
-
Total Repair Time:30 - 60 mins
-
Tools:Pliers, Screw drivers
1 person
found this instruction helpful.
Was this instruction helpful to you?
Thank you for voting!
as better as it gets
the part is OEM and fits like a glove. No worries. There is a minor variation in design and is not like for like design but fits exactly per specs and works. I have been looking for this part for years now. Thank you for PS for maintaining the inventory.
Parts Used:
-
Praveen from Monroe Township, NJ
-
Difficulty Level:Really Easy
-
Total Repair Time:Less than 15 mins
1 person
found this instruction helpful.
Was this instruction helpful to you?
Thank you for voting!
Holes in old dishwasher basket
The replacement dishwasher basket easily fit in my dishwasher. Easy to order. Quick delivery. Highly recommended.
Parts Used:
-
James from FAIRFIELD, CT
-
Difficulty Level:Very Easy
-
Total Repair Time:Less than 15 mins
1 person
found this instruction helpful.
Was this instruction helpful to you?
Thank you for voting!
Rusty bottom dishwasher basket
-
Robert from BYRON CENTER, MI
-
Difficulty Level:Very Easy
-
Total Repair Time:Less than 15 mins
1 person
found this instruction helpful.
Was this instruction helpful to you?
Thank you for voting!
Rusty Lower Rack
-
Susan from MASON, OH
-
Difficulty Level:Very Easy
-
Total Repair Time:Less than 15 mins
1 person
found this instruction helpful.
Was this instruction helpful to you?
Thank you for voting!
Old Dishwasher Rack Was Rusted
Piece of cake! Slide old rack out, slide new one in. I wish I had known about this website sooner, would have changed this rack out 2 years ago. Yes, it’s a little different shape than the old one, and Yes, I can no longer put my silverware on the door. BIG DEAL! I would rather move a few dishes around than spend $700. on a new dishwasher. Tell your friends about this website, that will thank you.
Parts Used:
-
Elaine from NEWARK, DE
-
Difficulty Level:Really Easy
-
Total Repair Time:Less than 15 mins
1 of 2 people
found this instruction helpful.
Was this instruction helpful to you?
Thank you for voting!