




















GDF630PMM0ES General Electric Dishwasher - Instructions
Keep searches simple. Use keywords, e.g. "leaking", "pump", "broken" or "fit".
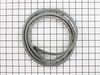
Water was leaking at the bottom of the door
The old gasket pulled right out with no tools needed,
The new gasket went in the same way.
Results:
It did help on one side, but the bottom gasket also needs to be replaced it has a couple of tears one on each end.
Next Steps:
When the bottom gasket gets here I will replace that and it should be as good as new.
The new gasket went in the same way.
Results:
It did help on one side, but the bottom gasket also needs to be replaced it has a couple of tears one on each end.
Next Steps:
When the bottom gasket gets here I will replace that and it should be as good as new.
Parts Used:
-
Brian from GRAND MARSH, WI
-
Difficulty Level:Very Easy
-
Total Repair Time:Less than 15 mins
3 of 3 people
found this instruction helpful.
Was this instruction helpful to you?
Thank you for voting!
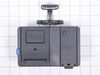
soap did not dispense correctly
Followed video instructions step by step.
I was fortunate i had enough slack in water, electric and discharge lines to avoid disconnecting.
Two wrinkles
1. wire clips on my door had to be pulled/pried loose from door and there were two not one
2. could not slide dishwasher out after lowering adjusters and figured out it was the mounting tabs bumpimng the granite countertop, thus the use of putty knives to slide the dishwasher out.
I was fortunate i had enough slack in water, electric and discharge lines to avoid disconnecting.
Two wrinkles
1. wire clips on my door had to be pulled/pried loose from door and there were two not one
2. could not slide dishwasher out after lowering adjusters and figured out it was the mounting tabs bumpimng the granite countertop, thus the use of putty knives to slide the dishwasher out.
Parts Used:
-
LaRay from PRESCOTT, AZ
-
Difficulty Level:A Bit Difficult
-
Total Repair Time:30 - 60 mins
-
Tools:Nutdriver, Screw drivers
3 of 3 people
found this instruction helpful.
Was this instruction helpful to you?
Thank you for voting!
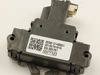
Dishwasher would not sense door was latched
Super easy repair, just removed the old latch and replaced it with the new one.
Parts Used:
-
Robert from CASEVILLE, MI
-
Difficulty Level:Very Easy
-
Total Repair Time:Less than 15 mins
-
Tools:Screw drivers
3 of 3 people
found this instruction helpful.
Was this instruction helpful to you?
Thank you for voting!
Old silverware basket wore through and melamine utensils fell through and stuck to heating element which cost me $100 for repairman to remove

-
Diana from NAPLES, FL
-
Difficulty Level:Very Easy
-
Total Repair Time:Less than 15 mins
3 of 4 people
found this instruction helpful.
Was this instruction helpful to you?
Thank you for voting!
The soap dispenser was not opening during the washing cycle
Took off the door and separated the two door pieces. Unscrewed the old dispenser and replaced it with the new one.
Parts Used:
-
Stephanie from Huntsville, AL
-
Difficulty Level:A Bit Difficult
-
Total Repair Time:1- 2 hours
-
Tools:Nutdriver, Pliers, Screw drivers
4 of 7 people
found this instruction helpful.
Was this instruction helpful to you?
Thank you for voting!
roller wheel was melted.
I removed the old roller wheels and the new roller wheels snapped together and the simple instructions made the repair quick and simple..
Parts Used:

-
Julian T from Dalton, GA
-
Difficulty Level:Really Easy
-
Total Repair Time:30 - 60 mins
2 of 2 people
found this instruction helpful.
Was this instruction helpful to you?
Thank you for voting!
Door gasket needed to be replaced
Simple answer- do not try to do this. GE makes you replace the entire door to replace this $3 part or call them and pay $100s to fix it. We decided to replace the entire dishwasher after we went through disassembly (there are no instructions on this) only to find out we could not fix without a brand new door.
Parts Used:
-
Corinna from MOUNT AIRY, MD
-
Difficulty Level:Very Difficult
-
Total Repair Time:More than 2 hours
3 of 5 people
found this instruction helpful.
Was this instruction helpful to you?
Thank you for voting!
The soap dispenser was broken os to save money I ordered one on-line
The repair instructions were great and the repair went well. The repair took less than an hour.
Thank you
Gary
Thank you
Gary
Parts Used:
-
GARY from SOAP LAKE, WA
-
Difficulty Level:Easy
-
Total Repair Time:30 - 60 mins
-
Tools:Nutdriver, Pliers, Screw drivers
2 of 2 people
found this instruction helpful.
Was this instruction helpful to you?
Thank you for voting!
washer would nt ru it beeped 3x and flash start lite
Looked upm the problem it said door wasn.t closed so cause was the door latch. put in the new one no change so I bought a new dishwasher
Parts Used:
-
Robert from ST AUGUSTINE, FL
-
Difficulty Level:Easy
-
Total Repair Time:30 - 60 mins
-
Tools:Screw drivers
2 of 2 people
found this instruction helpful.
Was this instruction helpful to you?
Thank you for voting!
No water getting to the dishwasher
Researched what others have posted about on Parts select. That really helped with the diagnosis! Took a chance on a $28 part. Repairman was going to charge $150 just to show up, then diagnose, leave for 2 months while waiting for the part, charge another $150 plus the part to fix…
Just had to pull out dishwasher far enough to take the water supply line off. Then the water inlet solenoid then 2 more screws and a 2 pronged plug reattach water supply then done! 15 minutes MAX!!!
Just had to pull out dishwasher far enough to take the water supply line off. Then the water inlet solenoid then 2 more screws and a 2 pronged plug reattach water supply then done! 15 minutes MAX!!!
Parts Used:

-
William from JUNCTION CITY, OR
-
Difficulty Level:Really Easy
-
Total Repair Time:15 - 30 mins
-
Tools:Pliers, Screw drivers, Wrench set
2 of 2 people
found this instruction helpful.
Was this instruction helpful to you?
Thank you for voting!
The lower dishwasher rack was rusting out. The rubber/epoxy coating was coming off causing rack to rust out.

-
Chris from LAS VEGAS, NV
-
Difficulty Level:Very Easy
-
Total Repair Time:Less than 15 mins
2 of 2 people
found this instruction helpful.
Was this instruction helpful to you?
Thank you for voting!
old nasty gasket needed to be replaced
youtube youtube youtube!
No videos for the exact unit, but I got the gist from one video which included the trick of holding the door hinge springs in place with allen wrenches, while the door slid up and away for access to the gasket. I also had to pull the unit out from under the counter by about a foot. No need to disconnect anything. Good luck.
No videos for the exact unit, but I got the gist from one video which included the trick of holding the door hinge springs in place with allen wrenches, while the door slid up and away for access to the gasket. I also had to pull the unit out from under the counter by about a foot. No need to disconnect anything. Good luck.
Parts Used:
-
Peter from N HOLLYWOOD, CA
-
Difficulty Level:Really Easy
-
Total Repair Time:15 - 30 mins
-
Tools:Nutdriver, Pliers
3 of 5 people
found this instruction helpful.
Was this instruction helpful to you?
Thank you for voting!
Noisy dishwasher when running. Sounds like something is interfering with spray arm.
-
Ronald from CAPE CORAL, FL
-
Difficulty Level:Very Easy
-
Total Repair Time:Less than 15 mins
2 of 2 people
found this instruction helpful.
Was this instruction helpful to you?
Thank you for voting!
Dish rack prongs rusted and broke off
It wasnt exactly the right lower dish rack to hold silverware holder. Instead of the trouble of sending it back we will use it. Silverware holder takes up some of the space for other dishes.
Parts Used:
-
David from Hooksett, NH
-
Difficulty Level:Really Easy
-
Total Repair Time:Less than 15 mins
2 of 2 people
found this instruction helpful.
Was this instruction helpful to you?
Thank you for voting!
Leaking under door
Since I have granite countertops, unscrewed 2 screws on each side of cabinet. Unscrewed the toe plate, unplugged the wire connector, and disconnected the cable
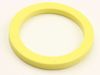
from the door which was held by tie wraps. Pulled out dishwasher about a foot. Unhooked the spring cable to the door, lifted the door out and placed it on a spare table. With door face down on a towel, I unscrewed the screws at the bottom to release the latches, then unscrew the screws that hold the door locked in place. Turned the door on its back face up, wedged a flathead driver to release the settings display, from the body of the door. Separated the 2 panels replaced the foam rubber vent seal. Placed the face face down, reconnected both pieces of the door together pushing down. Rescrewed the bottom to lock the 2 pieces together reinsert the hinges, screwed them in with nutdriver1/4". Grabbed the old gasket, replaced it with new one, sliding it into the groove on the bottom inside of door. Reattached the door to the washer, rehooked the cables to the door, retired with zip ties the cable to the underside of door, reinstalled the wire connector, and re screwed the toe plate. Pushed the dishwasher, leveled, rescrewed into cabinet. Replaced the tub gasket.
from the door which was held by tie wraps. Pulled out dishwasher about a foot. Unhooked the spring cable to the door, lifted the door out and placed it on a spare table. With door face down on a towel, I unscrewed the screws at the bottom to release the latches, then unscrew the screws that hold the door locked in place. Turned the door on its back face up, wedged a flathead driver to release the settings display, from the body of the door. Separated the 2 panels replaced the foam rubber vent seal. Placed the face face down, reconnected both pieces of the door together pushing down. Rescrewed the bottom to lock the 2 pieces together reinsert the hinges, screwed them in with nutdriver1/4". Grabbed the old gasket, replaced it with new one, sliding it into the groove on the bottom inside of door. Reattached the door to the washer, rehooked the cables to the door, retired with zip ties the cable to the underside of door, reinstalled the wire connector, and re screwed the toe plate. Pushed the dishwasher, leveled, rescrewed into cabinet. Replaced the tub gasket.
Parts Used:
-
Josef from MT CARMEL, TN
-
Difficulty Level:A Bit Difficult
-
Total Repair Time:30 - 60 mins
-
Tools:Nutdriver, Pliers, Screw drivers
2 of 3 people
found this instruction helpful.
Was this instruction helpful to you?
Thank you for voting!