




















GCE21IETAFBB General Electric Refrigerator - Instructions
Keep searches simple. Use keywords, e.g. "leaking", "pump", "broken" or "fit".
Clear Insert Cracked
Firmly but gently pulled apart both sides of module shelf to release the damaged clear insert. It came out very easy as there are two tabs, one on each side that fit into the module shelf. Did the same thing to install the new insert. It took 2-3 minutes to complete. Very Easy. Part #PS2323441 fit my older GE fridge perfectly.
Parts Used:
-
John from SURPRISE, AZ
-
Difficulty Level:Very Easy
-
Total Repair Time:Less than 15 mins
3 of 4 people
found this instruction helpful.
Was this instruction helpful to you?
Thank you for voting!
Light in the Refrigerator don't turn on.
I located the light switch at the bottom of the area where the door closes. I just popped it out with a small screwdriver and installed the new switch. A 2 wire connecter and small clip is all there is to it.
Parts Used:
-
Richard from West Alton, MO
-
Difficulty Level:Really Easy
-
Total Repair Time:Less than 15 mins
-
Tools:Screw drivers
3 of 4 people
found this instruction helpful.
Was this instruction helpful to you?
Thank you for voting!
broken light switch
Really simple... broken light switch easily removed with flat edge screw driver. Once removed unplug and plug new one in and good to go.
Parts Used:
-
Sally from Avon, CO
-
Difficulty Level:Really Easy
-
Total Repair Time:Less than 15 mins
-
Tools:Screw drivers
4 of 7 people
found this instruction helpful.
Was this instruction helpful to you?
Thank you for voting!
The refrige light switch broke when I dropped something on it.
I got the model # off the fridge, ordered the part online. The part was fairly cheap and was at my house 2 days after I ordered it. It was the exact part and I installed it in about 15 minutes and everyting worked out fine and easy and cheap, under $15 total to fix the issue. All I needed to do was use a flathead screwdriver to "pop" out the old switch, remove the 2 wires off the wire connection points, put the wires on the new switch and push it back into place. easy. Great place to get exact parts and fast shipping.
Parts Used:
-
robert from otisville, NY
-
Difficulty Level:Really Easy
-
Total Repair Time:Less than 15 mins
-
Tools:Pliers, Screw drivers
3 of 4 people
found this instruction helpful.
Was this instruction helpful to you?
Thank you for voting!
The light would not turn on!
I pulled the bulb out to see if it was the bulb, no! I took the switch out, of course with the refer unplugged, and jummped out the wires and the light came on. Ordered my switch and put it in in 10 seconds and then there was light! Thanks again for showing me the light!
Tim in NJ
Tim in NJ
Parts Used:
-
TIMOTHY from CLIFTON, NJ
-
Difficulty Level:Really Easy
-
Total Repair Time:Less than 15 mins
-
Tools:Screw drivers
3 of 4 people
found this instruction helpful.
Was this instruction helpful to you?
Thank you for voting!
A jar fell and hit the switch light and broke it.
My father called and asked me if I knew where he could get a new switch light for his refrigerator. I came across your web site and found the part right away. In less than 3 days the part came and my father put it on. He said it was easy and that it was great to have the part come to him instead of having to search all over town. Thanks so much for the fast, easy service.
Parts Used:
-
Theodore from Lake Circle, FL
-
Difficulty Level:Really Easy
-
Total Repair Time:Less than 15 mins
-
Tools:Screw drivers
3 of 4 people
found this instruction helpful.
Was this instruction helpful to you?
Thank you for voting!
Water Tank Cracked
First:
Remove all shelf’s and drawers from fridge inside that were on the way of the water tank
Second:
Pull the fridge from the wall
Turn off the water supply:
Unplugged the power supply
Third:
Remove the cardboard cover at bottom of the fridge on the back for better access to the water pipes
From the front remove the toe kick for better access at the water pipes
Disconnected the water pipe at the front left side, use a rag or paper towel to hold the water that may drip ( bigger pipe)
Remove the covers on the top of the water tank inside the fridge
Disconnected the water pipe at the back left side ( smaller pipe)
Unscrew the water tank (two screws)
Pull the water tank out with the water pipes attached
Fourth:
Install the new water tank assembly , make sure the pipes goes on the hole at the right side and reaches the from and back
Connect pipes until the line that shows on the pipes
Screw back the new water tank
Put the protections back on the top
Plug the fridge and open the water supply to make sure there is no water leaks
The water is ready to be use
Remove all shelf’s and drawers from fridge inside that were on the way of the water tank
Second:
Pull the fridge from the wall
Turn off the water supply:
Unplugged the power supply
Third:
Remove the cardboard cover at bottom of the fridge on the back for better access to the water pipes
From the front remove the toe kick for better access at the water pipes
Disconnected the water pipe at the front left side, use a rag or paper towel to hold the water that may drip ( bigger pipe)
Remove the covers on the top of the water tank inside the fridge
Disconnected the water pipe at the back left side ( smaller pipe)
Unscrew the water tank (two screws)
Pull the water tank out with the water pipes attached
Fourth:
Install the new water tank assembly , make sure the pipes goes on the hole at the right side and reaches the from and back
Connect pipes until the line that shows on the pipes
Screw back the new water tank
Put the protections back on the top
Plug the fridge and open the water supply to make sure there is no water leaks
The water is ready to be use
Parts Used:

-
Fernando from SOUTHAMPTON, NY
-
Difficulty Level:Easy
-
Total Repair Time:15 - 30 mins
-
Tools:Screw drivers
3 of 4 people
found this instruction helpful.
Was this instruction helpful to you?
Thank you for voting!
Refrigerator was getting to cold
Removed light cover, found 2 screws in front and rear of light area.Remove screws and you can unplug light to get out of way, but not necessary. Next pop off plastic cover with flat head screw driver and remove the two screws under cover. Next pull cover off water filter and remove water filter this will give you room to slide inlet cover out. Install plastic cone provided by in new kit. Next slide new cover over cone and re-install bottom screws, however leave them loose in order to adjust for the following screws to line up. After all screws and plugs are in place snug all screws. Replace light cover an install water filter and cover. You are done.
Parts Used:
-
Lawrence from Crestwood, KY
-
Difficulty Level:A Bit Difficult
-
Total Repair Time:15 - 30 mins
-
Tools:Screw drivers
4 of 7 people
found this instruction helpful.
Was this instruction helpful to you?
Thank you for voting!
Broken light switch, caused by a dropped can of whipped topping
I had some trouble removing the broken switch because a lot of the frame was missing due to the damage from the dropped can. I tried a screwdriver first and then switched to a small putty knife, which someone else had suggested.
Once the switch was loose and wires were accessible, I also had some trouble disconnecting them but they finally turned loose. After that the new switch was easily connected and popped back into the opening.
Definitely take photos as you disconnect!
Once the switch was loose and wires were accessible, I also had some trouble disconnecting them but they finally turned loose. After that the new switch was easily connected and popped back into the opening.
Definitely take photos as you disconnect!
Parts Used:

-
Frances from WINSTON SALEM, NC
-
Difficulty Level:Easy
-
Total Repair Time:15 - 30 mins
3 of 4 people
found this instruction helpful.
Was this instruction helpful to you?
Thank you for voting!
both freezer and refigerator were warm.
I watched the video online and it said there were three sensors in the refrigerator, two in the freezer and one in the refrigerator. I only ordered one sensor and was going to try the one in the refrigerator first. He said the upper one in the freezer is the most difficult, but is usually the problem. So, I replaced the upper sensor and tried restarting the unit. Everything went well and it fixed the problem.
Parts Used:
-
Harry from DURYEA, PA
-
Difficulty Level:Easy
-
Total Repair Time:15 - 30 mins
-
Tools:Nutdriver
2 of 2 people
found this instruction helpful.
Was this instruction helpful to you?
Thank you for voting!
water dispen.kept freezing up
remove light cover then remove 4 screws holding light fixture in place pulled out fresh food inlet cover and had to removed 2 more screws at bottom of cover then unplug electrical connector. replace with new one then replace all 6 screws and light cover done. so far its been working great no more freeze ups.
Parts Used:
-
KENSIL J from JACKSONVILLE, NC
-
Difficulty Level:Easy
-
Total Repair Time:15 - 30 mins
-
Tools:Screw drivers
3 of 5 people
found this instruction helpful.
Was this instruction helpful to you?
Thank you for voting!
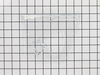
Cover was broken
-
Clifford from Hopewell, VA
-
Difficulty Level:Really Easy
-
Total Repair Time:15 - 30 mins
-
Tools:Screw drivers
2 of 2 people
found this instruction helpful.
Was this instruction helpful to you?
Thank you for voting!
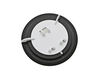
heavy frost buildup in ice dispenser chute and door
After inspection of the new door recess assembly, I realized that I could use sidecutters (electronic assembly type) and 'clip' off the inward lock tabs of the old recess assembly and disengage it from the crank door arm without any further disassembly of the refrigerator door. It was easy to 'unhitch' the tang from the crank arm and wiggle it out through the external opening of the ice/water dispenser compartment. I reversed the process and inserted the new assembly through the external opening of the compartment. The new door recess assembly snapped into place on the crank arm and fit tightly against the ice chute opening, correcting the issue caused by aging distortion of the old rubber seal cup portion of the door recess assembly.
Parts Used:
-
Robert from Rockford, IL
-
Difficulty Level:Really Easy
-
Total Repair Time:15 - 30 mins
-
Tools:Pliers
2 of 2 people
found this instruction helpful.
Was this instruction helpful to you?
Thank you for voting!
When serving of ice thought the door, ice was comming out without stoping , filling up the glass and falling on the floor.
Part: Dispenser Crusher cover: after whatch the movie on line: How to change the dispenser crusher cover, was very easy to do the job. The video is excelent and show in details wht to do. No problem at all. Changed the part, fixed the problem, works as a brand new.
Parts Used:
-
PAULO from HIALEAH, FL
-
Difficulty Level:Really Easy
-
Total Repair Time:15 - 30 mins
-
Tools:Screw drivers
4 of 8 people
found this instruction helpful.
Was this instruction helpful to you?
Thank you for voting!
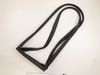
Freezer Gasket was torn in some spots, freezer had condensation inside and could not maintain zero degree temperature.
Ordered gasket. Laid out gasket near sunlit window untangled and flat on carpet for 24 hours to insure it was pilable and correct shape. Removed the old gasket manually easily without any tools and cleaned the door's seal groove with a paper towel slightly soaked with Simply Green. Installed new gasket starting at the upper corners then inserting upper edge by tilting the gasket toward the inside of the door with my fingers. Then installed the lower corners along with the bottom edge. Proceeded installing the side edge working from the set corners inserting the gasket's inner tongue into the door groove with my fingers again tilting the gasket inside the door. Once the gasket was installed, I closed the door and guided my fingers along the gasket to insure the magnetic edge formed a firm seal. This is wear the DIY videos suggested applying petroleum jelly but I did not need it since the gasket was pliable enough. Overall, the effort took 15 minutes because I think laying out the gasket for 24 hours allowed it to settle into its desired form..
Parts Used:
-
Bryan from LANDING, NJ
-
Difficulty Level:Very Easy
-
Total Repair Time:15 - 30 mins
2 of 2 people
found this instruction helpful.
Was this instruction helpful to you?
Thank you for voting!