




















GC3NHAXVA00 Whirlpool Refrigerator - Instructions
Keep searches simple. Use keywords, e.g. "leaking", "pump", "broken" or "fit".
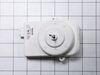
Front bearing had worn so that the fan vibrated causing the noise.
I removed the cardboard back then using a nut driver removed the three mounting screws, removed the old fan/motor and installed the new one, installing the three screws and replacing the cardboard cover.
My big problem was getting the right parts. Don't ever order refrigerator parts using the refrigerator model number. I did and got the wrong part, sent it back and talked to the parts lady and ordered again describing the error, the needed parts shape etc and she sent me the exact part I had sent back. I sent it back and removed the fan motor to get the part number, called and ordered by number and got the right one. Hallelujah!
My big problem was getting the right parts. Don't ever order refrigerator parts using the refrigerator model number. I did and got the wrong part, sent it back and talked to the parts lady and ordered again describing the error, the needed parts shape etc and she sent me the exact part I had sent back. I sent it back and removed the fan motor to get the part number, called and ordered by number and got the right one. Hallelujah!
Parts Used:
-
Earl from PIMA, AZ
-
Difficulty Level:Easy
-
Total Repair Time:30 - 60 mins
-
Tools:Nutdriver, Pliers
7 of 7 people
found this instruction helpful.
Was this instruction helpful to you?
Thank you for voting!
The wrong filter was sent the first time.
I removed the cap from the filter pushed a lever and removed fliter. I replaced the old filter, removed the caps on the new one and slid it into channel after replacing the outer cap. I removed water from the spigot for 4 mins. and it was ready to go. I pushed the reset button to get the green light to come on.
Parts Used:
-
Sandra S from Topeka, KS
-
Difficulty Level:Difficult
-
Total Repair Time:15 - 30 mins
8 of 11 people
found this instruction helpful.
Was this instruction helpful to you?
Thank you for voting!
light not working in fridge
It was so easy!
Thanks for the rush to my home on the part.
I just unscrewed the plate that locks in the light switch (screwdriver) and unplugged the old faulty part and plugged in the new switch, screwed the cover back on and I was done!
Easy!
And I am not Mr. Fix-it!
Thanks for the rush to my home on the part.
I just unscrewed the plate that locks in the light switch (screwdriver) and unplugged the old faulty part and plugged in the new switch, screwed the cover back on and I was done!
Easy!
And I am not Mr. Fix-it!
Parts Used:

-
Michael from East Meadow, NY
-
Difficulty Level:Really Easy
-
Total Repair Time:Less than 15 mins
-
Tools:Screw drivers
7 of 8 people
found this instruction helpful.
Was this instruction helpful to you?
Thank you for voting!
Ice maker quit after 3 years
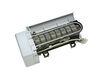
I removed the two screws holding the cover door, then the three on the uder side of the icemaker assembly. I carefully worked the old unit out; it was a tight fit. The most difficult step involved disconnecting the power assembly. Due to the space, it was hard to get hold of each side of the clip to pull it out. After the old unit was out, just reversed the steps and had the first batch of ice in less than an hour. (I washed the new unit with warm water and soup as it had grease/lubricant on it when taken out of the package).
Parts Used:
-
Jeffrey from Topeka, KS
-
Difficulty Level:Really Easy
-
Total Repair Time:15 - 30 mins
-
Tools:Nutdriver
8 of 11 people
found this instruction helpful.
Was this instruction helpful to you?
Thank you for voting!
Water filter
-
David from port st lucie, FL
-
Difficulty Level:Really Easy
-
Total Repair Time:Less than 15 mins
10 of 18 people
found this instruction helpful.
Was this instruction helpful to you?
Thank you for voting!
Black flecks in ice
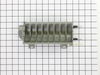
The lining of the ice mold (Whirlpool) started flecking off (black flecks in the ice cubes), so I decided to replace the mold.
Loosen the two 1/4 inch upper nuts and remove the lower nut to remove the ice maker from the freezer. The hardest part was getting it unplugged. I used a small blade screwdriver to release the catch on the connector and pull it out.
Remove the ice maker front cover. If you have a skinny enough phillips screw driver, there are two deep set screws through two holes on the lower portion of the control module (otherwise, remove the three screws on the controller, unlatch the shut-off arm from the control module, and separate the controller to access the mold screws). Unhook the shut-off wire from the end of the tray. Unscrew the two screws holding the mold and remove the mold.
Remove the plastic hardware from the old mold and install on the new mold.
Attach the new mold on to the control module.
WARNING WARNING WARNING!!! The mold I bought already had the alumilastic on it for the contact point to the thermostat. When I installed it and tightened the screws, the alumilastic was dried out, didn't squash down, and dented the bi-metal thermostat on the controller, ruining it. I had to buy a new thermostat. Be sure to check that the alumilastic is pliable. If not, take it off and buy some fresh to put on there.
Re-install the ice maker. It took a while to get the first batch of ice because the ice maker was at room temperature and I had the freezer door open for several minutes. So the freezer had to get cold and the ice maker had to chill down. Once everything got cold, it started making ice again.
Loosen the two 1/4 inch upper nuts and remove the lower nut to remove the ice maker from the freezer. The hardest part was getting it unplugged. I used a small blade screwdriver to release the catch on the connector and pull it out.
Remove the ice maker front cover. If you have a skinny enough phillips screw driver, there are two deep set screws through two holes on the lower portion of the control module (otherwise, remove the three screws on the controller, unlatch the shut-off arm from the control module, and separate the controller to access the mold screws). Unhook the shut-off wire from the end of the tray. Unscrew the two screws holding the mold and remove the mold.
Remove the plastic hardware from the old mold and install on the new mold.
Attach the new mold on to the control module.
WARNING WARNING WARNING!!! The mold I bought already had the alumilastic on it for the contact point to the thermostat. When I installed it and tightened the screws, the alumilastic was dried out, didn't squash down, and dented the bi-metal thermostat on the controller, ruining it. I had to buy a new thermostat. Be sure to check that the alumilastic is pliable. If not, take it off and buy some fresh to put on there.
Re-install the ice maker. It took a while to get the first batch of ice because the ice maker was at room temperature and I had the freezer door open for several minutes. So the freezer had to get cold and the ice maker had to chill down. Once everything got cold, it started making ice again.
Parts Used:
-
Anthony from Billings, MT
-
Difficulty Level:A Bit Difficult
-
Total Repair Time:More than 2 hours
-
Tools:Nutdriver, Screw drivers
6 of 6 people
found this instruction helpful.
Was this instruction helpful to you?
Thank you for voting!
Broken Water Filter Cap
Took the broken cap off. Actually it practically fell off. Put the new cap in place, turned it to the right and Presto! it locked in and works fine. It took longer to get it out of the box than it did to install it :)
Parts Used:

-
Larry from Pasadena, CA
-
Difficulty Level:Really Easy
-
Total Repair Time:Less than 15 mins
6 of 7 people
found this instruction helpful.
Was this instruction helpful to you?
Thank you for voting!
All three lights are not working...lights are off but refrigerator still cooling. Also, the control box not lit up to show the temparture for freezer and refrigerator
Used a screw driver to pull old switch. Pulled one wire at a time, only two wires. After wires instlled to new switch push new one back in place where the old one was.
Parts Used:
-
Antonio from San Antonio, TX
-
Difficulty Level:Really Easy
-
Total Repair Time:Less than 15 mins
-
Tools:Screw drivers
7 of 10 people
found this instruction helpful.
Was this instruction helpful to you?
Thank you for voting!
Broken track
Removed broken tracks, installed new tracks. Had to file off two knobs on each track that prevented the tracks from seating properly. Installed easily and locked into place once the knobs were gone.
Parts Used:

-
Jay from Minneapolis, MN
-
Difficulty Level:Easy
-
Total Repair Time:15 - 30 mins
6 of 7 people
found this instruction helpful.
Was this instruction helpful to you?
Thank you for voting!
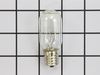
light blew out
-
KELVIN from SOUTHFIELD, MI
-
Difficulty Level:Very Easy
-
Total Repair Time:Less than 15 mins
7 of 10 people
found this instruction helpful.
Was this instruction helpful to you?
Thank you for voting!
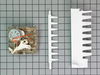
ice maker not operating
Unlug refrig or turn off refrig from its control panel On/OFF switch.
For ease of work remove freezer shelve directly below the ice maker. Remove four screws from the bottom of the ice maker assembly, three that secure the ice maker and the other that holds a plastice shroud in place over the ice maker's power plug.
The ice maker is now ready to be removed; it will slide forward by pushing up on left and right side of the ice maker's mounting slide rails. Once the ice maker is moved forward it is easier to disconnect its power plug (depress a locking tab on the side of the connector and pull connector apart and remove ice maker assembly.
Remove and replace motor module by removing three screws and and replace with new unit.
Reverse ice maker removal proceure for installation. Once installation is completed turn on Power to Refrig, Ice making should begin after a few hours.
For ease of work remove freezer shelve directly below the ice maker. Remove four screws from the bottom of the ice maker assembly, three that secure the ice maker and the other that holds a plastice shroud in place over the ice maker's power plug.
The ice maker is now ready to be removed; it will slide forward by pushing up on left and right side of the ice maker's mounting slide rails. Once the ice maker is moved forward it is easier to disconnect its power plug (depress a locking tab on the side of the connector and pull connector apart and remove ice maker assembly.
Remove and replace motor module by removing three screws and and replace with new unit.
Reverse ice maker removal proceure for installation. Once installation is completed turn on Power to Refrig, Ice making should begin after a few hours.
Parts Used:
-
Dennis from Sebastian, FL
-
Difficulty Level:A Bit Difficult
-
Total Repair Time:1- 2 hours
-
Tools:Nutdriver, Screw drivers
6 of 7 people
found this instruction helpful.
Was this instruction helpful to you?
Thank you for voting!
My Ice Maker stopped working.
I Ordered an Ice maker assembly and installed it myself using the video that was associated with the part on the website. It was simple and fast.
Parts Used:
-
Jennifer from HUNTSVILLE, AL
-
Difficulty Level:Really Easy
-
Total Repair Time:15 - 30 mins
-
Tools:Nutdriver, Screw drivers
5 of 5 people
found this instruction helpful.
Was this instruction helpful to you?
Thank you for voting!
No water to ice maker
Built-in filter was corroded due to age. New filter corrected problem.
Parts Used:
-
William from Danville, VA
-
Difficulty Level:Really Easy
-
Total Repair Time:Less than 15 mins
-
Tools:Pliers
7 of 11 people
found this instruction helpful.
Was this instruction helpful to you?
Thank you for voting!
Ice maker just stpooed making ice
The troubleshooting time takes about 20 to 30 minutes. After checking out the solenoid (valve water), the water line, and the electronic board (emitter/receiver) are working fine. The only thing left is the ice module. I called Partselect and talked to a sale rep to make sure I get the right part, and the lady was so helpful by sendind the picture of the part so I can review before ordering it. I received the part in 3 days ( normal shipping) and did the folowings:
1) Unplugged the power cord from refrigerator.
2) Removed the ice module by removed a 1/4" screw from under the right side of the icemaker that retains the icemaker and a “U” plastic clamp and then pull out the whole unit it from the track.
3) Unplugged the cable connected to the ice maker.
4) Using the phillips screw driver to remove the 3 screws. Carefully pulled out the ice module and installed the new ice module.
5) Put the ice maker back to the freezer, plug the cable back to the ice maker and put the clamp and tighten the nut.
6) Plugged the power cable back to the wall.
The first ice I got in an hour and a full bucket of ice in less than 24 hours. I spent less than $80 for the whole thing. Thank you so much Partselect for the great service and the stories posted, it really helped me to get it done.
1) Unplugged the power cord from refrigerator.
2) Removed the ice module by removed a 1/4" screw from under the right side of the icemaker that retains the icemaker and a “U” plastic clamp and then pull out the whole unit it from the track.
3) Unplugged the cable connected to the ice maker.
4) Using the phillips screw driver to remove the 3 screws. Carefully pulled out the ice module and installed the new ice module.
5) Put the ice maker back to the freezer, plug the cable back to the ice maker and put the clamp and tighten the nut.
6) Plugged the power cable back to the wall.
The first ice I got in an hour and a full bucket of ice in less than 24 hours. I spent less than $80 for the whole thing. Thank you so much Partselect for the great service and the stories posted, it really helped me to get it done.
Parts Used:
-
Cuong from Camarillo, CA
-
Difficulty Level:Easy
-
Total Repair Time:Less than 15 mins
-
Tools:Nutdriver, Screw drivers
5 of 5 people
found this instruction helpful.
Was this instruction helpful to you?
Thank you for voting!
Broken ice bin coupling
Online parts detail made identifiying the correct part very easy. $10 fix instead of a $150 service call. Once the right part was identified, fixing it was very easy.
Parts Used:

-
Bradley from Woodstock, MD
-
Difficulty Level:Really Easy
-
Total Repair Time:Less than 15 mins
7 of 11 people
found this instruction helpful.
Was this instruction helpful to you?
Thank you for voting!