




















GBD277PDT8 Whirlpool Wall Oven - Instructions
Keep searches simple. Use keywords, e.g. "leaking", "pump", "broken" or "fit".
The bottom bake element died
Well, the instructions on the computer site were very easy to understand, however, the difficulty lay in the fact that we were 2 78 yr old people and getting to the inside the oven, lifting up the element so that we could see where it should be connected and get it connected was a task. We had to get down on our knees and then get back up. That was a chore within itself. But, the instructions were easy and clear.
Bottom line if us old people can do it, anyone can.
Bottom line if us old people can do it, anyone can.
Parts Used:

-
Judith from QUINCY, CA
-
Difficulty Level:A Bit Difficult
-
Total Repair Time:30 - 60 mins
-
Tools:Screw drivers
2 of 3 people
found this instruction helpful.
Was this instruction helpful to you?
Thank you for voting!
Upper Oven Latch Not Functioning Properly
Originally ordered just the spring assuming that might be it and it was the cheapest way. However after getting in I found that the latch assembly had a broken 'tit' that is intended to hold the metal latch in place as it moves. Attempted to glue w/ epoxy but as i expected there was too much pressure to hold it in place. So....ordered the assembly.
TURN OFF BREAKER.....
1) Remove the two side rails by removing screw on the inside bottom of rails.
2) It helps to remove the door to get it out of your way but not required. To do this open door fully and insert two nails or similar into holes on each hinge. Close the door until the hinge contact nails. Lift the door up and out.
3) remove the top control panel by removing screw on either side (outside of oven)and screws on the underside of panel behind upper door.
4) It help to completely remove the panel to have more room to work but not required. If you do it is a good idea to photo the cable locations so it is easy to recall where they go. For the most part they only fit one location but always a good idea.
5) remove the latch by removing all spade connectors and two screws in front.
6) place new latch and reassemble.
TURN OFF BREAKER.....
1) Remove the two side rails by removing screw on the inside bottom of rails.
2) It helps to remove the door to get it out of your way but not required. To do this open door fully and insert two nails or similar into holes on each hinge. Close the door until the hinge contact nails. Lift the door up and out.
3) remove the top control panel by removing screw on either side (outside of oven)and screws on the underside of panel behind upper door.
4) It help to completely remove the panel to have more room to work but not required. If you do it is a good idea to photo the cable locations so it is easy to recall where they go. For the most part they only fit one location but always a good idea.
5) remove the latch by removing all spade connectors and two screws in front.
6) place new latch and reassemble.
Parts Used:

-
Jack from Austin, TX
-
Difficulty Level:A Bit Difficult
-
Total Repair Time:30 - 60 mins
-
Tools:Pliers, Screw drivers
3 of 6 people
found this instruction helpful.
Was this instruction helpful to you?
Thank you for voting!
There was an annoying buzzing sound coming from the bottom of the stove
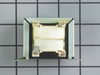
I pinpointed the location of the sound, took off the protective plate, felt it vibrating against the plate. I disconnected the power supply, and looked at the wirings and how it was connected, saw some burning residue surrounding the area of the Transformer. Then figured that I could simply replace this. I wrote down the Model and Serial number of the Stove, searched online, found this site. Located the part on the diagram, then simply ordered it. My part arrived in 3 days, and had the part replaced the next day. Couldn't be a smoother fix. Thanks.
Parts Used:
-
Craig from Snoqualmie, WA
-
Difficulty Level:Easy
-
Total Repair Time:15 - 30 mins
-
Tools:Screw drivers
6 of 15 people
found this instruction helpful.
Was this instruction helpful to you?
Thank you for voting!
I was trying to remove the oven door so I could clean the glass. Spills had run down between the layers of glass.
This oven probably was manufactured in the '60s when the house was built. The door doesn't just pull off like the newer models. These pins fit into small holes on the oven hinges. I inserted the pins and lifted the door to a 45 degree angle, before pulling the door completely off. Now that turned out to be the easy part. I then proceeded to completely dismantle the door. It actually has 4 glass layers which had to be cleaned individually. The hardest part of all was actually remembering how to put it back together again. I put the door back on just as I had removed it, then took out the pins, and I was finally done! This was not an easy project, BUT the results look great.
Parts Used:
-
Karen from Oklahoma City, OK
-
Difficulty Level:Difficult
-
Total Repair Time:More than 2 hours
-
Tools:Screw drivers
3 of 6 people
found this instruction helpful.
Was this instruction helpful to you?
Thank you for voting!
burned out light

-
Charles from WEST END, NC
-
Difficulty Level:Very Easy
-
Total Repair Time:30 - 60 mins
2 of 3 people
found this instruction helpful.
Was this instruction helpful to you?
Thank you for voting!
Elements went out in the oven
Small, older female with limited hand strength here. Turned off the power to the stove. Removed the baking element from the oven wall with a screwdriver, snapped out the old one and snapped in the new one. 5 min tops. The broiler was a bit more labor intensive as the rusted and/or stripped screws did not want to come out. Used some liquid wrench, gripping grit, and a power drill to remove, but once the screws were out, it was another easy snap off/snap back in process. Had some screws on hand to replace the stripped ones. Broiled a steak that night with the new red hot broiler. So happy. This repair just saved me approximately $1800 to replace a 28 yr old drop-range. Very happy with this purchase.
Parts Used:

-
Kati from Henrico, VA
-
Difficulty Level:Really Easy
-
Total Repair Time:30 - 60 mins
-
Tools:Screw drivers
1 person
found this instruction helpful.
Was this instruction helpful to you?
Thank you for voting!
Broken front glass
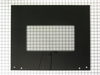
Very easy. Take the two top screws out and the two bottom holders off. The bottom holders hold the glass up in place. Grab the handle and pull glass out. To install put handles screws back on the glass and slide in place. Once in place install the bottom holders pieces back on. *** I would buy screws because after years of use the head rust out and sometimes they are hard to get off... all in all very easy to install
Parts Used:
-
Alan from PEARISBURG, VA
-
Difficulty Level:Really Easy
-
Total Repair Time:30 - 60 mins
-
Tools:Screw drivers
2 of 4 people
found this instruction helpful.
Was this instruction helpful to you?
Thank you for voting!
The interior glass broke when I tried to wipe hot glass with a cold washcloth
I watched the video on the product page and followed it step by step. Not difficult at all.
Parts Used:

-
Susan from PLANO, TX
-
Difficulty Level:Really Easy
-
Total Repair Time:30 - 60 mins
-
Tools:Screw drivers
1 person
found this instruction helpful.
Was this instruction helpful to you?
Thank you for voting!
The element had burned up.
Unplugged old element unit and plugged in new element. Took two needle nose pliers and a flexible body. Took about 5 minutes. Works fine. Anybody can do it. Make sure power is off at the box.
Parts Used:
-
Kenyon from CALHOUN, GA
-
Difficulty Level:Really Easy
-
Total Repair Time:30 - 60 mins
-
Tools:Pliers
1 person
found this instruction helpful.
Was this instruction helpful to you?
Thank you for voting!
The oven was over heating because it wasn’t reading the temperature
Pulled the stove out, unscrewed the back and plugged the new thermostat in. Screwed the back back on
Parts Used:

-
LAURIE from BILTMORE LAKE, NC
-
Difficulty Level:Really Easy
-
Total Repair Time:30 - 60 mins
-
Tools:Screw drivers
2 of 4 people
found this instruction helpful.
Was this instruction helpful to you?
Thank you for voting!
replaced lower blower of a double wall oveno
Easily, Removed the oven with help of my grandson, this model is quite heavy. Open the back cover panel, removed the old blower. replaced with the new blower, covered with the back protective panel. About one hour because some screws much harder to reach.
Parts Used:

-
Duane from COON RAPIDS, MN
-
Difficulty Level:Really Easy
-
Total Repair Time:30 - 60 mins
-
Tools:Pliers, Screw drivers
1 person
found this instruction helpful.
Was this instruction helpful to you?
Thank you for voting!
E1 and e15
-
Calvin from GARNER, NC
-
Difficulty Level:Really Easy
-
Total Repair Time:30 - 60 mins
-
Tools:Screw drivers
1 person
found this instruction helpful.
Was this instruction helpful to you?
Thank you for voting!
The oven in the demo video did not have an interior set of screws holding in the exterior glass
Watched the repair video and started the project. Ran into a problem when trying to remove the interior panel off the door to reach the broken interior glass. On this model Kitchen Aid there is another section that is screwed in holding the exterior glass pieces in place. It prevents the interior panel from coming off the front of the oven door. So we had to flip over the door and unscrew the glass retaining bars to get the interior panel off and reach the glass. This allows the entire door to come apart in pieces so you have to carefully line up everything to re-assemble the door. Part of the issue with this is some of the retaining screws are not very long so you have to press the pieces back together to make sure the screw will catch in the original hole. We had to do this twice to ensure the interior door glass was laying flush on its mounts. A bit fiddly for sure, and if I was working alone it may not have been successful. But at least we know how the door is put together!
Parts Used:
-
KEVIN from HOUSTON, TX
-
Difficulty Level:A Bit Difficult
-
Total Repair Time:30 - 60 mins
-
Tools:Screw drivers
1 person
found this instruction helpful.
Was this instruction helpful to you?
Thank you for voting!
Inner glass on the oven door was broken
First remove the side trimmings by opening the oven door and taking out the two screws near the bottom. Remove the bottom trim by removing the two screws now exposed. Here's the hard part .. The outer glass is held by 4 screws 2 at the top and 2 through U brackets at the bottom. You must remove the 2 bottom ones first and then VERY carefully, whilst supporting the glass remove the 2 top ones and then gently pull from the bottom to release the glass at the top and pull away. The rest is straightforward. There are 4 glass pieces to remove, make sure you clean the finger marks off as you replace them. I would suggest 2 people to replace the final outer glass 'to be safe"
Parts Used:
-
Stephen from Sunnyvale, CA
-
Difficulty Level:A Bit Difficult
-
Total Repair Time:15 - 30 mins
-
Tools:Screw drivers
6 of 16 people
found this instruction helpful.
Was this instruction helpful to you?
Thank you for voting!
The element connector broke on the element
I shut the power off first as this is 240v. Then removed all the screws that hold the element on. The old one had 5 screws. For this part you will need to buy new or reuse the old screws. I reused the old ones. Once loose the element pulled forward and exposed the connectors. I used pliers to pull the broken one out as it did not come out with the old element. It will only pull out a few inches, but that is enough to unplug the connectors. After unplugged the element can be taken to recycling. The new one can be set in the oven with the connectors near the wires and plug the two sides into the connectors. Have a screw ready and slide the rear of the element back into rear which will support it while you insert one of the screws into the front support to hold the element in place. Then move the element and support as needed to install the remaining screws. Once it is all tight, turn on the power and make sure it works.
Parts Used:
-
Joe from Bloomington, IN
-
Difficulty Level:A Bit Difficult
-
Total Repair Time:30 - 60 mins
-
Tools:Pliers, Screw drivers
1 person
found this instruction helpful.
Was this instruction helpful to you?
Thank you for voting!