




















GB2SHDXPS01 Whirlpool Refrigerator - Instructions
Keep searches simple. Use keywords, e.g. "leaking", "pump", "broken" or "fit".
Raplaced switch
Repair went well,took about five to ten minutes to disconnect the power from the fridge removed the defective switch installed the new one ,reconnected the power,,,and Let there be light and there was light!
Parts Used:

-
Winston A from Brooklyn, NY
-
Difficulty Level:Really Easy
-
Total Repair Time:Less than 15 mins
-
Tools:Pliers
5 of 9 people
found this instruction helpful.
Was this instruction helpful to you?
Thank you for voting!
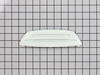
Broken clips on old part
-
Rose from OCOEE, FL
-
Difficulty Level:Really Easy
-
Total Repair Time:Less than 15 mins
3 of 3 people
found this instruction helpful.
Was this instruction helpful to you?
Thank you for voting!
Broke the Rocker Switch in Fridge side
Popped out with butter knife and unplugged 3 prong connector and reversed with anew switch.
But, unfortunately it got broken again exactly same way as before.
So, I ordered same switch again for 2nd time.
Maytag should recall that Rocker Switch and build with better materials.
But, unfortunately it got broken again exactly same way as before.
So, I ordered same switch again for 2nd time.
Maytag should recall that Rocker Switch and build with better materials.
Parts Used:

-
Sung-Su from BISMARCK, ND
-
Difficulty Level:Very Easy
-
Total Repair Time:Less than 15 mins
4 of 6 people
found this instruction helpful.
Was this instruction helpful to you?
Thank you for voting!
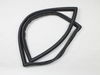
Freezer freezing up. Frost everywhere.
Old gasket pulled of easily with no tools. New gasket was placed on floor and heated with blow dryer to straighten. Then installed new gasket by pressing in with my hands. Noticed that the old gasket was hard and not flexible. All was great. Fit perfectly. No frost after a week. Happy.
Parts Used:
-
Daniel from LAKE CITY, FL
-
Difficulty Level:Very Easy
-
Total Repair Time:Less than 15 mins
3 of 3 people
found this instruction helpful.
Was this instruction helpful to you?
Thank you for voting!
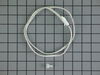
Top section warm, but freezer okay.
Popped off the control panel at the top behind the door. Found the thermistor and replaced it, cutting the wires and splicing the new one in. Immediately the warm section of the refrigerator was getting below freezing temperature readings, so the cooling vent was not opening. I put the old one back on and the temperature readings went back to being accurate. So this was not the problem. I believe now that the fan somehow is not blowing enough cold air up. So now I'll probably buy a fan motor and maybe a blade and try that. Otherwise the computer module I priced at $500 so I hope it isn't that. I replace the fan motor a few years ago already.
Parts Used:
-
Christopher from HOMESTEAD, FL
-
Difficulty Level:Easy
-
Total Repair Time:15 - 30 mins
-
Tools:Screw drivers
3 of 3 people
found this instruction helpful.
Was this instruction helpful to you?
Thank you for voting!
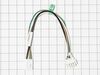
Ice maker not producing ice
The parts were very easy to replace, however I am still without ice and cannot figure out why. I have ohm tested the contol unit and everything works fine, I am able to jump it and turn on the motor and water fill valve. Any suggestions?...
Parts Used:
-
frank from NORTHRIDGE, CA
-
Difficulty Level:Very Easy
-
Total Repair Time:15 - 30 mins
-
Tools:Nutdriver
3 of 3 people
found this instruction helpful.
Was this instruction helpful to you?
Thank you for voting!
changed the light bulb still would not work so I figured it was the switch sure enough.
I took a chance and ordered a switch that is next to the top of the door. looked for how to remove it easily done in ten minutes works fine last long time.
Parts Used:
-
anthony from HAVELOCK, NC
-
Difficulty Level:Really Easy
-
Total Repair Time:15 - 30 mins
3 of 4 people
found this instruction helpful.
Was this instruction helpful to you?
Thank you for voting!
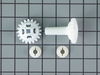
Boyfriends freezer door wouldn’t shut completely
I got really tired of taking food out covered in icicles and stabbing a huge block of ice out of the bottom. Turns out all he needed was a little wheel with cogs and I looked up the sticker model number on this site and clicked the part of the fridge. So simple, wish I would’ve done it sooner.
Parts Used:
-
Megan from NORFOLK, VA
-
Difficulty Level:Really Easy
-
Total Repair Time:Less than 15 mins
3 of 4 people
found this instruction helpful.
Was this instruction helpful to you?
Thank you for voting!
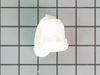
One of the light bulbs went out on my Whirlpool refrigerator.
I changed the bulb but it still didn’t work. I ordered a bulb holder and replaced it and it works properly now. It was an easy repair, remove the bulb, gently pry the bulb holder out with a screwdriver and snap the new one in.
It was useful that under the description of the part in the catalog, it showed that this part was often used to repair this issue. The service was great and the delivery was fast.
It was useful that under the description of the part in the catalog, it showed that this part was often used to repair this issue. The service was great and the delivery was fast.
Parts Used:
-
Brian from LAKE CHARLES, LA
-
Difficulty Level:Very Easy
-
Total Repair Time:Less than 15 mins
-
Tools:Screw drivers
3 of 4 people
found this instruction helpful.
Was this instruction helpful to you?
Thank you for voting!
shut off arm was broke and so was bracket
i just took the prts apart and replaced with new part really easy and saved $185.00 easy as pie
Parts Used:


-
brandon from Cedar Rapids, IA
-
Difficulty Level:Easy
-
Total Repair Time:Less than 15 mins
-
Tools:Nutdriver, Screw drivers
12 of 31 people
found this instruction helpful.
Was this instruction helpful to you?
Thank you for voting!
Light switch wasn't working.. As I would close the door I would notice our frig light wasn't going off...
I simply removed the old switch by gently pulling down on the old switch with a screwdriver. When it was about half way out I just gently pulled down on the old switch and it popped out... I removed the two connectors attached to the old switch by pulling on the connectors with a pliers...I tried using my fingers but wasn't able to pull the connectors off so I used pliers. It worked perfectly.. When pulling off the old connectors, make sure you attach the new switch to the same tabs on the new switch... It was very easy to do and took under 5 mins.....The light switch works perfect....P.S. You should unplug the frig while making the connection just in case....Safety first....!!!
Parts Used:
-
David from Hemet, CA
-
Difficulty Level:Really Easy
-
Total Repair Time:Less than 15 mins
-
Tools:Pliers, Screw drivers
3 of 4 people
found this instruction helpful.
Was this instruction helpful to you?
Thank you for voting!
defective light switch
inserted a knife between the switch and the plastic interior in order to pop the switch out.
then took off the 2 wires on the old switch put them on the new switch and reinserted the switch into the plastic interior.
then took off the 2 wires on the old switch put them on the new switch and reinserted the switch into the plastic interior.
Parts Used:
-
THOMAS from WILLARD, OH
-
Difficulty Level:Really Easy
-
Total Repair Time:Less than 15 mins
3 of 4 people
found this instruction helpful.
Was this instruction helpful to you?
Thank you for voting!
The refrigerator stopped running
I was told to order the run capacitor and the technician thought it would repair the refrigerator; but it did not. The appliance technician had to take the run capacitor off and install what he called a "hard start" and the refrigerator is operating right now.
Parts Used:

-
Barbara H. from South Hill, VA
-
Difficulty Level:Easy
-
Total Repair Time:1- 2 hours
-
Tools:Screw drivers
4 of 7 people
found this instruction helpful.
Was this instruction helpful to you?
Thank you for voting!
Freezer cold ; fridge warm . Freezer not defrosting.
Unplugged fridge
Pulled light cover off
Used screwdrivers to press in on tabs holding control board cover.
Unplug wiring harnesses.
Snapped board in two.
Install in cover
Reattach wires
Done
Pulled light cover off
Used screwdrivers to press in on tabs holding control board cover.
Unplug wiring harnesses.
Snapped board in two.
Install in cover
Reattach wires
Done
Parts Used:

-
Tim from Oxford, MA
-
Difficulty Level:Really Easy
-
Total Repair Time:1- 2 hours
-
Tools:Screw drivers
2 of 2 people
found this instruction helpful.
Was this instruction helpful to you?
Thank you for voting!
No ice forming in ice maker
I looked at a video on YouTube that described how to check if the water inlet valve was working. By using an ohm meter, it indicated the water valve was bad. I could hear the ice maker trying to make ice. I ordered the part; it was shipped that day. The email confirmation also had a video on how to change. I watched and changed it out quickly. The valve is easy to take out by disconnecting the water line and quick disconnect electrical line. (Turn off water and unplug unit). I took pictures of my steps so I could remember the valve orientation. The new valve went in the same way in just 2 minutes. I needed a 1/4 inch nut driver.
We had a full ice tray in 24 hours.
Our freezer door handle popped off and I learned how to put it back by watching a YouTube video.
I am not handy at this type of repair but this was a great experience. Thank you!!
We had a full ice tray in 24 hours.
Our freezer door handle popped off and I learned how to put it back by watching a YouTube video.
I am not handy at this type of repair but this was a great experience. Thank you!!
Parts Used:

-
Neil from ELKTON, MD
-
Difficulty Level:Very Easy
-
Total Repair Time:30 - 60 mins
-
Tools:Nutdriver
2 of 2 people
found this instruction helpful.
Was this instruction helpful to you?
Thank you for voting!