




















GB2FHDXWD01 Whirlpool Refrigerator - Instructions
Keep searches simple. Use keywords, e.g. "leaking", "pump", "broken" or "fit".
Control noisy when opening and closing removed damper housing
Pop off vent cover remove 2 screws removed cover housing and foam. Removed damper by unclipping tabs on left and right side of control lift up and out. Unplugged power wires reinstalled in reverse order.
Parts Used:

-
Nelson from CATSKILL, NY
-
Difficulty Level:Easy
-
Total Repair Time:Less than 15 mins
-
Tools:Screw drivers
4 of 4 people
found this instruction helpful.
Was this instruction helpful to you?
Thank you for voting!
Ice Maker was leaking
Used socket set to remove screws. Removed the wire harness, then removed lift arm from old ice maker and then put lift arm on the new ice maker. Reinstall wire harness then installed back in freeze with the screws. Video was very helpful. I will do business with Partselect in the future. Shipping was very fast. Thanks Partselect
Parts Used:

-
Robert from Severn, MD
-
Difficulty Level:Really Easy
-
Total Repair Time:Less than 15 mins
-
Tools:Screw drivers, Socket set
4 of 4 people
found this instruction helpful.
Was this instruction helpful to you?
Thank you for voting!
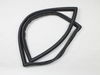
bad gasket
took about 15 min just took off gasket with flat screwdriver cleaned and put it on no glue it has magnets very easy
Parts Used:
-
Donna from Palestine, TX
-
Difficulty Level:Really Easy
-
Total Repair Time:Less than 15 mins
-
Tools:Screw drivers
4 of 4 people
found this instruction helpful.
Was this instruction helpful to you?
Thank you for voting!
The water supply line to the ice maker kept popping off after I replaced the water filter because an "ice plug" had formed in the fill tube, unbeknownst to me.
1. Turn your water OFF and pull the refrigerator out from the wall so you can access the back.
2. Use pliers to remove tubing clamp.
3. Remove old water fill tube.
4. I used a putty knife to gently pry out the old fill tube from the back of the refrigerator. Once the fill tube pulls out about 1/4 to 1/2", then you can gently pull the remainder of the tube out by hand. Once I removed my "old" fill tube, that is when I saw the "ice plug" that was causing pressure in the water supply line and caused my water line to pop off.
5. Install new fill tube. The end that goes in first needs to go through a small "ring" inside the freezer (this "ring" is not encountered until the fill tube only has about one more inch to be inserted into the back of the refigerator. I could barely see this "ring" if I opened the freezer drawer and stuck my head in as far as I could. I had to gently rotate the new fill tube until it cleared the "ring". You will feel some resistance until it lines up properly.
6. Snugly push in the part that stays on the outside of the refrigerator until it looks like it is sealed.
7. Gently push up the water fill tube where it belongs in the new part and replace the tubing clamp.
8. Turn your water on and make sure there are no leaks (I left my refrigerator out for about an hour).
9. Push your refrigerator back in place.
2. Use pliers to remove tubing clamp.
3. Remove old water fill tube.
4. I used a putty knife to gently pry out the old fill tube from the back of the refrigerator. Once the fill tube pulls out about 1/4 to 1/2", then you can gently pull the remainder of the tube out by hand. Once I removed my "old" fill tube, that is when I saw the "ice plug" that was causing pressure in the water supply line and caused my water line to pop off.
5. Install new fill tube. The end that goes in first needs to go through a small "ring" inside the freezer (this "ring" is not encountered until the fill tube only has about one more inch to be inserted into the back of the refigerator. I could barely see this "ring" if I opened the freezer drawer and stuck my head in as far as I could. I had to gently rotate the new fill tube until it cleared the "ring". You will feel some resistance until it lines up properly.
6. Snugly push in the part that stays on the outside of the refrigerator until it looks like it is sealed.
7. Gently push up the water fill tube where it belongs in the new part and replace the tubing clamp.
8. Turn your water on and make sure there are no leaks (I left my refrigerator out for about an hour).
9. Push your refrigerator back in place.
Parts Used:
-
Michael from TAKOMA PARK, MD
-
Difficulty Level:Easy
-
Total Repair Time:30 - 60 mins
-
Tools:Nutdriver, Pliers
5 of 7 people
found this instruction helpful.
Was this instruction helpful to you?
Thank you for voting!
The freezer door wouldn't stay closed
Replaced the rail and slide baskets. Also readjusted the basket. This was extremely easy and saved me close to $500
Parts Used:

-
Nicole from BUFFALO, NY
-
Difficulty Level:Really Easy
-
Total Repair Time:30 - 60 mins
-
Tools:Screw drivers
7 of 13 people
found this instruction helpful.
Was this instruction helpful to you?
Thank you for voting!
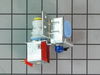
Ice maker quit working. Was not getting water.
Took cardboard cover off rear of refrigerator, five screws. Turned water off and unplugged fridge. Took out two screws holding inlet valve, pulled off quick release power wires and changed out water supplies in and out. Rebooked power and replaces cardboard cover. With power and water back on, ice maker was supplied with water.
Parts Used:
-
Thomas from ZEPHYRHILLS, FL
-
Difficulty Level:Really Easy
-
Total Repair Time:30 - 60 mins
-
Tools:Nutdriver, Screw drivers, Wrench (Adjustable)
4 of 4 people
found this instruction helpful.
Was this instruction helpful to you?
Thank you for voting!
Refrigerator light would not stay on
Removed the 2 screws holding the light bulb shield, then the 4 uolding the metal panel. Unplugged the olw door switch and replaced.
reassembled the pieces.
reassembled the pieces.
Parts Used:

-
Dave from Manchester Center, VT
-
Difficulty Level:Easy
-
Total Repair Time:15 - 30 mins
-
Tools:Nutdriver, Socket set
4 of 4 people
found this instruction helpful.
Was this instruction helpful to you?
Thank you for voting!
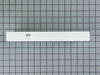
Center crisper rail breaking off.
After the original center crisper drawer slide rail broke and and second also looking in deep into your parts catalog I discovered that the refrigerator never came with a crisper frame brace from the store or factory.
Thanks to you , I no longer have the use of the center rail breaking off for now everything is made out of cheaply make plastic by whirlpool.
Thanks to you , I no longer have the use of the center rail breaking off for now everything is made out of cheaply make plastic by whirlpool.
Parts Used:

-
John from CRESCO, PA
-
Difficulty Level:Really Easy
-
Total Repair Time:Less than 15 mins
4 of 5 people
found this instruction helpful.
Was this instruction helpful to you?
Thank you for voting!
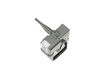
intermittent clicking noise; otherwise fridge seemed to be working fine
Googled "intermittent clicking noise" or something similar and consensus was it was either the capacitor or compressor start relay. You-tubed videos on how to replace these. Looked easy. Just unplug them from the condenser and replace. Contacted Part Select and staff said 50% of the the time it was the capacitor, 50% of the time it was the relay. I was in a time crunch so I ordered both and they came in a couple of days. I replaced the capacitor but the clicking noise continued. I replaced the relay and problem solved! Maybe I could have gotten away with just replacing the relay, but I had them both by then and figured with a 10 year old fridge, better replace them both at the same time and be done with the problem. So far, so good.
Parts Used:

-
Peter from EUGENE, OR
-
Difficulty Level:Really Easy
-
Total Repair Time:15 - 30 mins
-
Tools:Pliers
4 of 5 people
found this instruction helpful.
Was this instruction helpful to you?
Thank you for voting!
Broken light switch
Watched video. Unplugged refrigerator and popped out switch. In plugged connector and pushed switch in place. Plugged in refrigerator and the light worked
Parts Used:

-
Terry from WARMINSTER, PA
-
Difficulty Level:Really Easy
-
Total Repair Time:15 - 30 mins
-
Tools:Screw drivers
4 of 5 people
found this instruction helpful.
Was this instruction helpful to you?
Thank you for voting!
needed a Door Bin to replace the old one

-
Susan from BLOOMINGTON, IN
-
Difficulty Level:Easy
-
Total Repair Time:Less than 15 mins
6 of 11 people
found this instruction helpful.
Was this instruction helpful to you?
Thank you for voting!
the rail to hold the crisper drawers broke
I first removed the bottom shelf. Then I popped the rail in. It was pretty easy although I did have to use some force to fit it in. Ordering the part and doing it myself was a lot cheaper than calling the repair man.
Parts Used:
-
Christina from Orange, CT
-
Difficulty Level:Really Easy
-
Total Repair Time:Less than 15 mins
4 of 5 people
found this instruction helpful.
Was this instruction helpful to you?
Thank you for voting!
Water overflowing ice maker
Removed the 3 screws that hold the ice maker in place and remove the cover and level wire. Put the cover and wire on new part and install the 3 screws. Had ice within 1 hour. A very easy job for the do it yourselfer. Suspect the heat coil that melts the cubes was not working in the old unit and cubes stayed in the tray.
Parts Used:
-
James from Denver, NC
-
Difficulty Level:Really Easy
-
Total Repair Time:Less than 15 mins
-
Tools:Nutdriver
5 of 8 people
found this instruction helpful.
Was this instruction helpful to you?
Thank you for voting!
leaking ice maker,big chunks ot ice were forming and had to remove them 2-3 times a day
removed old ice maker by taking out a couple of screws in the back of freezer,when new ice maker arrived i saw that it didn't have the same hose apparatus as old one so I easily took apart old one then took apart new one and switched them out-very-- easily done for a 61 yr old lady I might add-- also had to reinstall ice maker arm off old ice maker as new one does not come with one Then installed new ice maker in freezer I am very very pleased,sure saved a lot of money doing it my self
Parts Used:
-
Linda from Johnson City, NY
-
Difficulty Level:Really Easy
-
Total Repair Time:30 - 60 mins
-
Tools:Screw drivers
4 of 5 people
found this instruction helpful.
Was this instruction helpful to you?
Thank you for voting!
Refrigerator section wasn't getting cold.
Took out the drawer and upper rack out of freezer removed back wall from freezer took out fan motor housing and replaced motor and thermostat. Works like new now.
Parts Used:

-
Edward from Muncie, IN
-
Difficulty Level:A Bit Difficult
-
Total Repair Time:30 - 60 mins
7 of 14 people
found this instruction helpful.
Was this instruction helpful to you?
Thank you for voting!