




















G32526PEKB4 Maytag Refrigerator - Instructions
Keep searches simple. Use keywords, e.g. "leaking", "pump", "broken" or "fit".
Replacing leaking freezer door gasket
When the gasket is delivered it will be folded. You will need to unfold it and leave it on a flat surface for several days. Keep it as square as possible, and heat the kinked portions with a hair dryer on high heat and slow fan while molding kinked portions with your hands for 30 to 60 seconds at a time. Do that 2-3 times per day. When it looks 90% uniform with the non kinked portions, you can install it. Installation takes less than 10 minutes. Clean the metal edge of the freezer well. I recommend taking the door annd frame off (This is remarkably easy. THe door and frame pretty much lifts up and out after you hold the rail clips inward) because the lower edge is so close to the floor. The just pulll off the old gasket. There are no screws or clips. Starting in any corner, press new gasket into place. Go around the perimeter several times to make sure it is pushed in fully and evenly. Then reinstall the door and frame.
Parts Used:

-
Joseph from OCEAN SPRINGS, MS
-
Difficulty Level:Easy
-
Total Repair Time:30 - 60 mins
3 of 3 people
found this instruction helpful.
Was this instruction helpful to you?
Thank you for voting!
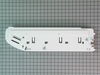
Pin for drawer lid broke off
Empty drawer and take out . remove glass shelf and front and rear shelf braces. remove 2 screws holding pantry end cap to fridge. remove rear bracket by unsnapping clips. remove temp control arm. and reattach to new end cap. reinstall rear bracket to fridge and align end cap, align screws and tighten. reinstall drawers and shelf brackets. replace glass shelf. and reattach lid to brackets. Open beer and enjoy success.
Parts Used:
-
John from WATERBURY, CT
-
Difficulty Level:Easy
-
Total Repair Time:30 - 60 mins
-
Tools:Nutdriver
3 of 3 people
found this instruction helpful.
Was this instruction helpful to you?
Thank you for voting!
lights wouldn't come on/work in refrigerator
Referencing the info/schematics you have on your website, I unscrewed/unattached top-front panel (carefully), from behind the panel you have to detach the wires (2) from the switch, pushed "in" the switch to remove, put in new switch and attach wires to test BEFORE remounting panel. Tada!! Thank you PartSelect! You saved me at least $80...would have been at least $100 to have a repair person come to the house!
Parts Used:

-
Jane from Albuquerque, NM
-
Difficulty Level:Easy
-
Total Repair Time:15 - 30 mins
-
Tools:Pliers, Screw drivers, Socket set
4 of 6 people
found this instruction helpful.
Was this instruction helpful to you?
Thank you for voting!
clips to pantry drawer lid had been broken off
First I removed the pantry drawer; then the two crisper drawers and glass shelf. Then I removed the hex screws that held end cap in place. Removal of cap from refrigerator was complicated by the adjustable temperature control - it is loosely attached at the back of end cap and also has to be removed to get cap out. Gentle persuasion accomplishes this. Getting the slider off end cap also a bit difficult. Then I removed the drawer glides. Reversing all steps was fairly easy and the rest of the "fix" went well. I wished that there had been some written directions - or at the very least, a diagram of how all went together. All in all was still cheaper than repair person.
Parts Used:
-
Linda from West Harwich, MA
-
Difficulty Level:A Bit Difficult
-
Total Repair Time:15 - 30 mins
-
Tools:Nutdriver
3 of 3 people
found this instruction helpful.
Was this instruction helpful to you?
Thank you for voting!
Broken clips on old part
-
Rose from OCOEE, FL
-
Difficulty Level:Really Easy
-
Total Repair Time:Less than 15 mins
3 of 3 people
found this instruction helpful.
Was this instruction helpful to you?
Thank you for voting!
Raplaced switch
Repair went well,took about five to ten minutes to disconnect the power from the fridge removed the defective switch installed the new one ,reconnected the power,,,and Let there be light and there was light!
Parts Used:
-
Winston A from Brooklyn, NY
-
Difficulty Level:Really Easy
-
Total Repair Time:Less than 15 mins
-
Tools:Pliers
5 of 9 people
found this instruction helpful.
Was this instruction helpful to you?
Thank you for voting!
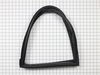
Right door seal was torn at top of door
I followed the remove and replace instructions in the Part Sect video when I ordered the seal. Pulled out the old seal by hand and installed the new seal. No tools needed, very easy. Took 10 minutes at most.
Parts Used:
-
Richard from MIDDLETOWN, MD
-
Difficulty Level:Really Easy
-
Total Repair Time:Less than 15 mins
3 of 3 people
found this instruction helpful.
Was this instruction helpful to you?
Thank you for voting!
Center rail broke.
Removed the top glass above the vegetable drawers and slipped the center rail in place. And I would like to add that I would do business with this site again!
Parts Used:

-
Frank I. from FREMONT, CA
-
Difficulty Level:Very Easy
-
Total Repair Time:Less than 15 mins
3 of 3 people
found this instruction helpful.
Was this instruction helpful to you?
Thank you for voting!
Tab off of veggie drawer broke off
ordered part -- great delivery-- 3 days--- removed damaged bracket and replaced with new --- very easy to order correct part per web pg thanks
Parts Used:
-
ALBERT from BERLIN, VT
-
Difficulty Level:Very Easy
-
Total Repair Time:Less than 15 mins
-
Tools:Nutdriver
3 of 3 people
found this instruction helpful.
Was this instruction helpful to you?
Thank you for voting!
Broken Glass crisper top

-
Robert from Southwick, MA
-
Difficulty Level:Really Easy
-
Total Repair Time:Less than 15 mins
4 of 6 people
found this instruction helpful.
Was this instruction helpful to you?
Thank you for voting!
Plastic food door hinge broke
Removed the food bins and lower shelf. Unscrewed the end cap. Removed the drawer hinge. Re-installed hing on new end cap. Installed the new end cap. Re-installed drawers and shelf. DONE!
Great graphics on the website helped to correctly idenitfy the required part. Part arrived quickly and well packed. One of the easiest transactions ever!
Great graphics on the website helped to correctly idenitfy the required part. Part arrived quickly and well packed. One of the easiest transactions ever!
Parts Used:
-
Michael from Nesconset, NY
-
Difficulty Level:Really Easy
-
Total Repair Time:Less than 15 mins
-
Tools:Nutdriver, Screw drivers
3 of 4 people
found this instruction helpful.
Was this instruction helpful to you?
Thank you for voting!
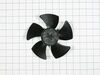
I had a loose fitting old condensor fan blade on my new motor.
I made a temporary repair by drilling the old blade plastic hub and put a small screw in it to hold it on to the shaft until the new blade arrived. The new blade came in within the two days I needed before Thanksgiving. I removed the old and pushed on the new. There were 8 screws on the back guard and two to hold the motor on. It was a snap.
Thank you PartSelect.com The wife is very, very happy now, we had 51 coming over for Thanksgiving. :)
Thank you PartSelect.com The wife is very, very happy now, we had 51 coming over for Thanksgiving. :)
Parts Used:
-
Roger from SMITHFIELD, RI
-
Difficulty Level:Very Easy
-
Total Repair Time:Less than 15 mins
-
Tools:Nutdriver
3 of 4 people
found this instruction helpful.
Was this instruction helpful to you?
Thank you for voting!
Boyfriends freezer door wouldn’t shut completely
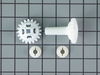
I got really tired of taking food out covered in icicles and stabbing a huge block of ice out of the bottom. Turns out all he needed was a little wheel with cogs and I looked up the sticker model number on this site and clicked the part of the fridge. So simple, wish I would’ve done it sooner.
Parts Used:
-
Megan from NORFOLK, VA
-
Difficulty Level:Really Easy
-
Total Repair Time:Less than 15 mins
3 of 4 people
found this instruction helpful.
Was this instruction helpful to you?
Thank you for voting!
Light switch wasn't working.. As I would close the door I would notice our frig light wasn't going off...
I simply removed the old switch by gently pulling down on the old switch with a screwdriver. When it was about half way out I just gently pulled down on the old switch and it popped out... I removed the two connectors attached to the old switch by pulling on the connectors with a pliers...I tried using my fingers but wasn't able to pull the connectors off so I used pliers. It worked perfectly.. When pulling off the old connectors, make sure you attach the new switch to the same tabs on the new switch... It was very easy to do and took under 5 mins.....The light switch works perfect....P.S. You should unplug the frig while making the connection just in case....Safety first....!!!
Parts Used:
-
David from Hemet, CA
-
Difficulty Level:Really Easy
-
Total Repair Time:Less than 15 mins
-
Tools:Pliers, Screw drivers
3 of 4 people
found this instruction helpful.
Was this instruction helpful to you?
Thank you for voting!
defective light switch
inserted a knife between the switch and the plastic interior in order to pop the switch out.
then took off the 2 wires on the old switch put them on the new switch and reinserted the switch into the plastic interior.
then took off the 2 wires on the old switch put them on the new switch and reinserted the switch into the plastic interior.
Parts Used:
-
THOMAS from WILLARD, OH
-
Difficulty Level:Really Easy
-
Total Repair Time:Less than 15 mins
3 of 4 people
found this instruction helpful.
Was this instruction helpful to you?
Thank you for voting!