




















G32526PEKB3 Maytag Refrigerator - Instructions
Keep searches simple. Use keywords, e.g. "leaking", "pump", "broken" or "fit".
defective light switch
inserted a knife between the switch and the plastic interior in order to pop the switch out.
then took off the 2 wires on the old switch put them on the new switch and reinserted the switch into the plastic interior.
then took off the 2 wires on the old switch put them on the new switch and reinserted the switch into the plastic interior.
Parts Used:

-
THOMAS from WILLARD, OH
-
Difficulty Level:Really Easy
-
Total Repair Time:Less than 15 mins
3 of 4 people
found this instruction helpful.
Was this instruction helpful to you?
Thank you for voting!
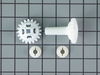
Boyfriends freezer door wouldn’t shut completely
I got really tired of taking food out covered in icicles and stabbing a huge block of ice out of the bottom. Turns out all he needed was a little wheel with cogs and I looked up the sticker model number on this site and clicked the part of the fridge. So simple, wish I would’ve done it sooner.
Parts Used:
-
Megan from NORFOLK, VA
-
Difficulty Level:Really Easy
-
Total Repair Time:Less than 15 mins
3 of 4 people
found this instruction helpful.
Was this instruction helpful to you?
Thank you for voting!
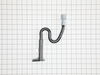
Water not draining to pan. It caused an ice build up under the freezer draw
Remove the grate at the back of the refrigerator. Remove the existing drawn tube. Replace the exiting drain tube with the updated drain tube. Check to see if water was draining properly. Replace the grate. Sit back and have a beer.
Parts Used:
-
Rich from WINSTED, CT
-
Difficulty Level:Very Easy
-
Total Repair Time:Less than 15 mins
-
Tools:Nutdriver, Pliers, Screw drivers
3 of 4 people
found this instruction helpful.
Was this instruction helpful to you?
Thank you for voting!
One of the light bulbs went out on my Whirlpool refrigerator.
I changed the bulb but it still didn’t work. I ordered a bulb holder and replaced it and it works properly now. It was an easy repair, remove the bulb, gently pry the bulb holder out with a screwdriver and snap the new one in.
It was useful that under the description of the part in the catalog, it showed that this part was often used to repair this issue. The service was great and the delivery was fast.
It was useful that under the description of the part in the catalog, it showed that this part was often used to repair this issue. The service was great and the delivery was fast.
Parts Used:
-
Brian from LAKE CHARLES, LA
-
Difficulty Level:Very Easy
-
Total Repair Time:Less than 15 mins
-
Tools:Screw drivers
3 of 4 people
found this instruction helpful.
Was this instruction helpful to you?
Thank you for voting!
Crisper pan cracked
You remove the white frame from around the old pan by popping it off from the bottom being careful not to break it. Install it on the new pan using the reverse procedures. Popping it on starting at the bottom. Very easy
Parts Used:

-
Patrick from KELSO, WA
-
Difficulty Level:Very Easy
-
Total Repair Time:Less than 15 mins
3 of 4 people
found this instruction helpful.
Was this instruction helpful to you?
Thank you for voting!
Refrigerator light would not stay on. Water dispenser would not dispense unless the refrigerator light was on.
My non mechanical husband used a flat edged screwdriver to pry out the broken switch. Then it was a matter of reconnecting to small wires and popping the switch back in place....voila, life has been great ever since. ;)
Parts Used:
-
INEZ from RIALTO, CA
-
Difficulty Level:Really Easy
-
Total Repair Time:15 - 30 mins
-
Tools:Screw drivers
3 of 4 people
found this instruction helpful.
Was this instruction helpful to you?
Thank you for voting!
changed the light bulb still would not work so I figured it was the switch sure enough.
I took a chance and ordered a switch that is next to the top of the door. looked for how to remove it easily done in ten minutes works fine last long time.
Parts Used:
-
anthony from HAVELOCK, NC
-
Difficulty Level:Really Easy
-
Total Repair Time:15 - 30 mins
3 of 4 people
found this instruction helpful.
Was this instruction helpful to you?
Thank you for voting!
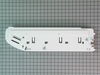
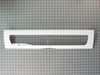
broken nipple/hungry kids
Took bottom 2 shelves out. 2 screws held assembly in to main cabin. Remove them then 2 additional screws held drawer bracket in place. Easy yet patience and finesse is needed
Parts Used:
-
Michael from potomac, MD
-
Difficulty Level:Easy
-
Total Repair Time:30 - 60 mins
-
Tools:Socket set
3 of 4 people
found this instruction helpful.
Was this instruction helpful to you?
Thank you for voting!
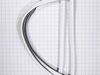
Folded in shipping box
Had to use heat, somebody said to put in dryer before installation
Parts Used:
-
Robert from BOKEELIA, FL
-
Difficulty Level:Easy
-
Total Repair Time:30 - 60 mins
-
Tools:Socket set
2 of 2 people
found this instruction helpful.
Was this instruction helpful to you?
Thank you for voting!
Frost on the top edge of the freezer drawer
Put the gasket in the dryer for 15 minutes to warm it up. It fit much better after it was warm.
Parts Used:

-
Lee Ann from College Station, TX
-
Difficulty Level:Really Easy
-
Total Repair Time:30 - 60 mins
2 of 2 people
found this instruction helpful.
Was this instruction helpful to you?
Thank you for voting!
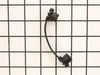
ICE BUILD UP AT BOTTOM OF FREEZER
-
Gerald from COLORADO SPGS, CO
-
Difficulty Level:Really Easy
-
Total Repair Time:30 - 60 mins
3 of 5 people
found this instruction helpful.
Was this instruction helpful to you?
Thank you for voting!
Door on the pullout lower "Pantry" had cracked
Part was pretty ubiquitous so plastic door pins part fits a lot of refrigs, no tools necessary, new part is flexible enough to bend slightly to fit over pins at side. Mine was a bottom freezer type.
Parts Used:
-
Donald from RICHMOND, IN
-
Difficulty Level:Really Easy
-
Total Repair Time:30 - 60 mins
2 of 2 people
found this instruction helpful.
Was this instruction helpful to you?
Thank you for voting!
Plastic hinge pin broken on original endcap
Really easy - Remove drawers, remove glass shelf and associated support rails, remove drawer slide from old endcap, remove old endcap, reverse proceedure installing new endcap - now the hard part, have a cool softdrink while you carry the old endcap and packing material from the new one out to the trash.
By the way - the part got here really fast - thanks for the great service.
By the way - the part got here really fast - thanks for the great service.
Parts Used:
-
ROBERT from Lufkin, TX
-
Difficulty Level:Really Easy
-
Total Repair Time:30 - 60 mins
-
Tools:Nutdriver, Screw drivers
2 of 2 people
found this instruction helpful.
Was this instruction helpful to you?
Thank you for voting!
broken end cap
took out the drawers and glass shelf and unscrewed the sides took parts for drawer glide off put them on the new part reinstallled saved $110 service cll and $20 on the part!
Parts Used:
-
chris from las vegas, NV
-
Difficulty Level:Easy
-
Total Repair Time:15 - 30 mins
-
Tools:Nutdriver, Screw drivers
3 of 5 people
found this instruction helpful.
Was this instruction helpful to you?
Thank you for voting!
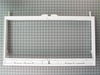
Too much weight on shelf over time caused it to crack down middle
Removing the old pieces & figuring out how to separate the front trim so it could be reinstalled on the new frame took the longest! (released the securing tabs with a screw driver). Reinstalling the new parts were straight forward, "no problem". (epg)
Parts Used:

-
EMILE from RACELAND, LA
-
Difficulty Level:Easy
-
Total Repair Time:15 - 30 mins
-
Tools:Screw drivers
2 of 2 people
found this instruction helpful.
Was this instruction helpful to you?
Thank you for voting!