




















FGX831FS3 Frigidaire Washer Dryer Combo - Instructions
Keep searches simple. Use keywords, e.g. "leaking", "pump", "broken" or "fit".
washer went into spin mode but would not spin
I removed the front panel to see the belt was snapped in two. The front roller is sping loaded, so I gave it a little tention, slid the belt back on and viola! it was that easy. If your washer starts to vibrate more and sounds louder than normal, get a belt as soon as possible because that may be the problem. Once I put on the new belt, the machine ran as quiet as it did when I first bought it.
Parts Used:

-
Damon from Hinesville, GA
-
Difficulty Level:Really Easy
-
Total Repair Time:Less than 15 mins
-
Tools:Screw drivers
9 of 12 people
found this instruction helpful.
Was this instruction helpful to you?
Thank you for voting!
Dryer runs but produces no heat
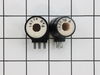
Unplug the unit. The top of the dryer is held down by 2 simple friction pins. By lifting the dryer top above it's front door panel the top will swing up. Prop the top up so you can reach down the front panel. There are 2 Phillips screws about 6 inches down on the dryers front panel. Remove the 2 screws, tip the front panel toward you it will slip off the dryer drum. Remove the 2 push on wires attached to the door switch. Gently lift the front panel off the 2 hinge points at the bottom and set it aside. The parts that your going to replace are the 2 solenoids on the burner assembly. The burner assembly is located on the lower left side of the dryer. Remove the 2 Philips screws that "clamp" the solenoids in place. Pull the 3 & 2 wire friction connectors off the solenoids. Lift the clamp off the top of the solenoids. Pick the 2 solenoids up off the valve assemble. Put the 2 new solenoids on the valve assembly push the wires back on, put the clamp back on and resemble the dryer. *Note: just to make a quick check on the continuity of the solenoids. I suspended the dryer drum so it could rotate without damaging it, put my clamp on amp probe on the 120v line to the solenoids the 3 wire one was good the 2 wire one was open.
Parts Used:
-
Richard from Appleton, ME
-
Difficulty Level:Really Easy
-
Total Repair Time:Less than 15 mins
-
Tools:Screw drivers
8 of 9 people
found this instruction helpful.
Was this instruction helpful to you?
Thank you for voting!
water continually leaking into tub when not in use
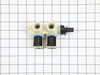
Repair was harder than originally anticipated. Front had to be taken off, but trying to get all panels back in place was quite a job
Parts Used:
-
D from Baytown, TX
-
Difficulty Level:Difficult
-
Total Repair Time:1- 2 hours
-
Tools:Pliers, Screw drivers
8 of 9 people
found this instruction helpful.
Was this instruction helpful to you?
Thank you for voting!
Takes multiple cycles to dry clothes
I don't think it would take others as long as it took me.
I had to take the drum out to get to the limiter. And my dryer is in a builtin housing with limited space in front of the dryer - so lots of manuevers to get access.
The limiter was very easy to find, thanks to diagrams on this site. The space between drum and limiter made it impossible to get to the limiter screws without removing drum. Found very helpful drum removal instructions on PartSelect here:
http://www.partselect.com/PS1148434-Frigidaire-134503600-Dryer-Drum-Belt.htm?SourceCode=13&ModelNum=FSE748GFS0
Great site - thank you.
I had to take the drum out to get to the limiter. And my dryer is in a builtin housing with limited space in front of the dryer - so lots of manuevers to get access.
The limiter was very easy to find, thanks to diagrams on this site. The space between drum and limiter made it impossible to get to the limiter screws without removing drum. Found very helpful drum removal instructions on PartSelect here:
http://www.partselect.com/PS1148434-Frigidaire-134503600-Dryer-Drum-Belt.htm?SourceCode=13&ModelNum=FSE748GFS0
Great site - thank you.
Parts Used:

-
Pamela from Portland, OR
-
Difficulty Level:Difficult
-
Total Repair Time:1- 2 hours
-
Tools:Pliers, Screw drivers
8 of 10 people
found this instruction helpful.
Was this instruction helpful to you?
Thank you for voting!
timer wouldnt clock it would just keep washing & washing
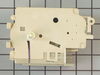
I removed the screws holding the access cover in place than the screws in the plastic ends than the screws at the bottom edge of the control panel pulled the button on the back of the timer removed the handles than one screw under the handle area to remove the timer it was easy
Parts Used:
-
Chuck from Centralia, IL
-
Difficulty Level:Really Easy
-
Total Repair Time:Less than 15 mins
-
Tools:Screw drivers
7 of 8 people
found this instruction helpful.
Was this instruction helpful to you?
Thank you for voting!
Timer made noise but would not move
A bit iintimidating in trying to get the knob off the timer without breaking it. finally discovered the plastic tip that went straight thru to the back, pulleed it out and walla walla the knob came off easily. Getting to the timer was a bit interesting, was not sure how far I had to tear down the washer/dryer combo front. Once I got to the part it was easy to do. I have three of these machines, two in my daughter's houses so now am dconfident i can repair if needed. Got the wrong part at first and had tosend back for the right on, got the timer for the dryer first. Expensive parts.....
Parts Used:
-
calvin from tomball, TX
-
Difficulty Level:A Bit Difficult
-
Total Repair Time:30 - 60 mins
-
Tools:Pliers, Screw drivers
7 of 8 people
found this instruction helpful.
Was this instruction helpful to you?
Thank you for voting!
drum glides worn out making thumping noise.
watched video on replacing rear bearing.although rear bearing was not the part(s) i needed to replace, video instructed disassembly procedures to get to the drum glides. this was a very simple and easy to follow video. repair was a breezeand took roughly 25 minutes. the most time consuming segement of repair was vaccuuming out lint,that was 15 minutes. In future, as a preventative, i plan to remove front of machine to clean annually.
Thank you.
Thank you.
Parts Used:

-
david from edinboro, PA
-
Difficulty Level:Really Easy
-
Total Repair Time:15 - 30 mins
-
Tools:Screw drivers
7 of 8 people
found this instruction helpful.
Was this instruction helpful to you?
Thank you for voting!
dryer stopped in middle of cycle and wouldn't restart
followed video and replaced part( cleaned and vacuumed dryer while I had it apart),relatively easy repair
Parts Used:
-
Michael from HUDSON, NY
-
Difficulty Level:Easy
-
Total Repair Time:30 - 60 mins
-
Tools:Pliers, Screw drivers
6 of 6 people
found this instruction helpful.
Was this instruction helpful to you?
Thank you for voting!
Washer wouldn't spin
I used a screwdriver to remove the front of the washing machine, fit the belt around the main pulley, held in the spring loaded tension pulley, and threaded the belt aound. It works great! I really need this inexpensive repair, since my job was downsized, and I can't afford to pay anyone.
Parts Used:
-
Phillip from Huntersville, NC
-
Difficulty Level:Easy
-
Total Repair Time:Less than 15 mins
-
Tools:Screw drivers
6 of 6 people
found this instruction helpful.
Was this instruction helpful to you?
Thank you for voting!
dryer door part broke
Dryer door would not close, part had broke and fallen in. Once part was received it took less than an minute to put the new one in and I was back in business.
thanks for making it easy to find the part needed. and the delivery was fast!
bonnie J.
thanks for making it easy to find the part needed. and the delivery was fast!
bonnie J.
Parts Used:

-
Bonnie from Saint Augustine, FL
-
Difficulty Level:Really Easy
-
Total Repair Time:Less than 15 mins
7 of 9 people
found this instruction helpful.
Was this instruction helpful to you?
Thank you for voting!
Convert from Nat Gas to LP Gas
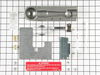
I followed the written instructions that came with the kit. They were relatively straight forward. Had problems getting the burner unit out.
Had to disconnect from 4" tube and disconnect all wiring.
Kit came with parts not needed.
Only needed to replace orfice and regulator control.
Tight area to work in.
Had to disconnect from 4" tube and disconnect all wiring.
Kit came with parts not needed.
Only needed to replace orfice and regulator control.
Tight area to work in.
Parts Used:
-
Tom from Chuluota, FL
-
Difficulty Level:A Bit Difficult
-
Total Repair Time:1- 2 hours
-
Tools:Nutdriver, Screw drivers, Wrench (Adjustable), Wrench set
14 of 30 people
found this instruction helpful.
Was this instruction helpful to you?
Thank you for voting!
Terminal block, and wires were dammaged/melted
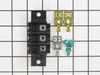
Used nut driver to remove screw and cover from dryer cord terminal block, used screw driver to remove two screws securing old terminal block, cut dammaged wire and stripped wire back and crimped on new terminal connecter, replaced old terminal block with new one, replaced two screws, installed new cord, and replaced cover plate and screw.
Parts Used:
-
Edwin from Eagar, AZ
-
Difficulty Level:Really Easy
-
Total Repair Time:30 - 60 mins
-
Tools:Nutdriver, Pliers, Screw drivers
7 of 9 people
found this instruction helpful.
Was this instruction helpful to you?
Thank you for voting!
Thumping Noise, Clothes Getting Stuck
Unplug, lift top, unplug 5 wires, remove 2 screws, pull dryer front away while supporting drum. Remove old glides, snap in new. Reverse disassembly procedure
Parts Used:
-
LT Frank from Wacissa, FL
-
Difficulty Level:Easy
-
Total Repair Time:30 - 60 mins
-
Tools:Screw drivers
6 of 6 people
found this instruction helpful.
Was this instruction helpful to you?
Thank you for voting!
drum wouldn't turn
I removed the front access panel above the washer and removed the top dryer front panel. Then pulled out the drum and noticed the drum support ball stud had broken off, rather than order a new one, I welded it back on with a mig welder. I then replaced the drum support bearing and reinstalled the drum. I then installed the new belt before placing the front top panel in place. I removed the small vented panel on the back side to access the belt tensioner and fit the belt around the pulley and motor shaft. The whole job took less than an hour.
Parts Used:

-
Keith from Midwest City, OK
-
Difficulty Level:Easy
-
Total Repair Time:30 - 60 mins
-
Tools:Screw drivers
6 of 7 people
found this instruction helpful.
Was this instruction helpful to you?
Thank you for voting!
Filter Needed Replacing

-
Joe from Reston, VA
-
Difficulty Level:Really Easy
-
Total Repair Time:Less than 15 mins
7 of 10 people
found this instruction helpful.
Was this instruction helpful to you?
Thank you for voting!