




















FFHS2311LWNA Frigidaire Refrigerator - Instructions
Keep searches simple. Use keywords, e.g. "leaking", "pump", "broken" or "fit".
no big deal
-
Shelia from Odessa, TX
-
Difficulty Level:Really Easy
-
Total Repair Time:Less than 15 mins
48 of 63 people
found this instruction helpful.
Was this instruction helpful to you?
Thank you for voting!
The 2 year old used the 2 bottom trays as a step stool
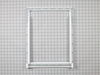
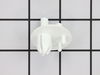
Repair was pretty straight forward. The Plastic around the glass cover of the crisper pan all broke where the stud holds it up. Replaced both of the plastic covers.
The broken support stud was a bit of a pain, you have to use a long nose pliers to try and pull the middle stud that locks everything in place. Forcing the entire support stud out will crack the plastic body of the fridge, so you have to truly find a way to get that middle stud out first to lose the clamps. Look at the new one you have and figure out how it works to give you an idea of how you can pull out the broken one.
All in all, was a pretty simple install. More annoying as you have a small space to work in.
The broken support stud was a bit of a pain, you have to use a long nose pliers to try and pull the middle stud that locks everything in place. Forcing the entire support stud out will crack the plastic body of the fridge, so you have to truly find a way to get that middle stud out first to lose the clamps. Look at the new one you have and figure out how it works to give you an idea of how you can pull out the broken one.
All in all, was a pretty simple install. More annoying as you have a small space to work in.
Parts Used:
-
Richard from Goodyear, AZ
-
Difficulty Level:Really Easy
-
Total Repair Time:Less than 15 mins
43 of 52 people
found this instruction helpful.
Was this instruction helpful to you?
Thank you for voting!
Ice Maker stopped working
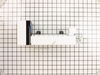
Reviewed the video on your website and followed the directions to the letter. Great video
Parts Used:
-
Dennis from DEER LODGE, MT
-
Difficulty Level:Really Easy
-
Total Repair Time:15 - 30 mins
-
Tools:Nutdriver
39 of 47 people
found this instruction helpful.
Was this instruction helpful to you?
Thank you for voting!
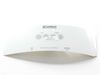
Cracked Label Module Cover
At first I thought I was going to have to undo a bunch of screws and stuff come to find out when I got the part in the mail all it ended up being is just like a giant sticker. So I just had to peel off the old one and line up and stick on the new one. Really simple. So if your button display on your the door of where your ice maker is where is says crushed / cubed or light on / off is cracked in anyway this is the place to get your part and saves you money on labor charges and the fee for an estimate. I would have had to pay 60. 00 To have someone come out and then money for the part then plus labor which would be approximately 150. 00 And all I paid was 46. 00 , Outstanding !!!!
Parts Used:
-
ADOLPH from LAKEWOOD, CA
-
Difficulty Level:Really Easy
-
Total Repair Time:Less than 15 mins
33 of 35 people
found this instruction helpful.
Was this instruction helpful to you?
Thank you for voting!
Water coming out of the ice maker when dispensing water from the door.
This issue was noted in the advice area as being a filter, or valve assembly. But it turned out to be a diode kit that was causing this issue. I don't know why I could not find this issue anywhere on line? When I received the diode kit there was instructions that noted exactly the problem I was having.
The fix was easy just a few wires cut and spliced and viola fixed.
The fix was easy just a few wires cut and spliced and viola fixed.
Parts Used:
-
kyle from Palo Alto, CA
-
Difficulty Level:Easy
-
Total Repair Time:15 - 30 mins
-
Tools:Nutdriver
40 of 56 people
found this instruction helpful.
Was this instruction helpful to you?
Thank you for voting!
ice maker would not rotate out cube or crushed ice.
1. Remove outer plastic face cover (4) screws.
2. Revove (1) U type nut keeper & (1) metal washer.
3. Remove (1) plastic nut on end of metal auger.
4. Remove inner plastic cover (4) screws and disconnect control rod. (Note postion of control rod befor disconnecting)
5. Note position and order of metal blades and plastic spacers on auger before siding off the end of auger to reposition them upon re-assembly.
6. Remove metal support panel from end of ice bucket (4) screws.
7. Remove auger & plastic cylinder from ice bucket.
8. Remove - slide drive blade off auger.
9. Drive blade replaced.
10. Re-assembled other items removed in reverse order
2. Revove (1) U type nut keeper & (1) metal washer.
3. Remove (1) plastic nut on end of metal auger.
4. Remove inner plastic cover (4) screws and disconnect control rod. (Note postion of control rod befor disconnecting)
5. Note position and order of metal blades and plastic spacers on auger before siding off the end of auger to reposition them upon re-assembly.
6. Remove metal support panel from end of ice bucket (4) screws.
7. Remove auger & plastic cylinder from ice bucket.
8. Remove - slide drive blade off auger.
9. Drive blade replaced.
10. Re-assembled other items removed in reverse order
Parts Used:
-
David from Ponca City, OK
-
Difficulty Level:Easy
-
Total Repair Time:30 - 60 mins
-
Tools:Nutdriver, Pliers, Screw drivers
40 of 62 people
found this instruction helpful.
Was this instruction helpful to you?
Thank you for voting!
Ice Crusher Broke. Plastic in Ice Tray
Removed 4 screws holding face plate onto ice bucket. Removed the 3 screws holding the ice crusher housing. Noted postion and rotation of teh s;ring loaded ice selecting rod. Removed broken crusher housing. Reveresed process for installion. Took for test drive. Operational...
Parts Used:
-
Ronald from Dickson, TN
-
Difficulty Level:Easy
-
Total Repair Time:15 - 30 mins
-
Tools:Screw drivers
36 of 54 people
found this instruction helpful.
Was this instruction helpful to you?
Thank you for voting!
Ice maker did not produce ice.
The repair was easy. The problem was the lack of explanation. This may help other customers. I was told by the virtual trouble shooting system that about 30% of the cure was to replace the water filter and 70% was to replace the water valve. I did both and still had the problem. People need to be told why they have to replace the water valve. The reason is this. The valve has a very small leak in it that lets water continue to flow into the freezer compartment drop by drop. Eventually, this freezes and clogs the hole , so no water can pass and thus no ice can be made.In either your web site or another they stated that it may freeze up here, but there was no connection to the water valve.It seemed like it was another topic. Its very hard to see the frozen area, unless you remove it from the freezer area. I wish I was TOLD TO DO THIS, after i replaced the valve It would have saved me a repair bill. I hope this helps others.
Take care-Bill
Take care-Bill
Parts Used:
-
william from new port richey, FL
-
Difficulty Level:Really Easy
-
Total Repair Time:15 - 30 mins
-
Tools:Nutdriver, Pliers
27 of 29 people
found this instruction helpful.
Was this instruction helpful to you?
Thank you for voting!
The in the door ice dispencer would not dispense ice since the auger wasn't working properly to push the ice through the door.
Pulled the old ice container assembly out and discarded it and inserted the new one. It immediately worked and now dispenses both crushed and cubed ice through the door.
Parts Used:
-
Thomas from Pineville, LA
-
Difficulty Level:Really Easy
-
Total Repair Time:Less than 15 mins
28 of 33 people
found this instruction helpful.
Was this instruction helpful to you?
Thank you for voting!
Water leak
Unplug turn water off
Removed two screws with nut driver loosen one
Disconnected three solenoid valves
Disconnected four water lines
Plug tubing in, tighten one flare fitting
Reattach wires to solenoids
Slide under loose screw, replace two screws
Turn water on check for leaks plug in get a drink of water
Removed two screws with nut driver loosen one
Disconnected three solenoid valves
Disconnected four water lines
Plug tubing in, tighten one flare fitting
Reattach wires to solenoids
Slide under loose screw, replace two screws
Turn water on check for leaks plug in get a drink of water
Parts Used:
-
Russell from Jacksonville, AR
-
Difficulty Level:Really Easy
-
Total Repair Time:15 - 30 mins
-
Tools:Nutdriver, Wrench set
28 of 38 people
found this instruction helpful.
Was this instruction helpful to you?
Thank you for voting!
Ice maker quit working
Loosen two screws, unclip electrical connection, remove ice maker, remove l shaped leveling piece of metal from old one, put on new one. Install in reverse order. Hint.. when loosening two screws, use a mirror
Parts Used:
-
Robert from SIOUX FALLS, SD
-
Difficulty Level:Really Easy
-
Total Repair Time:30 - 60 mins
-
Tools:Nutdriver
27 of 35 people
found this instruction helpful.
Was this instruction helpful to you?
Thank you for voting!
The ice chute door didn't close all the timed
The door has nylon gear teeth that wore out and needed replaced. The ice chute came off very easy with 6 screws. I used a punch and pliers to remove the hinge pin. Then the door came off and the new one put on. Very easy. The part was ordered on Sunday and arrived on Tuesday.
Parts Used:
-
Shelby from Clinton, IL
-
Difficulty Level:Easy
-
Total Repair Time:30 - 60 mins
-
Tools:Screw drivers
39 of 73 people
found this instruction helpful.
Was this instruction helpful to you?
Thank you for voting!
Fridge side warm.
Removed the nut screws holding on the controls on the fridge side. Swapped out the old damper control for the new. Just need to be sure to get the new assembly in the same way the old one came out -- including placement of the freezer sensor control (separate part from the assembly). Replaced the control unit and damper worked and now my fridge is the right temperature! One other item -- when diagnosing the problem with a warm fridge, most newer fridges have a self testing method via the digital temperature controls. Find your Service Data Sheet for instructions. This would have saved me time from using my multimeter testing various components.
Parts Used:
-
Lyman from LEXINGTON, KY
-
Difficulty Level:Really Easy
-
Total Repair Time:15 - 30 mins
-
Tools:Nutdriver
23 of 26 people
found this instruction helpful.
Was this instruction helpful to you?
Thank you for voting!
Husband Broke Water Dispenser Arm ;-)
Project requires removal of 9 phillips head screws. Also have some needle nose pliers and a paper clip and/ or skinny magnet handy for steps (7) and (9).
(1) Turn off power to refrigerator.
(2) Slide out water catch tray at bottom of dispenser unit.
(3) Remove the three screws that are now visible.
(4) Pull front water/ ice dispenser (cosmetic) panel off of the refrigerator and set aside.
(5) Remove the 3 screws affixing circuitry panel in place and set aside.
(6) Gently pull out the circuit panel and allow it to hang from the refrigerator door. Note: Unless you have very large hands you should not have to disconnect any wiring to do this repair.
(7) Remove the three screws and two plates holding the dispenser actuator in place, being careful not to drop the screws or plates into the unit. If they do drop you can get them out of the unit using the needle nose pliers and/ or a bent pointy piece of metal (e.g., paper clip).
(8) Remove broken dispenser arm.
(9) Insert new dispenser arm.
(10) Replace all screws and panels.
(11) Turn refrigerator power back on.
Note: The new dispenser arm has reinforcing bars molded into the back that were not on the original model. The company is apparently aware of the problem of the weak dispenser arm and fixed it in the replacement part... so, you should not have to be doing this repair again.
(1) Turn off power to refrigerator.
(2) Slide out water catch tray at bottom of dispenser unit.
(3) Remove the three screws that are now visible.
(4) Pull front water/ ice dispenser (cosmetic) panel off of the refrigerator and set aside.
(5) Remove the 3 screws affixing circuitry panel in place and set aside.
(6) Gently pull out the circuit panel and allow it to hang from the refrigerator door. Note: Unless you have very large hands you should not have to disconnect any wiring to do this repair.
(7) Remove the three screws and two plates holding the dispenser actuator in place, being careful not to drop the screws or plates into the unit. If they do drop you can get them out of the unit using the needle nose pliers and/ or a bent pointy piece of metal (e.g., paper clip).
(8) Remove broken dispenser arm.
(9) Insert new dispenser arm.
(10) Replace all screws and panels.
(11) Turn refrigerator power back on.
Note: The new dispenser arm has reinforcing bars molded into the back that were not on the original model. The company is apparently aware of the problem of the weak dispenser arm and fixed it in the replacement part... so, you should not have to be doing this repair again.
Parts Used:
-
Deanna from Cleveland Heights, OH
-
Difficulty Level:Really Easy
-
Total Repair Time:Less than 15 mins
-
Tools:Pliers, Screw drivers
22 of 23 people
found this instruction helpful.
Was this instruction helpful to you?
Thank you for voting!
Refrigerator light was out
Test the light socket first with a bulb that you know is good. If the light still does not come on, unplug the refrigerator, remove the switch by inserting a very small, thin, flathead screwdriver alongside it and pull the switch out slowly with your other hand. There are two wires there. Remove them gently with some needle nose pliers. If you want to test to see if the switch is defective, take a insulated jumper wire, and attach it between the two wires. Plug the refrigerator back in and see if the light comes on. If the light does come on, replace with a new switch by re-attaching the wires and placing it back in the hole firmly.
Parts Used:
-
andy from Peshastin, WA
-
Difficulty Level:Really Easy
-
Total Repair Time:Less than 15 mins
-
Tools:Pliers, Screw drivers
26 of 37 people
found this instruction helpful.
Was this instruction helpful to you?
Thank you for voting!