




















FEZ831AS1 Frigidaire Washer Dryer Combo - Instructions
Keep searches simple. Use keywords, e.g. "leaking", "pump", "broken" or "fit".
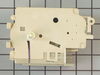
timer wouldnt clock it would just keep washing & washing
I removed the screws holding the access cover in place than the screws in the plastic ends than the screws at the bottom edge of the control panel pulled the button on the back of the timer removed the handles than one screw under the handle area to remove the timer it was easy
Parts Used:
-
Chuck from Centralia, IL
-
Difficulty Level:Really Easy
-
Total Repair Time:Less than 15 mins
-
Tools:Screw drivers
7 of 8 people
found this instruction helpful.
Was this instruction helpful to you?
Thank you for voting!
drum glides worn out making thumping noise.
watched video on replacing rear bearing.although rear bearing was not the part(s) i needed to replace, video instructed disassembly procedures to get to the drum glides. this was a very simple and easy to follow video. repair was a breezeand took roughly 25 minutes. the most time consuming segement of repair was vaccuuming out lint,that was 15 minutes. In future, as a preventative, i plan to remove front of machine to clean annually.
Thank you.
Thank you.
Parts Used:

-
david from edinboro, PA
-
Difficulty Level:Really Easy
-
Total Repair Time:15 - 30 mins
-
Tools:Screw drivers
7 of 8 people
found this instruction helpful.
Was this instruction helpful to you?
Thank you for voting!
Bearing Bracket Worn Out
Took off front panel, removed drum and replaced parts listed. A bit tricky to keep small parts in place. However, masking tape helped. Best of all was the online diagram of how the parts were assembled. In addition, taking step by step phone pixs aided in replacing parts since there was some down time between diagnosis and installation.
Parts Used:

-
David from Fairdale, KY
-
Difficulty Level:A Bit Difficult
-
Total Repair Time:30 - 60 mins
-
Tools:Nutdriver, Screw drivers
21 of 24 people
found this instruction helpful.
Was this instruction helpful to you?
Thank you for voting!
Timer made noise but would not move
A bit iintimidating in trying to get the knob off the timer without breaking it. finally discovered the plastic tip that went straight thru to the back, pulleed it out and walla walla the knob came off easily. Getting to the timer was a bit interesting, was not sure how far I had to tear down the washer/dryer combo front. Once I got to the part it was easy to do. I have three of these machines, two in my daughter's houses so now am dconfident i can repair if needed. Got the wrong part at first and had tosend back for the right on, got the timer for the dryer first. Expensive parts.....
Parts Used:
-
calvin from tomball, TX
-
Difficulty Level:A Bit Difficult
-
Total Repair Time:30 - 60 mins
-
Tools:Pliers, Screw drivers
7 of 8 people
found this instruction helpful.
Was this instruction helpful to you?
Thank you for voting!
Thumping Noise, Clothes Getting Stuck
Unplug, lift top, unplug 5 wires, remove 2 screws, pull dryer front away while supporting drum. Remove old glides, snap in new. Reverse disassembly procedure
Parts Used:
-
LT Frank from Wacissa, FL
-
Difficulty Level:Easy
-
Total Repair Time:30 - 60 mins
-
Tools:Screw drivers
6 of 6 people
found this instruction helpful.
Was this instruction helpful to you?
Thank you for voting!
dryer stopped in middle of cycle and wouldn't restart
followed video and replaced part( cleaned and vacuumed dryer while I had it apart),relatively easy repair
Parts Used:
-
Michael from HUDSON, NY
-
Difficulty Level:Easy
-
Total Repair Time:30 - 60 mins
-
Tools:Pliers, Screw drivers
6 of 6 people
found this instruction helpful.
Was this instruction helpful to you?
Thank you for voting!
Washer wouldn't spin
I used a screwdriver to remove the front of the washing machine, fit the belt around the main pulley, held in the spring loaded tension pulley, and threaded the belt aound. It works great! I really need this inexpensive repair, since my job was downsized, and I can't afford to pay anyone.
Parts Used:

-
Phillip from Huntersville, NC
-
Difficulty Level:Easy
-
Total Repair Time:Less than 15 mins
-
Tools:Screw drivers
6 of 6 people
found this instruction helpful.
Was this instruction helpful to you?
Thank you for voting!
dryer door part broke
Dryer door would not close, part had broke and fallen in. Once part was received it took less than an minute to put the new one in and I was back in business.
thanks for making it easy to find the part needed. and the delivery was fast!
bonnie J.
thanks for making it easy to find the part needed. and the delivery was fast!
bonnie J.
Parts Used:

-
Bonnie from Saint Augustine, FL
-
Difficulty Level:Really Easy
-
Total Repair Time:Less than 15 mins
7 of 9 people
found this instruction helpful.
Was this instruction helpful to you?
Thank you for voting!
Filter Needed Replacing

-
Joe from Reston, VA
-
Difficulty Level:Really Easy
-
Total Repair Time:Less than 15 mins
7 of 10 people
found this instruction helpful.
Was this instruction helpful to you?
Thank you for voting!
drum wouldn't turn
I removed the front access panel above the washer and removed the top dryer front panel. Then pulled out the drum and noticed the drum support ball stud had broken off, rather than order a new one, I welded it back on with a mig welder. I then replaced the drum support bearing and reinstalled the drum. I then installed the new belt before placing the front top panel in place. I removed the small vented panel on the back side to access the belt tensioner and fit the belt around the pulley and motor shaft. The whole job took less than an hour.
Parts Used:
-
Keith from Midwest City, OK
-
Difficulty Level:Easy
-
Total Repair Time:30 - 60 mins
-
Tools:Screw drivers
6 of 7 people
found this instruction helpful.
Was this instruction helpful to you?
Thank you for voting!
Screeching noise when drying
Rear plastic drum support bearing got worn making the shaft come in contact with the metal bearing bracket. That contact created a groove overtime and eventually snapped the shaft tip off.
Cut power off. Remove all the screws from the front panel. (where the controls are) working from the bottom to the top. Insert putty knife between the dryer and the control panel and push down to release. Carefully disconnect the wire harness.
You will find 2 screws at the bottom and 4 on top holding the dryer door. Remove and expose the drum.
Remove the drive belt
Remove the drum.
You need a 5/16 nut drive to remove the bearing bracket and an extra set of hands to hold the support from the back.
Re-install the parts. I used bearing grease to make it run smoother
Attach the new shaft to the drum and reinstall the drum (its best done with help)
Re install everything back again. And you are done
Cut power off. Remove all the screws from the front panel. (where the controls are) working from the bottom to the top. Insert putty knife between the dryer and the control panel and push down to release. Carefully disconnect the wire harness.
You will find 2 screws at the bottom and 4 on top holding the dryer door. Remove and expose the drum.
Remove the drive belt
Remove the drum.
You need a 5/16 nut drive to remove the bearing bracket and an extra set of hands to hold the support from the back.
Re-install the parts. I used bearing grease to make it run smoother
Attach the new shaft to the drum and reinstall the drum (its best done with help)
Re install everything back again. And you are done
Parts Used:
-
David from Rockville, MD
-
Difficulty Level:Easy
-
Total Repair Time:15 - 30 mins
-
Tools:Screw drivers
6 of 7 people
found this instruction helpful.
Was this instruction helpful to you?
Thank you for voting!
knowing how to open the top
I unpluged the machine. Pried out the old switch with the tip of a screw driver. Pried off the connectors, there was not enough extra wire for me to connect the new switch through the front of the machine. I pushed the new switch in place. Using the screw driver I carefully pried open the top front of the machine { there were 2 plastic spring clips securing the top}. I placed a wash bucket on the drum to hold the top open , connected the 2 connectors to the switch and snapped top back in place.
Parts Used:
-
Gary from Arlington Heights, IL
-
Difficulty Level:Easy
-
Total Repair Time:15 - 30 mins
-
Tools:Screw drivers
5 of 5 people
found this instruction helpful.
Was this instruction helpful to you?
Thank you for voting!
Broken Door Strike
After the part arrived, I located a pair of needle nose pliers. Then removed the broken one and inserted the new one. It was very easy.
I also noted that the new part was of a better design than the original. It should not need further attention.
I also noted that the new part was of a better design than the original. It should not need further attention.
Parts Used:
-
William from Martinsville, IN
-
Difficulty Level:Really Easy
-
Total Repair Time:Less than 15 mins
-
Tools:Pliers
9 of 17 people
found this instruction helpful.
Was this instruction helpful to you?
Thank you for voting!
Inlet valve leaked water from supply line(s) back into washer.
Pulled washer electrical plug from receptacle.
Unscrewed hot and cold water inlet hose connectors.
Removed screws retaining backplate.
Removed back plate.
Removed two screws connecting valve assembly to frame.
Pulled two spade electrical wire connectors from valve assembly.
Opened hose clip securing hose on outlet side of valve assembly, using pliers.
Pulled hose from valve assembly.
Valve assembly now free.
Reversed above with replacement valve assembly.
Unscrewed hot and cold water inlet hose connectors.
Removed screws retaining backplate.
Removed back plate.
Removed two screws connecting valve assembly to frame.
Pulled two spade electrical wire connectors from valve assembly.
Opened hose clip securing hose on outlet side of valve assembly, using pliers.
Pulled hose from valve assembly.
Valve assembly now free.
Reversed above with replacement valve assembly.
Parts Used:
-
John from Powhatan, VA
-
Difficulty Level:Really Easy
-
Total Repair Time:Less than 15 mins
-
Tools:Pliers, Screw drivers
6 of 8 people
found this instruction helpful.
Was this instruction helpful to you?
Thank you for voting!
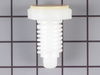
The front level screw legs are made of plastic and each time I move they break
-
Bobby from Asheboro, NC
-
Difficulty Level:Really Easy
-
Total Repair Time:15 - 30 mins
-
Tools:Wrench (Adjustable)
5 of 5 people
found this instruction helpful.
Was this instruction helpful to you?
Thank you for voting!