




















FEFBMZ96FCA Frigidaire Range - Instructions
Keep searches simple. Use keywords, e.g. "leaking", "pump", "broken" or "fit".
oven temp was not right
We removed the old part and replaced it then when warming the oven all of a sudden there was a loud noise and something went and so we called a repair man which I guess we should of done in the first place. Now he has ordered a part that cost 170 soo that is my story don't try to repair if you don't have experience.
Parts Used:
-
Kathy from Greentown, PA
-
Difficulty Level:Really Easy
-
Total Repair Time:Less than 15 mins
-
Tools:Screw drivers
8 of 18 people
found this instruction helpful.
Was this instruction helpful to you?
Thank you for voting!
Repaired Oven Range Light Bulb
The bulb has a plastic clear cover. That cover can just be carefully removed using a screwdriver. It's held in by a metal bracket. After you remove the cover. You'll just need to replace the bulb and then re-install the cover and bracket.
Parts Used:

-
Alan from SAN MATEO, CA
-
Difficulty Level:Very Easy
-
Total Repair Time:Less than 15 mins
-
Tools:Screw drivers
3 of 3 people
found this instruction helpful.
Was this instruction helpful to you?
Thank you for voting!
N/A
I had open back cover and remove the switch than replace new switch. Makesure cable conection.
Parts Used:

-
Dineshbhai from Rincon HWY21, GA
-
Difficulty Level:A Bit Difficult
-
Total Repair Time:Less than 15 mins
-
Tools:Screw drivers
4 of 7 people
found this instruction helpful.
Was this instruction helpful to you?
Thank you for voting!
Burner switch work sometime.
-
junius from WICOMICO, VA
-
Difficulty Level:Really Easy
-
Total Repair Time:1- 2 hours
-
Tools:Nutdriver
3 of 4 people
found this instruction helpful.
Was this instruction helpful to you?
Thank you for voting!
Lens cover for the oven light
-
Larry from COZAD, NE
-
Difficulty Level:Really Easy
-
Total Repair Time:30 - 60 mins
3 of 4 people
found this instruction helpful.
Was this instruction helpful to you?
Thank you for voting!
When I was cleaning the oven the plastic clock timer overlay melted.
I removed the back panel on the stove. Then I removed the switch plate, and pulled the melted plastic overlay off and replaced it with the new one.
Parts Used:
-
Nicholas from McHenry, IL
-
Difficulty Level:Easy
-
Total Repair Time:15 - 30 mins
-
Tools:Screw drivers, Socket set
4 of 7 people
found this instruction helpful.
Was this instruction helpful to you?
Thank you for voting!
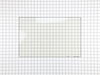
Crack in inner door glass
Removed two screws that are attached to handle then removed four screws from bottom edge of oven door. I was then able to remove the outer door glass,this gave me access to the three inner glasses. After removing the retainer for the glass assembly,I was able to remove all three and replace the inner one.I reversed this proceedure to reassemble.
Parts Used:
-
Robert from Richmond, IN
-
Difficulty Level:Really Easy
-
Total Repair Time:1- 2 hours
-
Tools:Screw drivers
4 of 7 people
found this instruction helpful.
Was this instruction helpful to you?
Thank you for voting!
Change on e of the inside glass
removed the screws holding the front part of the door and from there worked my way, untill the third glass.
It took a couple hours, my first time,. Overall easy,
It took a couple hours, my first time,. Overall easy,
Parts Used:
-
Ronald from Ozone Park, NY
-
Difficulty Level:Easy
-
Total Repair Time:1- 2 hours
-
Tools:Screw drivers
4 of 7 people
found this instruction helpful.
Was this instruction helpful to you?
Thank you for voting!
Old part was replaced by mfg’r. Wiring different. No drawings or any info was included to show wiring.
I was forced to call in a pro repairman. Will cost me at least $150 for part and repairman. I could have done job if instructions on how to rewire had been included.
Parts Used:
-
Nelson from FRUITHURST, AL
-
Difficulty Level:Difficult
-
Total Repair Time:30 - 60 mins
-
Tools:Nutdriver, Screw drivers, Socket set
2 of 2 people
found this instruction helpful.
Was this instruction helpful to you?
Thank you for voting!
Burner not controlable
Removed rear panal, removed screws from of switch. Unplued wires and installed new switch and put back together. Very easy.
Parts Used:
-
Royce from KEENE, TX
-
Difficulty Level:Very Easy
-
Total Repair Time:Less than 15 mins
-
Tools:Screw drivers
2 of 2 people
found this instruction helpful.
Was this instruction helpful to you?
Thank you for voting!
Stove was dropped and had broken, bent frame and adjuster feet
New ones fit perfectly. Take a minute to bend the frame straight. Then and I used oversize screws on the replacement parts as the drop had stripped out the screw holes of the frame.
Parts Used:

-
Paul from PORT ORANGE, FL
-
Difficulty Level:Really Easy
-
Total Repair Time:15 - 30 mins
-
Tools:Screw drivers
2 of 2 people
found this instruction helpful.
Was this instruction helpful to you?
Thank you for voting!
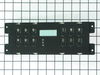
EOC FAILED
I removed the panel on the back of the range, with a small socket head. Then I removed the old EOC. I took a photo of the wire layout to help, when I connected the new EOC, just a smart step. Connected the NEW EOC, replaced all screws and the panel.
Parts Used:
-
obadiah j from SAINT CHARLES, MO
-
Difficulty Level:Really Easy
-
Total Repair Time:30 - 60 mins
-
Tools:Socket set
2 of 2 people
found this instruction helpful.
Was this instruction helpful to you?
Thank you for voting!
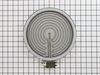
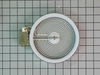
burners 1 would not do anything burned out 2 when from normal to out of control heat would not keep a constance heat
turned off breaker 3 Phil screws open door and on inside range top I would reconmend a board to hold top up square tip for cross bar and pliers to pull wires off fit perfect works really nice
Parts Used:
-
rick from Delta, OH
-
Difficulty Level:Really Easy
-
Total Repair Time:15 - 30 mins
-
Tools:Pliers, Screw drivers
2 of 2 people
found this instruction helpful.
Was this instruction helpful to you?
Thank you for voting!
The range element was not coming on
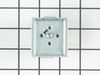
After settling that it was the Surface Element Switch, ordering and securing the switch, the first step was to disconnect the power to the Oven/Range. Next pull out the Range and remove the back and disconnect the switch from the top of the Range. Using the new switch I removed the wire connectors from the old switch and reconnected them to the new switch in the same spot that they came from. After connections were secure I reattached the switch to the back of the Range and reattached the back of the Range. When everything was back in place the power source was reconnected and that was it.
Parts Used:
-
William from BENTON, IL
-
Difficulty Level:Really Easy
-
Total Repair Time:15 - 30 mins
-
Tools:Socket set
2 of 2 people
found this instruction helpful.
Was this instruction helpful to you?
Thank you for voting!
The switch wasn't working on all the different settings.
first thing was to turn the breakers off. then pull the range away from the wall. used an 1/8 th inch socket to take off the back panel to get access to the switch.used a Phillips screwdriver to disconnect the switch under the knob in the front. took off the wire terminals one at a time and matched it to the numbers on the old switch.replaced the knob, screwed it on to the range. turned the breakers on and tested the switch.worked fine, replaced the back cover and pushed it back into place.
Parts Used:
-
James from NEW HYDE PARK, NY
-
Difficulty Level:Very Easy
-
Total Repair Time:15 - 30 mins
-
Tools:Screw drivers
2 of 3 people
found this instruction helpful.
Was this instruction helpful to you?
Thank you for voting!