




















FDE847GET0 Frigidaire Dryer - Instructions
Keep searches simple. Use keywords, e.g. "leaking", "pump", "broken" or "fit".
Rusty streaks on clothes.
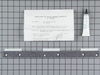
I First pulled the top panel up and off from the front. Then, on the inside, removed a square head screw from each side holding the front door panel on. I then pulled off the front panel enough to expose the drum. I then removed the old drum glide with a putty knife, and following instructions supplied with the new glide, glued the new glide into place. I then assembled in reverse order of disassembly.
Parts Used:
-
Arne from Nome, AK
-
Difficulty Level:Easy
-
Total Repair Time:15 - 30 mins
-
Tools:Screw drivers
1 person
found this instruction helpful.
Was this instruction helpful to you?
Thank you for voting!
Dryer was burning clothes
There was a gap between the drum and the front opening. So, we opened the top of the dryer using the putty knife. There are two clips once you find them you just have to push back on them to release the top of the dryer. Then there are two screws that hold the front of the dryer on. Once they are removed the front of the dryer just came off. The kit has glue and instructions past that point and I just followed them.
Parts Used:
-
toshio from canton, GA
-
Difficulty Level:Easy
-
Total Repair Time:15 - 30 mins
-
Tools:Screw drivers
1 person
found this instruction helpful.
Was this instruction helpful to you?
Thank you for voting!
The clothes was getting stuck on the tumbler
First I removed the 2 screws on the back. These 2 screws hold the top cover. I also used a flat screw driver to press the 2 locks that hold the top cover, they are located in front and under the top cover . Then I removed the 2 screws that hold the front cover. After removing the front cover I replaced the drum glider and the seal-basket lower. Now my dryer is working perfectly...
Parts Used:
-
Juan from Dallas, TX
-
Difficulty Level:Easy
-
Total Repair Time:15 - 30 mins
-
Tools:Screw drivers
1 person
found this instruction helpful.
Was this instruction helpful to you?
Thank you for voting!
the attached anchors and holes linled up about 80% of the time.
I cut off the four that didn't line up - I suppose since this was a gasket that fit several makes, I should expect this type of problem.
Parts Used:

-
Allan D from REDLANDS, CA
-
Difficulty Level:A Bit Difficult
-
Total Repair Time:15 - 30 mins
1 person
found this instruction helpful.
Was this instruction helpful to you?
Thank you for voting!
dryer was leaving brown marks on clothes
there are several srcews to remove. there are some u dont have to take out but it looks like u do.ease of the front panel and remove the old drum glide,very hard to get of all the felt.check the the bottom guide before u order parts if possible(i could've replaced mine,but didnt have time to check it first).when glue back in place follow directions exact and clamp.allow glue to dry as long as u can. mine set overnight it was nice and dry(if u dont you'll be doing it all over again)replace everything as you took them off.all works great perfect fit!!
Parts Used:
-
Robert from Medina, NY
-
Difficulty Level:Easy
-
Total Repair Time:30 - 60 mins
-
Tools:Screw drivers
1 person
found this instruction helpful.
Was this instruction helpful to you?
Thank you for voting!
read shaft and bearing wore out..screaching bad
I took the dryer apart to vacuum and check because of the screaching noise. Took drum out and found the bearing in pieces and shaft had rubbed against the brace. I thought as old as my dryer was I would never get a piece to fix it. I got online and found PartSelect.com. I found the part but could not tell if all was included. there was a Phone Number so I called it. I was helped instantly. They acted like it was no big deal to have a dryer that old. I got my part within a week and had my dryer back together. It works like new. Thank you
Parts Used:

-
rickey from richmond, MO
-
Difficulty Level:Really Easy
-
Total Repair Time:30 - 60 mins
-
Tools:Screw drivers
1 person
found this instruction helpful.
Was this instruction helpful to you?
Thank you for voting!
Loud squealing
As all others have said, without being redundant, I'd view post #1 or #2 for a good detailed set of instructions.
The primary issue I had was with the stainless steel ball bearing that was shipped with the kit. I couldn't figure out what it was used for, because when I removed the bearing carrier the ball fell out before I could see where the original one was located. The stainless ball bearing is a grounding ball, not a bearing. It goes on the exterior of the plastic bearing carrier/receiver.
Once I figured that part out, it was a piece of cake.
Took a little longer than other people's repairs, but I also put a new belt on and re-worked the exhaust duct for solid ducting versus flexible duct. fine-tuning the rigid duct work was a piece of cake with the tumbler out, since i could crawl right inside the chassis and make sure everything would line up (level legs, adjust elbows, etc)
The primary issue I had was with the stainless steel ball bearing that was shipped with the kit. I couldn't figure out what it was used for, because when I removed the bearing carrier the ball fell out before I could see where the original one was located. The stainless ball bearing is a grounding ball, not a bearing. It goes on the exterior of the plastic bearing carrier/receiver.
Once I figured that part out, it was a piece of cake.
Took a little longer than other people's repairs, but I also put a new belt on and re-worked the exhaust duct for solid ducting versus flexible duct. fine-tuning the rigid duct work was a piece of cake with the tumbler out, since i could crawl right inside the chassis and make sure everything would line up (level legs, adjust elbows, etc)
Parts Used:
-
John from Avis, PA
-
Difficulty Level:Really Easy
-
Total Repair Time:30 - 60 mins
-
Tools:Nutdriver, Pliers, Screw drivers
1 person
found this instruction helpful.
Was this instruction helpful to you?
Thank you for voting!
Drum making noise when running ( rear bearing )
Took a putty knife and released top clips. Tipped top back , and took out 4 screws holding front cover in place. Lifted out drum, replaced bearing plate. Removed 2 screws and replaced back panel bearing. Placed drum back in place, installed front panel, snapped top back in place and job was done. Very easy. Took about one hour.
Parts Used:
-
Ralph from Wisconsin Rapids, WI
-
Difficulty Level:Really Easy
-
Total Repair Time:30 - 60 mins
-
Tools:Screw drivers
1 person
found this instruction helpful.
Was this instruction helpful to you?
Thank you for voting!
Main drum bearing was worn out.
First and most important, I unplugged the dryer and then pulled it out to work on it. Disassembly: I removed the top and front of the dryer, removed the belt from the drive pulley, and lifted the drum out of the bearing seat. I removed the old main bearing from the drum and the bearing seat from the back of the dryer. Re-assembly: I installed the new parts, set the drum back into the new seat, set the belt on the drive pulley, and put the covers back on. It all goes very quickly and easily.
Parts Used:

-
Frederic from Rock Springs, WI
-
Difficulty Level:Really Easy
-
Total Repair Time:1- 2 hours
-
Tools:Nutdriver, Pliers, Screw drivers
1 person
found this instruction helpful.
Was this instruction helpful to you?
Thank you for voting!
Cloths were getting snagged on top drum guide
Partselect provided me with what to look for with my symptoms and excellent delivery time.
Parts Used:
-
kevin from knoxville, IA
-
Difficulty Level:Really Easy
-
Total Repair Time:1- 2 hours
-
Tools:Pliers, Screw drivers
2 of 4 people
found this instruction helpful.
Was this instruction helpful to you?
Thank you for voting!
Rear Bearing wearing out
I first looked at your directions then felt I could do the repair. So I ordered the part. The video was extremely helpful and allowed me to follow each step in the process. Last time I paid $270 for the exact repair. This time I costs me under $30. Plus I was able to clean out the entire inside of the dryer. The sitr instructions were very helpful and on target for any level of experience. I fixed my own dryer and saved a ton on it! Thank You, Randy In Colorado
Parts Used:
-
Randy from CENTENNIAL, CO
-
Difficulty Level:Really Easy
-
Total Repair Time:1- 2 hours
-
Tools:Nutdriver, Screw drivers, Socket set
1 person
found this instruction helpful.
Was this instruction helpful to you?
Thank you for voting!
Brown stains on clothes
Removed the door and replace the upper glide and the lower seal. The repair was easy.
Parts Used:
-
Peter from Topsham, ME
-
Difficulty Level:Really Easy
-
Total Repair Time:30 - 60 mins
-
Tools:Nutdriver, Screw drivers
1 person
found this instruction helpful.
Was this instruction helpful to you?
Thank you for voting!
lack of heat
-
ann from WALLA WALLA, WA
-
Difficulty Level:Really Easy
-
Total Repair Time:30 - 60 mins
-
Tools:Screw drivers
1 person
found this instruction helpful.
Was this instruction helpful to you?
Thank you for voting!
Rear drum bearing and belt needed to be replaced.
Remove top cover and front and remove drum and install a new bearing kit and new belt.
Parts Used:
-
Antonio from LOS GATOS, CA
-
Difficulty Level:Really Easy
-
Total Repair Time:30 - 60 mins
-
Tools:Screw drivers
1 person
found this instruction helpful.
Was this instruction helpful to you?
Thank you for voting!
Clothes getting caught in the drum and getting rust stains
Looking from the front at the top cover I lifted the cover with my fingers and inserted a screw driver about one or two inches from each edge.
The top pops loose and lifts up like the hood of a car.
Inside the dryer on either side behind the front panel there is one screw on each side. Remove the screws and lift the entire panel and door. Then swing the assembly out like a door with a hinge on the right. It won't come off due to the wiring harness.
Make sure you study the upper drum glide before removing it. Remove the upper drum glide using Acetone, this is easy but a little messy.
Apply glue, I applied to the drum but if I did it again I would apply it to the glide and clamp it to the drum in three or four places.
This is an income property and my tenants weren't happy so I didn't wait for the other parts. I don't know now if I really needed them. I will replace them anyway.
I realize they make these things easy to repair. It makes the $200+ they charge that much more profitable.
I also vacuumed and cleaned inside.
This is pretty easy and does not require much skill.
Position the panel on the dryer. There are two clips that need to lined up on the bottom and fit the drum back on. Then snap the top cover in and test the dryer.
Remove the top replace the front panel screws and snap the top back in.
I wish I could post pictures there really isn't much to it.
For property owners I would recommend learning how to do this prior to getting a call.
Create a kit of parts that will wear or break. $100 will save you the hassle of ordering under pressure and get you up and running that much faster.
The top pops loose and lifts up like the hood of a car.
Inside the dryer on either side behind the front panel there is one screw on each side. Remove the screws and lift the entire panel and door. Then swing the assembly out like a door with a hinge on the right. It won't come off due to the wiring harness.
Make sure you study the upper drum glide before removing it. Remove the upper drum glide using Acetone, this is easy but a little messy.
Apply glue, I applied to the drum but if I did it again I would apply it to the glide and clamp it to the drum in three or four places.
This is an income property and my tenants weren't happy so I didn't wait for the other parts. I don't know now if I really needed them. I will replace them anyway.
I realize they make these things easy to repair. It makes the $200+ they charge that much more profitable.
I also vacuumed and cleaned inside.
This is pretty easy and does not require much skill.
Position the panel on the dryer. There are two clips that need to lined up on the bottom and fit the drum back on. Then snap the top cover in and test the dryer.
Remove the top replace the front panel screws and snap the top back in.
I wish I could post pictures there really isn't much to it.
For property owners I would recommend learning how to do this prior to getting a call.
Create a kit of parts that will wear or break. $100 will save you the hassle of ordering under pressure and get you up and running that much faster.
Parts Used:
-
john from Oak Park, IL
-
Difficulty Level:Easy
-
Total Repair Time:30 - 60 mins
-
Tools:Screw drivers
1 person
found this instruction helpful.
Was this instruction helpful to you?
Thank you for voting!