




















FDE847GET0 Frigidaire Dryer - Instructions
Keep searches simple. Use keywords, e.g. "leaking", "pump", "broken" or "fit".
Bearing Bracket Worn Out
Took off front panel, removed drum and replaced parts listed. A bit tricky to keep small parts in place. However, masking tape helped. Best of all was the online diagram of how the parts were assembled. In addition, taking step by step phone pixs aided in replacing parts since there was some down time between diagnosis and installation.
Parts Used:

-
David from Fairdale, KY
-
Difficulty Level:A Bit Difficult
-
Total Repair Time:30 - 60 mins
-
Tools:Nutdriver, Screw drivers
21 of 24 people
found this instruction helpful.
Was this instruction helpful to you?
Thank you for voting!
Dryer drum would squeak and squeal until warmed up, but progressively got worse as the days drug on.
First pry up on the front edge of the top panel of the dryer which is held in place by snap in clips. Pivot the top open and support against wall or other taking care not to pull on wiring harness. Next remove the 2 screws that hold the front panel in place. These are located on the inside of the front panel. The front then snaps loose also. Remove the plastic drum stop located at the top edge of the front of the dryer. Next I removed the 3 drum screws located inside at the back center of the dryer. Next you can you need to remove the belt the motor located at the rear vent panel on the back. Slide the now loose drum out exposing the rear bearing. With a 5/16 end wrench, loosen the 2 screws on either side of the bearing retainer. Assemble the new bearing bracket to match the old one. Apply a liberal amount of supplied lubricant to the pivot ball and plastic retainer. At this point it was helpful to have someone at the rear of the dryer hold the new retainer bracket against the back of the dryer while I tightened the new bearing assembly in. Assemble dryer in reverse.
Parts Used:
-
Chad from Glyndon, MN
-
Difficulty Level:Easy
-
Total Repair Time:1- 2 hours
-
Tools:Screw drivers, Wrench set
20 of 23 people
found this instruction helpful.
Was this instruction helpful to you?
Thank you for voting!
lint filter did not fit "squarely" into its place
replaced old filter, only to find that the new one had the same issue. After closer examination, I determined the filter guide that screws into place, which I had removed earlier to clean lint out, did not hold the lint casing correctly. I removed and reinstalled the piece that has the metal moisture sensors, and replaced it, ensure both screws held the lint casing as it should. Now I have two lint filters that fit perfectly! So, if you ever remove the piece wtih the metal sensors, make sure that the lint casing is screwed in correctly when replacing.
Parts Used:
-
Jeff from Bethalto, IL
-
Difficulty Level:Easy
-
Total Repair Time:Less than 15 mins
18 of 19 people
found this instruction helpful.
Was this instruction helpful to you?
Thank you for voting!
overheating, squeeking
Unplung it, pop up the top and take it off, unplug the 2 plugs, take 2 screws out that hold the front door, take out the door. Get the belt loose from the back roller, pull out the entire drum. I changed all 3 thermostat, 2 in the back and 1 in the front, also change the rear bearing. Dryer works great now, no more squeeking and no more overheating it's like having a new dryer. I'm a woman and did it all by myself, save me a bunch of bucks!!!
Parts Used:
-
Christine from Wheelersburg, OH
-
Difficulty Level:Easy
-
Total Repair Time:30 - 60 mins
-
Tools:Screw drivers
18 of 20 people
found this instruction helpful.
Was this instruction helpful to you?
Thank you for voting!
Old Dryer drum veins degraded and broke down.
I opened the top of the dryer to gain access to the outside of the drum. Then I removed the screws holding the old drum veins in using the electric drill with the nut driver attachment. Then I positioned the new veins in place on the inside of the drum and replaced the screws from the outside of the drum to hold the veins in place. Then I replaced the top and was ready to go.
This is the third repair that I have done using parts from parts select. the other two repairs involved replacing electrical parts. Specifically thermostatic controls or swicthes. I am very happy with the parts and the diagrams provided on your web site without wich I would have had to replace my dryer a long time ago.
This is the third repair that I have done using parts from parts select. the other two repairs involved replacing electrical parts. Specifically thermostatic controls or swicthes. I am very happy with the parts and the diagrams provided on your web site without wich I would have had to replace my dryer a long time ago.
Parts Used:
-
Alfred from Loveland, CO
-
Difficulty Level:Really Easy
-
Total Repair Time:15 - 30 mins
-
Tools:Nutdriver
16 of 19 people
found this instruction helpful.
Was this instruction helpful to you?
Thank you for voting!
Dryer would not start.
Unplugged the dryer from electrical socket. Vacuumed lint from dryer and exit hose. Removed top from dryer. Used pliers to remove the 2 wires from the thermal limiter. Used screwdriver to remove 2 screws that held the limiter in place.
Installed the new limiter, connected the 2 wires, plugged in the dryer's electrical connection, turned on dryer, and resumed my "washday chores".
Installed the new limiter, connected the 2 wires, plugged in the dryer's electrical connection, turned on dryer, and resumed my "washday chores".
Parts Used:
-
Onmi from Douglas, GA
-
Difficulty Level:Easy
-
Total Repair Time:15 - 30 mins
-
Tools:Pliers, Screw drivers
15 of 18 people
found this instruction helpful.
Was this instruction helpful to you?
Thank you for voting!
Dryer would not start. When turning on, I could hear faint humming, but the motor would not start.
1) Unplug the unit.
2) Remove all screws from top of the unit except for the one in the center front that does not go through the outer casing.
3) Find the Thermal Limiter which is on the back wall near the top on the left side when looking from the front.
4) Disconnect the two wires
5) Remove the two screws that mount the limiter to the back wall.
6) Use an ohmeter to test if a current flows through the unit. If no current flows through (an open switch), then the unit will need to be replaced.
7) Clean any lint that you can at this point.
8) Use two screws to mount new Thermal Limiter
9) Reconnect the two wires to the Limiter.
10) Attach the top of the dryer case.
2) Remove all screws from top of the unit except for the one in the center front that does not go through the outer casing.
3) Find the Thermal Limiter which is on the back wall near the top on the left side when looking from the front.
4) Disconnect the two wires
5) Remove the two screws that mount the limiter to the back wall.
6) Use an ohmeter to test if a current flows through the unit. If no current flows through (an open switch), then the unit will need to be replaced.
7) Clean any lint that you can at this point.
8) Use two screws to mount new Thermal Limiter
9) Reconnect the two wires to the Limiter.
10) Attach the top of the dryer case.
Parts Used:
-
Mark from Normalville, PA
-
Difficulty Level:Easy
-
Total Repair Time:15 - 30 mins
-
Tools:Screw drivers
15 of 18 people
found this instruction helpful.
Was this instruction helpful to you?
Thank you for voting!
Dryer Drum Squealing Loudly!
This unit is a stackable washer&dryer,so first pull unit away from wall atleast 4 foot. Unplug power cord,then take10 dagree front panel off then the control panel off and unplug the 5 connetors if your unit has that many,then lay panel asside. Take dryer door off,makes it easier when putting it all back together. Now take front panel off and the dryer lent tube,now just take the 3 center phillips head screws out and slide drum out. Pull upward on what they call the shaft which held drum on. Now these are the parts you should order. Belt,grounding ball clip,grounding ball,drum support bearing,bearing bracket,and most important part is the shaft. The shaft is ur insurance for the whole job. Use a good grease like white lithium grease and coat the shaft end and the drum support bearing. The grease will cut down on friction for a while,and re assemble the way you took apart. Reminder grounding ball goes behind drum support bearing not in front. Good luck and please vaccum.
Parts Used:
-
john from waynesboro, VA
-
Difficulty Level:A Bit Difficult
-
Total Repair Time:1- 2 hours
-
Tools:Pliers, Screw drivers, Socket set
13 of 13 people
found this instruction helpful.
Was this instruction helpful to you?
Thank you for voting!
Dryer not working
After reading about similar problems people have had with this make of dryer, I focused attention on the thermal limiter. I determined that it was the culprit by "jumping" it with a 6" piece of wire. Then I simply went on the site, ordered the part. It arrived a few days later and I pulled out the old one, screwed in the new one, and the dryer is good as new.
Parts Used:
-
Susan from Point Pleasent Beach, NJ
-
Difficulty Level:A Bit Difficult
-
Total Repair Time:15 - 30 mins
-
Tools:Screw drivers
14 of 18 people
found this instruction helpful.
Was this instruction helpful to you?
Thank you for voting!
top glide was worn and "grabbing" clothes
Unplug dryer (gotta say it). Remove the two screws that hold in the lint catch. Remove top of dryer (two screws in back hold brackets, the front snaps on). remove two screws along the front edge to take front panel off the dryer (there are also clips). Unhook the two electrical connectors that control the door shut off. Once the front is off, remove the old glide and felt and install the new parts. Be sure not to step on the tube of contact cement, making it explode inside the bag. That sucked. Reassemble.
Parts Used:
-
DANIEL from WEST HAZLETON, PA
-
Difficulty Level:Really Easy
-
Total Repair Time:1- 2 hours
-
Tools:Pliers, Screw drivers
10 of 10 people
found this instruction helpful.
Was this instruction helpful to you?
Thank you for voting!
dryer had a bad squeak
Removed dryer front, unscrewed 3 screws in center hub, replaced bearing assembly. Removed old basket seal with razor scraper, cleaned surface with mineral spirits, applied new basket seal. Replaced dryer front and project was done. Dryer has no more sqeaks.
Parts Used:
-
Jana from Fort Worth, TX
-
Difficulty Level:A Bit Difficult
-
Total Repair Time:1- 2 hours
-
Tools:Screw drivers, Socket set
10 of 10 people
found this instruction helpful.
Was this instruction helpful to you?
Thank you for voting!
Wretched screeching noise
Make sure you order a new belt and a new drum glide with the rear drum bearing assembly. If your bearing is worn out, so are the belt and drum glide!
1) Use a flat screw driver or putty knife to release the blind clips that hold the front side of the top of the dryer cabinet down
2) Swing dryer top up and remove two screws that hold the face of the cabinet.
3) Unplug the wiring harness and remove the cabinet face.
4) Remove the 3 screws that hold the drum to the bearing assembly (accessed from inside the drum. This makes it easier to remove the drum as the bearing assembly can be difficult to remove before you see how it snaps together
5) Reach under the drum and take the belt off the motor pulley, then remove the drum
6) Remove the old bearing assembly from the socket (slide up then out)
7) Remove the two screws that hold the bearing socket to the dryer
8) Fasten the new socket to the dryer (you'll need help doing this unless you have REALLY long arms because you have to reach inside the driver and the back of the dryer at the same time)
9) Grease the socket with the supplied high temp grease
10) Bolt the new bearing assembly to the drum and put the new belt around the drum
11) Put the drum back in and snap the bearing socket in and down
12) Guide the new belt around the motor pulley & tensioner
13) Glue the new drum glide / felt piece to the front cabinet
14) Put the cabinet back together
1) Use a flat screw driver or putty knife to release the blind clips that hold the front side of the top of the dryer cabinet down
2) Swing dryer top up and remove two screws that hold the face of the cabinet.
3) Unplug the wiring harness and remove the cabinet face.
4) Remove the 3 screws that hold the drum to the bearing assembly (accessed from inside the drum. This makes it easier to remove the drum as the bearing assembly can be difficult to remove before you see how it snaps together
5) Reach under the drum and take the belt off the motor pulley, then remove the drum
6) Remove the old bearing assembly from the socket (slide up then out)
7) Remove the two screws that hold the bearing socket to the dryer
8) Fasten the new socket to the dryer (you'll need help doing this unless you have REALLY long arms because you have to reach inside the driver and the back of the dryer at the same time)
9) Grease the socket with the supplied high temp grease
10) Bolt the new bearing assembly to the drum and put the new belt around the drum
11) Put the drum back in and snap the bearing socket in and down
12) Guide the new belt around the motor pulley & tensioner
13) Glue the new drum glide / felt piece to the front cabinet
14) Put the cabinet back together
Parts Used:
-
Paul from Broadalbin, NY
-
Difficulty Level:Really Easy
-
Total Repair Time:30 - 60 mins
-
Tools:Nutdriver, Screw drivers
9 of 9 people
found this instruction helpful.
Was this instruction helpful to you?
Thank you for voting!
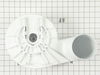
Dryer stopped every 5 minutes. Had to be hand turned to stop.
Repair to replace motor and blower kit. Disconnected Power Source and turned off breaker. Removed top and front with screwdriver. Removed back plate with screwdriver. Disengaged belt. Removed plastic piece in front top with phillip screwdriver. Removed Drum. Disconected thermostat from blower. Unplugged motor connections. Removed screws holding in blower unit. Removed blower unit and motor as a unit. Removed pully unit (2 Screws). Took off blower unit security nut to be used on new unit. Took old seal out of pully unit. (New Motor has one installed on it). Put pully unit back in. Put in new motor and blower unit. Screwed them in place. Reconnected thermostat. (2 screws).
Connected electrical plugs to motor. Put drum in and plastic piece in front top of dryer. Hooked belt back up from rear. Replaced rear door. (2 screws). Reconnected ground wire on back top of dryer. Put on front making sure all wires to Timer are connected(they can pull off when taking drum out). Close front. Polug dryer in. Reset dryer in place. Turn on Breaker. Done.
Connected electrical plugs to motor. Put drum in and plastic piece in front top of dryer. Hooked belt back up from rear. Replaced rear door. (2 screws). Reconnected ground wire on back top of dryer. Put on front making sure all wires to Timer are connected(they can pull off when taking drum out). Close front. Polug dryer in. Reset dryer in place. Turn on Breaker. Done.
Parts Used:
-
RICHARD from MERCHANTVILLE, NJ
-
Difficulty Level:Easy
-
Total Repair Time:30 - 60 mins
-
Tools:Screw drivers, Wrench set
11 of 16 people
found this instruction helpful.
Was this instruction helpful to you?
Thank you for voting!
Dryer would not turn on
I contacted a company to come out and diagnose the problem. They informed me that the thermal limiter is bad and needed to be replaced for $15 for the part and $85 labor. I found the part on this site for about $10, and did the repair myself. The dryer was mostly dismantled so I pulled the drum back, and replaced the part. The tricky part was the pulley system was, so make sure you see it before hand or find a diagram online. Once that was figured out, I set the drum back up, greased and tightened the pulley, reattached the front of the washer with connections, and closed the lid.
Parts Used:
-
Michael from Erlanger, KY
-
Difficulty Level:A Bit Difficult
-
Total Repair Time:1- 2 hours
-
Tools:Screw drivers
9 of 10 people
found this instruction helpful.
Was this instruction helpful to you?
Thank you for voting!
Heating element went
Tried to follow the directions of others but ran into a problem with getting the top panel off. This is how I did it.
1 Disconnect power and dryer vent tube. Move away from wall.
2 Remove slotted access panel in back of dryer and take belt off motor and idler pulley. Leave on drum.
3 Unscrew the screws on the back of the top panel brackets( mine are silver) where they screw into the back panel and pull up and to the back to get the top panel off. Someone else said to slide a putty knife in the front to release the top but my machine has no spring clips.
4 With the cover off you can see the two heat sensors and I tested them with a multi meter they registered 0 which meant they were OK.
5 Remove the screws that hold the control board on and the plugs that are wired into it making sure that you draw a diagram to remember the wiring. There was a zip tie that I cut to be able to feed the plugs through the hole in the front panel that the wiring must go when the front panel drops down.
6 Remove the screws on the top of the front panel and the screws on the inside of the side panel that hold the front panel secure.
7 A lot goes on on step 7 because the front panel which is hinged drops from the top down to the floor. Diagram and remove all wires there are two green ground wires on the side, Three wires on the door lock, two wires for the light and wires for a moisture sensor. When disconnected feed the control panel plugs and other wires through the hole in the front panel and lift up and out on the front panel it will pop out. Lower it to the floor and let it rest there.
8 Now you can get the drum out of the way by pulling up then out the front where the front panel is now on the floor. Leave the belt on it.
9 Diagram the wiring on the heating element there are connections for the element and the sensor. They gave me a new sensor screwed onto the new heating element. Then unscrew it from the back panel the screws are on the back of the machine.
10 Install is the reverse of the rip down
In hindsight I would have liked to have had the new part before I started the project because the wiring wasn't so fresh in my head a week later when it arrived even with diagrams. Over all it was very simple and took under two hours to complete. I did clean everything I could inside the machine and reglued a couple of the seals that had fallen loose. Works like new and probably went because of overheating with a clogged vent. Lesson... clean your dryer vent every year or sooner.
1 Disconnect power and dryer vent tube. Move away from wall.
2 Remove slotted access panel in back of dryer and take belt off motor and idler pulley. Leave on drum.
3 Unscrew the screws on the back of the top panel brackets( mine are silver) where they screw into the back panel and pull up and to the back to get the top panel off. Someone else said to slide a putty knife in the front to release the top but my machine has no spring clips.
4 With the cover off you can see the two heat sensors and I tested them with a multi meter they registered 0 which meant they were OK.
5 Remove the screws that hold the control board on and the plugs that are wired into it making sure that you draw a diagram to remember the wiring. There was a zip tie that I cut to be able to feed the plugs through the hole in the front panel that the wiring must go when the front panel drops down.
6 Remove the screws on the top of the front panel and the screws on the inside of the side panel that hold the front panel secure.
7 A lot goes on on step 7 because the front panel which is hinged drops from the top down to the floor. Diagram and remove all wires there are two green ground wires on the side, Three wires on the door lock, two wires for the light and wires for a moisture sensor. When disconnected feed the control panel plugs and other wires through the hole in the front panel and lift up and out on the front panel it will pop out. Lower it to the floor and let it rest there.
8 Now you can get the drum out of the way by pulling up then out the front where the front panel is now on the floor. Leave the belt on it.
9 Diagram the wiring on the heating element there are connections for the element and the sensor. They gave me a new sensor screwed onto the new heating element. Then unscrew it from the back panel the screws are on the back of the machine.
10 Install is the reverse of the rip down
In hindsight I would have liked to have had the new part before I started the project because the wiring wasn't so fresh in my head a week later when it arrived even with diagrams. Over all it was very simple and took under two hours to complete. I did clean everything I could inside the machine and reglued a couple of the seals that had fallen loose. Works like new and probably went because of overheating with a clogged vent. Lesson... clean your dryer vent every year or sooner.
Parts Used:
-
Jeff from Newfane, NY
-
Difficulty Level:Really Easy
-
Total Repair Time:1- 2 hours
-
Tools:Pliers, Screw drivers
10 of 15 people
found this instruction helpful.
Was this instruction helpful to you?
Thank you for voting!