




















FDE747RES0 Frigidaire Dryer - Instructions
Keep searches simple. Use keywords, e.g. "leaking", "pump", "broken" or "fit".
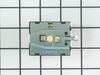
Broken switch
Removed rear cover, unplug 2 spade connectors, twist out old switch, twistin new switch. plug connectors, install cover
Parts Used:
-
Richard from Yucca Valley, CA
-
Difficulty Level:Really Easy
-
Total Repair Time:Less than 15 mins
-
Tools:Screw drivers
4 of 10 people
found this instruction helpful.
Was this instruction helpful to you?
Thank you for voting!
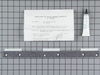
Dryer drum upper seal worn
First I removed power from dryer. Then I lifted the lid and removed the 2 screws holding the front onto the dryer. I then used a pair of pliers to grip the seal and help pull it off. Cleaned off old adhesive. Recommend getting GOOP BE GONE. Then apply high temp sealant onto area and place seal on top. Press firmly across it to make sure it is in place. Then put it all back together and your done. Also, if upper seal is worn.recommend ordering lower seal at same time. I didn't and should have. Save yourself from doing this twice.
Parts Used:
-
David from Orange Park, FL
-
Difficulty Level:Easy
-
Total Repair Time:15 - 30 mins
-
Tools:Pliers, Screw drivers
1 person
found this instruction helpful.
Was this instruction helpful to you?
Thank you for voting!
Drum On The Dryer Quit Turning
1) I took a screw driver and pop the top lid up. 2) Took a philp screw driver and took 2 screws out of both sides of the front panal. 3) Lift up on the front panal and turned it out to the side. 4)Put the belt over the drum and on to the motor and tension pulley. 5) Put everything back together in reverse order starting with 3 ,2 and 1
Parts Used:


-
Verlin from Hampton, IA
-
Difficulty Level:Really Easy
-
Total Repair Time:15 - 30 mins
-
Tools:Nutdriver, Screw drivers
1 person
found this instruction helpful.
Was this instruction helpful to you?
Thank you for voting!
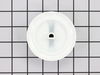
time knob broke
Slid on new knob. The turn around time on receiving the part was amazing. We were back in business within 2 days.
Parts Used:
-
Lori from Riverview, FL
-
Difficulty Level:Really Easy
-
Total Repair Time:Less than 15 mins
1 person
found this instruction helpful.
Was this instruction helpful to you?
Thank you for voting!
strike broken
-
Linda from Batesburg, SC
-
Difficulty Level:Easy
-
Total Repair Time:Less than 15 mins
7 of 19 people
found this instruction helpful.
Was this instruction helpful to you?
Thank you for voting!
bearing went out
took apart and replaced parts easy to do but no one in my town can get me parts. thay want 100.00 gust to come out and look at it so found parts online and thats that
Parts Used:
-
james from tahlequah, OK
-
Difficulty Level:Really Easy
-
Total Repair Time:Less than 15 mins
-
Tools:Screw drivers
1 person
found this instruction helpful.
Was this instruction helpful to you?
Thank you for voting!
Noisy
Took it apart and installed the parts. Then I threw the dryer in the trash and bought a new one.
Parts Used:
-
April from CARYVILLE, TN
-
Difficulty Level:Really Easy
-
Total Repair Time:15 - 30 mins
-
Tools:Screw drivers
1 person
found this instruction helpful.
Was this instruction helpful to you?
Thank you for voting!
Just popped the part I ordered right in and it's was closing in no time !

-
Debra from BROOKLYN, NY
-
Difficulty Level:Very Easy
-
Total Repair Time:15 - 30 mins
1 person
found this instruction helpful.
Was this instruction helpful to you?
Thank you for voting!
Rear Bearing wearing out
I first looked at your directions then felt I could do the repair. So I ordered the part. The video was extremely helpful and allowed me to follow each step in the process. Last time I paid $270 for the exact repair. This time I costs me under $30. Plus I was able to clean out the entire inside of the dryer. The sitr instructions were very helpful and on target for any level of experience. I fixed my own dryer and saved a ton on it! Thank You, Randy In Colorado
Parts Used:
-
Randy from CENTENNIAL, CO
-
Difficulty Level:Really Easy
-
Total Repair Time:1- 2 hours
-
Tools:Nutdriver, Screw drivers, Socket set
1 person
found this instruction helpful.
Was this instruction helpful to you?
Thank you for voting!
belt broke
Took it apart, lost several screws cause I am an Idiot, placed belt back on, cut hand on back of dryer bled over every thing, curse loudly, put it back together and wiped the blood off, worked perfect!
I went great, worked fine, thanks for your very quick shipment. I will always buy from you if I can!
Thanks again
Bill Manning Florida
I went great, worked fine, thanks for your very quick shipment. I will always buy from you if I can!
Thanks again
Bill Manning Florida
Parts Used:
-
William from Ellenton, FL
-
Difficulty Level:A Bit Difficult
-
Total Repair Time:1- 2 hours
-
Tools:Nutdriver, Pliers, Screw drivers
1 person
found this instruction helpful.
Was this instruction helpful to you?
Thank you for voting!
dryer was leaving brown marks on clothes
there are several srcews to remove. there are some u dont have to take out but it looks like u do.ease of the front panel and remove the old drum glide,very hard to get of all the felt.check the the bottom guide before u order parts if possible(i could've replaced mine,but didnt have time to check it first).when glue back in place follow directions exact and clamp.allow glue to dry as long as u can. mine set overnight it was nice and dry(if u dont you'll be doing it all over again)replace everything as you took them off.all works great perfect fit!!
Parts Used:
-
Robert from Medina, NY
-
Difficulty Level:Easy
-
Total Repair Time:30 - 60 mins
-
Tools:Screw drivers
1 person
found this instruction helpful.
Was this instruction helpful to you?
Thank you for voting!
replace timer knob
I removed the cracked knob and attempted to replace with the new knob. Unfortunately my new knob did not fit. The internal diameter of the replacement knob was 2mm too small. I did not want to go through the hassle of returning and requesting another knob. So I just made it work. Thanks
Parts Used:
-
AG from Long Beach, CA
-
Difficulty Level:Difficult
-
Total Repair Time:30 - 60 mins
1 person
found this instruction helpful.
Was this instruction helpful to you?
Thank you for voting!
Brown stains on clothes
Removed the door and replace the upper glide and the lower seal. The repair was easy.
Parts Used:

-
Peter from Topsham, ME
-
Difficulty Level:Really Easy
-
Total Repair Time:30 - 60 mins
-
Tools:Nutdriver, Screw drivers
1 person
found this instruction helpful.
Was this instruction helpful to you?
Thank you for voting!
burn marks on clothes
Taking apart the dryer was easy. Pop the top, take out two screws, separate the front panel from the drum. Removed the old felt seals but much remained. Used a wire wheel on my drill to clean off felt and old glue (most difficult part). Applied new glue,used a band clamp, one hour later I reassembled the dryer; works fine. No more burn marks on clothes!
Parts Used:
-
Robert from Camby, IN
-
Difficulty Level:Easy
-
Total Repair Time:30 - 60 mins
1 person
found this instruction helpful.
Was this instruction helpful to you?
Thank you for voting!
Loud squealing
As all others have said, without being redundant, I'd view post #1 or #2 for a good detailed set of instructions.
The primary issue I had was with the stainless steel ball bearing that was shipped with the kit. I couldn't figure out what it was used for, because when I removed the bearing carrier the ball fell out before I could see where the original one was located. The stainless ball bearing is a grounding ball, not a bearing. It goes on the exterior of the plastic bearing carrier/receiver.
Once I figured that part out, it was a piece of cake.
Took a little longer than other people's repairs, but I also put a new belt on and re-worked the exhaust duct for solid ducting versus flexible duct. fine-tuning the rigid duct work was a piece of cake with the tumbler out, since i could crawl right inside the chassis and make sure everything would line up (level legs, adjust elbows, etc)
The primary issue I had was with the stainless steel ball bearing that was shipped with the kit. I couldn't figure out what it was used for, because when I removed the bearing carrier the ball fell out before I could see where the original one was located. The stainless ball bearing is a grounding ball, not a bearing. It goes on the exterior of the plastic bearing carrier/receiver.
Once I figured that part out, it was a piece of cake.
Took a little longer than other people's repairs, but I also put a new belt on and re-worked the exhaust duct for solid ducting versus flexible duct. fine-tuning the rigid duct work was a piece of cake with the tumbler out, since i could crawl right inside the chassis and make sure everything would line up (level legs, adjust elbows, etc)
Parts Used:
-
John from Avis, PA
-
Difficulty Level:Really Easy
-
Total Repair Time:30 - 60 mins
-
Tools:Nutdriver, Pliers, Screw drivers
1 person
found this instruction helpful.
Was this instruction helpful to you?
Thank you for voting!