




















FDE747RES0 Frigidaire Dryer - Instructions
Keep searches simple. Use keywords, e.g. "leaking", "pump", "broken" or "fit".
screeching dryer
Open the top cover by pushing the retention clips in from the front (just under the top edge) with the putty knife - that was the hardest to figure out - I found it online.
The rest is just 4 screws - 2 inside to release the plastic filter holder and two on the inner edges of the front panel.
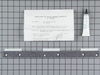
Took the front off, ripped the old slider, cleaned the glue residue with alcohol and mineral spirits and a lot of scrubbing, vacuumed all the lint from the fan.
Then glued the new slider in place and clamped it together. Didnt know how long the glue takes so I left it overnight, just in case.
It works well now. Cleaning the ducts and the fan with the vacuum hose made a world of an efficiency difference. They should make an easy way to do this for regular maintenance!
The rest is just 4 screws - 2 inside to release the plastic filter holder and two on the inner edges of the front panel.
Took the front off, ripped the old slider, cleaned the glue residue with alcohol and mineral spirits and a lot of scrubbing, vacuumed all the lint from the fan.
Then glued the new slider in place and clamped it together. Didnt know how long the glue takes so I left it overnight, just in case.
It works well now. Cleaning the ducts and the fan with the vacuum hose made a world of an efficiency difference. They should make an easy way to do this for regular maintenance!
Parts Used:
-
Plamen from Alexandria, VA
-
Difficulty Level:Easy
-
Total Repair Time:15 - 30 mins
-
Tools:Pliers, Screw drivers
1 person
found this instruction helpful.
Was this instruction helpful to you?
Thank you for voting!
Rusty streaks on clothes.
I First pulled the top panel up and off from the front. Then, on the inside, removed a square head screw from each side holding the front door panel on. I then pulled off the front panel enough to expose the drum. I then removed the old drum glide with a putty knife, and following instructions supplied with the new glide, glued the new glide into place. I then assembled in reverse order of disassembly.
Parts Used:
-
Arne from Nome, AK
-
Difficulty Level:Easy
-
Total Repair Time:15 - 30 mins
-
Tools:Screw drivers
1 person
found this instruction helpful.
Was this instruction helpful to you?
Thank you for voting!
Dryer was burning clothes
There was a gap between the drum and the front opening. So, we opened the top of the dryer using the putty knife. There are two clips once you find them you just have to push back on them to release the top of the dryer. Then there are two screws that hold the front of the dryer on. Once they are removed the front of the dryer just came off. The kit has glue and instructions past that point and I just followed them.
Parts Used:
-
toshio from canton, GA
-
Difficulty Level:Easy
-
Total Repair Time:15 - 30 mins
-
Tools:Screw drivers
1 person
found this instruction helpful.
Was this instruction helpful to you?
Thank you for voting!
the fan broke in half
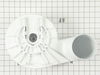
i used one screw driver universal to pop off the cover then, i unscrewed the 2 screws off one on the left side and one on the right side, then useing the screw driver i popped off the left and right off the dryer houseing body their are 2 wires 2 unplug then at the back of the dryer theirs a vent 4 screw take then off then take off the belt then on screw the drum from in side pull out the drum,then 2 more wires to unplug now take off the blower housing with the motor and unscrewed the fan then your done. put it back the same way 15 to 30 mins
Parts Used:
-
PEDRO from BRONX, NY
-
Difficulty Level:Really Easy
-
Total Repair Time:15 - 30 mins
-
Tools:Pliers, Screw drivers
4 of 10 people
found this instruction helpful.
Was this instruction helpful to you?
Thank you for voting!
dryer was squealing loadly
took off face of dryer, removed drum 4 screws removed two srews holding bearing and shaft ,replaced shaft bearing and shaft . Just for preventive maintenance i replaced idleling arm and dryer belt. I lined everything up replaced drum used shop vac to clean lint and dust from all parts replaced face of dryer and boom i got a btand new dryer
Parts Used:
-
MIKE from MASSAPEQUA PARK, NY
-
Difficulty Level:Really Easy
-
Total Repair Time:15 - 30 mins
-
Tools:Pliers, Screw drivers, Wrench set
1 person
found this instruction helpful.
Was this instruction helpful to you?
Thank you for voting!
The clothes was getting stuck on the tumbler
First I removed the 2 screws on the back. These 2 screws hold the top cover. I also used a flat screw driver to press the 2 locks that hold the top cover, they are located in front and under the top cover . Then I removed the 2 screws that hold the front cover. After removing the front cover I replaced the drum glider and the seal-basket lower. Now my dryer is working perfectly...
Parts Used:
-
Juan from Dallas, TX
-
Difficulty Level:Easy
-
Total Repair Time:15 - 30 mins
-
Tools:Screw drivers
1 person
found this instruction helpful.
Was this instruction helpful to you?
Thank you for voting!
door handle on washer broke.
Took out of package. Used screw driver to pop off old broken handle.
Installed new part in a minute or two. Nothing to it. Was very pleased to get the part and so easy to install.
Installed new part in a minute or two. Nothing to it. Was very pleased to get the part and so easy to install.
Parts Used:

-
Donna from BAKERSFIELD, CA
-
Difficulty Level:Really Easy
-
Total Repair Time:Less than 15 mins
-
Tools:Screw drivers
1 person
found this instruction helpful.
Was this instruction helpful to you?
Thank you for voting!
The timer knob on my dryer broke off
When the part was delivered I opened the box and unwrapped the knob from the protective paper. I walked down the whole length of my hallway to the laundry room and carefully approached the dryer. Stealthily I reached across the top of the dryer and slid the knob onto the metal rod. Voila! I am now a certified Frigidaire Clothesdryer Repairperson!!
Parts Used:
-
Joyce from Locust Grove, VA
-
Difficulty Level:Very Difficult
-
Total Repair Time:Less than 15 mins
2 of 4 people
found this instruction helpful.
Was this instruction helpful to you?
Thank you for voting!
Broken door handle
I unscrewed the 2 screws on the side of the door and the 2 screws on the bottom of the door, removed the broken handle and r replaced it with the new one.
Parts Used:
-
Susan from FULLERTON, CA
-
Difficulty Level:Very Easy
-
Total Repair Time:Less than 15 mins
-
Tools:Screw drivers
1 person
found this instruction helpful.
Was this instruction helpful to you?
Thank you for voting!
knob on dryer broke so it wouldn't turn the timer on
I know that the knobs on the Gibson dryers break as they are plastic and the back cracks so it won't turn. I have had to get several new ones over the years. I went to Google put in Gibson dryer knob and found it, I had the model number so that helped. I had the part within 24 hrs, awesome service from PartSelect.
Emma W
Emma W
Parts Used:
-
Emma from Omaha, NE
-
Difficulty Level:Really Easy
-
Total Repair Time:Less than 15 mins
1 person
found this instruction helpful.
Was this instruction helpful to you?
Thank you for voting!
The timer knob broke
Opened the plastic bag, took out the new knob, slid it on and DONE I'm not using pliers anymore!!
Parts Used:
-
Kymd from Campobello, SC
-
Difficulty Level:Really Easy
-
Total Repair Time:Less than 15 mins
1 person
found this instruction helpful.
Was this instruction helpful to you?
Thank you for voting!
clothes getting stuck in dryercausing brown stains on clothes
Opened top of dryer with screw driver,removed two screws securing the front door. moved door away from dryer. Removed old felt from door,scraped area to remove old glue and felt. Lightly sanded area to clean. Applied new provided glue and let set for 1 minute. put new felt in place and applied three small clamps to hold in place. Waited 1 hour and reassembled dryer.
Parts Used:
-
Kenneth C. from Fort Valley, GA
-
Difficulty Level:Really Easy
-
Total Repair Time:Less than 15 mins
1 person
found this instruction helpful.
Was this instruction helpful to you?
Thank you for voting!
Timer Knob broke off
-
Regina from Richmond, KY
-
Difficulty Level:Really Easy
-
Total Repair Time:Less than 15 mins
1 person
found this instruction helpful.
Was this instruction helpful to you?
Thank you for voting!
Timer knob broke on the dryer
-
BARRY from HARRISBURG, PA
-
Difficulty Level:Really Easy
-
Total Repair Time:Less than 15 mins
1 person
found this instruction helpful.
Was this instruction helpful to you?
Thank you for voting!
Our Clothes Would Get Caught In Between The Drum & The Front Cover, Making Marks On The Clothes.
I unpluged the dryer, raised the top cover up, removed 2 two screws & pulled front cover out. Removed the old seal, cleaned the area & installed the new seal. Reinstalled as new. Very, very easy.
Parts Used:
-
EDWARD from EDISON, NJ
-
Difficulty Level:Really Easy
-
Total Repair Time:Less than 15 mins
-
Tools:Screw drivers
1 person
found this instruction helpful.
Was this instruction helpful to you?
Thank you for voting!