




















FCRG3052AWE Electrolux Range - Instructions
Keep searches simple. Use keywords, e.g. "leaking", "pump", "broken" or "fit".
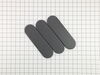
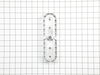
The range at a round burner and the wife wanted an oblong one
Removed 2 3/16 bolts and burner, set the oblong burner over the orifice and we were all done
Parts Used:
-
Cathie from WELLS, NY
-
Difficulty Level:Very Easy
-
Total Repair Time:Less than 15 mins
-
Tools:Nutdriver
2 of 2 people
found this instruction helpful.
Was this instruction helpful to you?
Thank you for voting!
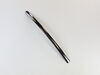
Broken oven door handle
Removed the screws from the door handle removed broken handle installed new handle
Parts Used:
-
John from ZIONSVILLE, IN
-
Difficulty Level:Really Easy
-
Total Repair Time:Less than 15 mins
-
Tools:Screw drivers
2 of 2 people
found this instruction helpful.
Was this instruction helpful to you?
Thank you for voting!
Glide replacement
Drawer glide came off oven drawer. Wish I had taken old part off and inspected more closely. I thought tab had broke off. Turns out these glides are made of steel and very robust. However the drawer is soft sheet metal. I took off the old glide and turned out it was fine. Tab just popped out. But there was a burr on drawer i had to file off to get back on. So my advice is take old glide off first and inspect carefully.
Parts Used:

-
John from KIRKLAND, WA
-
Difficulty Level:Really Easy
-
Total Repair Time:Less than 15 mins
-
Tools:Screw drivers
2 of 2 people
found this instruction helpful.
Was this instruction helpful to you?
Thank you for voting!
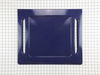
bottom oven plate had foil stuck to it
Very easy to order,part was delivered promptly and installation was easy.I unscrewed a few screws and lifted the bottom panel out and put the new one in.
Parts Used:
-
Wilma from Syracuse, NY
-
Difficulty Level:Really Easy
-
Total Repair Time:Less than 15 mins
-
Tools:Screw drivers
4 of 9 people
found this instruction helpful.
Was this instruction helpful to you?
Thank you for voting!
Oven taking along time to heat up
First thing. If your wife insists on helping buy 2
Because the first one will mysteriously come up broke. Just saying
This is a very easy replacement project. You can do it. TURN POWER OFF TO RANGE BEFORE REPLACING IGNITER Remove a couple screws take the heat shield out. Remove the bottom drawer unplug the igniter remove a couple screws holding the igniter in place. Replace the igniter and screws. Plug in the igniter replace bottom drawer. Screw heat shield back down. Turn power to stove back on. You’re done
Because the first one will mysteriously come up broke. Just saying
This is a very easy replacement project. You can do it. TURN POWER OFF TO RANGE BEFORE REPLACING IGNITER Remove a couple screws take the heat shield out. Remove the bottom drawer unplug the igniter remove a couple screws holding the igniter in place. Replace the igniter and screws. Plug in the igniter replace bottom drawer. Screw heat shield back down. Turn power to stove back on. You’re done
Parts Used:

-
don from GOLDENDALE, WA
-
Difficulty Level:Easy
-
Total Repair Time:30 - 60 mins
-
Tools:Nutdriver, Screw drivers
2 of 3 people
found this instruction helpful.
Was this instruction helpful to you?
Thank you for voting!
Gas stove won’t light on half the appliance
First we replaced the wiring harness because a multi-meter said it wasn’t getting power. That was only partially true. The wiring harness was burned looking so we just kept it instead of sending it back. When the spark module got here the burner caps were removed and then the wires were noted where they went on the module and then the power and gas were turned off. The spark module was removed and then the stove was tested and we were back in business.
Parts Used:
-
Julieta from ELMIRA, NY
-
Difficulty Level:A Bit Difficult
-
Total Repair Time:1- 2 hours
-
Tools:Screw drivers, Socket set
4 of 9 people
found this instruction helpful.
Was this instruction helpful to you?
Thank you for voting!
Oven igniter stopped working
When removing the screws that hold the igniter, the screws stripped. Not my first time so I very slowly removed the screws but they still stripped. I had to cut both with a small hacksaw but be careful not to damage the bracket that is welded to the burner. After successfully removing the screws had to go get 5/16 steel self tapping screws to install the new igniter. Use a self tapping screw to thread the hold first then remove and install the igniter with a new screw. Job was a success. Good luck with yours
Parts Used:
-
Darin from O FALLON, MO
-
Difficulty Level:A Bit Difficult
-
Total Repair Time:1- 2 hours
-
Tools:Nutdriver, Pliers, Screw drivers
1 person
found this instruction helpful.
Was this instruction helpful to you?
Thank you for voting!
Gas smell and test positive
Pulled gas pressure regulator and used OEM replacement part from this site Fit like a glove.
Parts Used:
-
Howard from Lynden, WA
-
Difficulty Level:Very Easy
-
Total Repair Time:30 - 60 mins
-
Tools:Pliers, Screw drivers, Wrench (Adjustable)
1 person
found this instruction helpful.
Was this instruction helpful to you?
Thank you for voting!
handle broke.
had to have another set of hands to hold door layers shut.then lined up screws and handle and used electric drill.
Parts Used:
-
John from Kirkland, WA
-
Difficulty Level:A Bit Difficult
-
Total Repair Time:Less than 15 mins
-
Tools:Screw drivers
1 person
found this instruction helpful.
Was this instruction helpful to you?
Thank you for voting!
Panel finish ruined by tin foil
Removed both oven racks the removed two screws in back. Lifted rear of panel until front lip of panel was free. Installed new panel in reverse order. I was recycled the old steel panel at our local recycling station.
Parts Used:
-
Barry from MOORE, OK
-
Difficulty Level:Easy
-
Total Repair Time:Less than 15 mins
-
Tools:Screw drivers
1 person
found this instruction helpful.
Was this instruction helpful to you?
Thank you for voting!
It was missing

-
Patricia from CREST HILL, IL
-
Difficulty Level:Really Easy
-
Total Repair Time:Less than 15 mins
1 person
found this instruction helpful.
Was this instruction helpful to you?
Thank you for voting!
Replacement of bottom oven panel
Very simple. I removed the oven racks, loosened the two screws that held the old panel in place, lifted out the old panel and replaced it with the new one, then tightened the screws to hold the new panel in place. It took no more than 10 minutes.
Parts Used:
-
Eileen from AKRON, OH
-
Difficulty Level:Very Easy
-
Total Repair Time:Less than 15 mins
-
Tools:Screw drivers
1 person
found this instruction helpful.
Was this instruction helpful to you?
Thank you for voting!
Broken oven door cap.
-
James from LAKEWOOD, OH
-
Difficulty Level:Really Easy
-
Total Repair Time:15 - 30 mins
-
Tools:Screw drivers
1 person
found this instruction helpful.
Was this instruction helpful to you?
Thank you for voting!
Oven bottom panel
Unscrewed old panel/removed and inserting new panel and used same 2 screws to secure in place.
Parts Used:
-
Maria from NEW ORLEANS, LA
-
Difficulty Level:Very Easy
-
Total Repair Time:Less than 15 mins
-
Tools:Screw drivers
1 of 2 people
found this instruction helpful.
Was this instruction helpful to you?
Thank you for voting!
light bilb went out

-
Denise from Landover, MD
-
Difficulty Level:Really Easy
-
Total Repair Time:Less than 15 mins
2 of 6 people
found this instruction helpful.
Was this instruction helpful to you?
Thank you for voting!