




















F31C747CT0 Frigidaire Dryer - Instructions
Keep searches simple. Use keywords, e.g. "leaking", "pump", "broken" or "fit".
Dryer Belt Broke & Would Not Spin
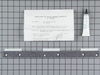
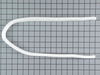
First I pulled up on top panel. Next I removed the two screws holding on the front panel on. Next I pulled forward and front panel pulls out. I cleaned the old upper & lower drum glide & drum seal using a razor blade. I used the high temp glue that came with the top glide. I glued them both on & let sit for about half hour. While the glued dried I installed new belt & belt idler pulley. I re-assembled the front panel while lining up the drum. Re-installed the 2 screws. Snapped the top panel back in place. Plugged it back in & turned it on. Awesome noise was gone & working great.
Parts Used:
-
ROBERT from LAKE ELSINORE, CA
-
Difficulty Level:Easy
-
Total Repair Time:30 - 60 mins
-
Tools:Screw drivers, Socket set
1 of 2 people
found this instruction helpful.
Was this instruction helpful to you?
Thank you for voting!
Drum Glide worn out - loud screeching noise.
I popped the top lid of the dryer which has hinges in the rear allowing it to be lifted. This exposes the drum. The front panel then can be detached using a nut driver and phillips screwdriver. The door shut off switch must be then removed so the front panel can be pulled away. I used an adjustable wrench to remove the lock nut. Once the front panel is clear of the drum, the felt and nylon glides are exposed. I removed the felt using a paint scraper, and cleaned the adhesive residue with lacquer thinner. The provided high temperature adhesive was then applied, I waited a minute per the directions, then applied the new felt and glides. The dryer reassembles in reverse of the above disassembly, making sure not to forget to reinstall the door switch. I plugged the dryer back in, and ran a load of laundry in quiet efficiency. Your part arrived quickly, the directions were good, and the dryer now works wonderfully.
Parts Used:
-
Jack from Phoenix, AZ
-
Difficulty Level:Easy
-
Total Repair Time:30 - 60 mins
-
Tools:Nutdriver, Pliers, Screw drivers, Wrench (Adjustable)
1 of 2 people
found this instruction helpful.
Was this instruction helpful to you?
Thank you for voting!
clothes get stuck and burn in upper drum glide
Found the promblem as described at this site while looking for diagrams for the dyer. Repair went as described. Once I removed the old upper drum glide I used acetone to remove old glue. Cleaned up fast and easy. Once installed I let cure for about an hour and then reassembled. Let it cure for about an hour more and then I used the dyer. I could feel that the gap around the front of the drum was again narrow so that my finger tip would not slide into a grove. So far so good.
Parts Used:
-
DOUGLAS from CHILLICOTHE, OH
-
Difficulty Level:Really Easy
-
Total Repair Time:15 - 30 mins
-
Tools:Screw drivers
1 of 2 people
found this instruction helpful.
Was this instruction helpful to you?
Thank you for voting!
Zippers and other items on clothing getting stuck in drum.
-
Dan from Parker, TX
-
Difficulty Level:Really Easy
-
Total Repair Time:15 - 30 mins
1 of 2 people
found this instruction helpful.
Was this instruction helpful to you?
Thank you for voting!
Dryer made a loud squeaking noise was ready to get a new one
I first diagnosed the problem using a Google search. Amazing how many hits I got and after reading a few was pretty certain what the cause was and what parts I probably needed to make the repair.
Some of the articles I read had links or mentioned PartSelect, so I searched for my model # and found the parts I would probably need. Knowing that I could probably get the parts I needed I disassembled the dryer (pretty easy really) and removed the old suspect part. It was devoid of lubricant and the bearing and ball showed some wear so I ordered the Bearing Assembly suggested by PartSelect (the illustrations looked just like my old parts). I left the dryer disassembled while I waited for the part, figuring it would take a week or so to arrive.
Much to my surprise, the part arrived three days later and after cleaning the dryer innards of all collected lint I put it all back together in 30 minutes.
So for a little research, a $30 part, and about an hour of my time, I have a clean and quiet operating dryer. I see no reason I can't get another 10 or so years out of it.
I consider myself a reasonably handy guy but had never worked on a dryer before. I'll be unlikely to ever call a repairman without first doing some investigation and seeing if the parts are available. With the internet and PartSelect I think I could take on a lot of other repairs I'm not familiar with. Thanks for a great outcome this time around.
Kevin
Some of the articles I read had links or mentioned PartSelect, so I searched for my model # and found the parts I would probably need. Knowing that I could probably get the parts I needed I disassembled the dryer (pretty easy really) and removed the old suspect part. It was devoid of lubricant and the bearing and ball showed some wear so I ordered the Bearing Assembly suggested by PartSelect (the illustrations looked just like my old parts). I left the dryer disassembled while I waited for the part, figuring it would take a week or so to arrive.
Much to my surprise, the part arrived three days later and after cleaning the dryer innards of all collected lint I put it all back together in 30 minutes.
So for a little research, a $30 part, and about an hour of my time, I have a clean and quiet operating dryer. I see no reason I can't get another 10 or so years out of it.
I consider myself a reasonably handy guy but had never worked on a dryer before. I'll be unlikely to ever call a repairman without first doing some investigation and seeing if the parts are available. With the internet and PartSelect I think I could take on a lot of other repairs I'm not familiar with. Thanks for a great outcome this time around.
Kevin
Parts Used:

-
Kevin from Kennewick, WA
-
Difficulty Level:Easy
-
Total Repair Time:30 - 60 mins
-
Tools:Nutdriver, Screw drivers
1 of 2 people
found this instruction helpful.
Was this instruction helpful to you?
Thank you for voting!
Dryer was putting brown spots and tearing clothes.
My husband took the front panel off. We scaped the old seals off. Used the adhesive that came with the drum glide and replaced both parts. No more ripped and stained clothes, that easy!
Parts Used:
-
Angela from Runnemede, NJ
-
Difficulty Level:Easy
-
Total Repair Time:15 - 30 mins
1 of 2 people
found this instruction helpful.
Was this instruction helpful to you?
Thank you for voting!
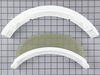
Lint screen was dilapidated and needed replacement.
I took the new screen out of the box. I removed the old lint screen from the dryer, and I put in the new screen. Real simple!
Parts Used:
-
Thomas from Norwich, CT
-
Difficulty Level:Really Easy
-
Total Repair Time:Less than 15 mins
1 of 2 people
found this instruction helpful.
Was this instruction helpful to you?
Thank you for voting!
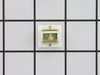
Door catch broke and fell into dryer.
-
Genevieve from NORTH ANDOVER, MA
-
Difficulty Level:Very Easy
-
Total Repair Time:Less than 15 mins
1 of 2 people
found this instruction helpful.
Was this instruction helpful to you?
Thank you for voting!
Lint screen had separated from frame letting lint into vent.
New screen and holder came in, removed screws holding the holder in place and reinstalled new one & dropped the screen in place.
Parts Used:
-
George W. from Wallkill, NY
-
Difficulty Level:Really Easy
-
Total Repair Time:Less than 15 mins
-
Tools:Screw drivers
1 of 2 people
found this instruction helpful.
Was this instruction helpful to you?
Thank you for voting!
The drum belt was making a squealing noise, and it looked frayed.
After watching the video that explained and showed how to replace the bearing assembly, installation was a breeze. Great company to do business with. Ordered the part and had it in two days, and the dryer was working again asap. Thanks PartSelect
PS this dryer is 23 years old.
PS this dryer is 23 years old.
Parts Used:
-
Margery from Hartland, ME
-
Difficulty Level:Really Easy
-
Total Repair Time:15 - 30 mins
-
Tools:Screw drivers, Socket set
1 of 3 people
found this instruction helpful.
Was this instruction helpful to you?
Thank you for voting!
drum turning out of balance, due to worn out drum glide top and bottom, and clothes being cougth beteween dryer frame and drum
I removed the top lid, then removed the front panel, to expose top and bottom drum glides attached to panel, then using a carpenter shisel, and cutting knive scraped away the old worn out glides, wiped clean with acetone the area were the new glides were being cemented. all of this thanks to couple of customers that had the same issues on their dryer, and documented step by step their own way to have this done, I just followed thru their experiences.
Parts Used:
-
guillermo from los angeles, CA
-
Difficulty Level:Easy
-
Total Repair Time:1- 2 hours
-
Tools:Screw drivers
1 of 3 people
found this instruction helpful.
Was this instruction helpful to you?
Thank you for voting!
Rear Drum Bearing replacement
First I have to say that the video on the Parts Select website was invaluable, it truly made the replacement a no brainer. The kit came with everything I need and was a great price.
Unplug the dryer, mine is a stackable so we had to remove the dry from the top of the washer. I then followed the instructions from the video. The only real difference was that my dryer is that is has dual direction tumbling, so there were 2 idler arms instead of one to move in order to un hook the belt. was pretty easy.
I only needed my husband's help a couple of times because 1. To get the dryer off of the washer. And 2. I didn’t have the reach to install the new bearing on the back of the drum.
Unplug the dryer, mine is a stackable so we had to remove the dry from the top of the washer. I then followed the instructions from the video. The only real difference was that my dryer is that is has dual direction tumbling, so there were 2 idler arms instead of one to move in order to un hook the belt. was pretty easy.
I only needed my husband's help a couple of times because 1. To get the dryer off of the washer. And 2. I didn’t have the reach to install the new bearing on the back of the drum.
Parts Used:
-
Samantha from Portland, OR
-
Difficulty Level:Easy
-
Total Repair Time:1- 2 hours
-
Tools:Nutdriver, Screw drivers
0 of 1 people
found this instruction helpful.
Was this instruction helpful to you?
Thank you for voting!
Loud squealing
Taking it apart was no problem other than having to remove solidified grease in order to remove bearing. Also I found it easier to remove belt by removing screws holding drum in place first. Putting it back together was more involved. Taping metal strip to back with scotch tape made putting in new bracket a breeze. Tipping dryer on its' back was the only way I could get the screw holes to line up when installing the drum. Removing the vent cover, and installing from the back, made re-installing the belt tensioner much easier.
Parts Used:
-
Gale from Portland, OR
-
Difficulty Level:Easy
-
Total Repair Time:30 - 60 mins
-
Tools:Nutdriver, Screw drivers
0 of 1 people
found this instruction helpful.
Was this instruction helpful to you?
Thank you for voting!
Dryer was making loud squeak
This was for my Daughter's dryer. A helper really makes this quick and easy. First of all-UNPLUG the unit from the wall. I pried the top up with flat screwdriver. Laid the top back against wall. Removed the two wires from the door cut-off switch. Then removed the two screw attaching the front to the cabinet. Removed the small access panel on back of cabinet. Depressed the belt tensioner to release pressure on the leather drive belt. Went back to front, pushed the belt to the rear of cabinet, then lifted the back of drum to pop the bearing up and out of the plastic cup. I then tilted the drum forward and down and removed through front of cabinet. Reached inside the drum with Phillips screwdriver, removing the two screws to realease the bearing and BB bracket from back of drum. I attached the new bearing cup with BB to the back of cabinet, filling the cup with the high temp grease provided in the cup. Before installing the new bearing on the drum, I ran the new screws into and back out of the new bearing to cut the threads, making it easier to attach on the drum. I then put the drum back into the cabinet popping the bearing into the top of the plastic cup. Next I went to the back, put a bit of grease on the shaft that the tensioner bearing rides on. I re-set the belt on the tensioner, making sure the belt was back in the original position around the drum. I then re-attached the front cabinet centering the front of the drum on the felt. This felt supports the front of the drum. I manually gave the drum a few turns to make sure the drum was centered properly, and belt was mounted correctly. I then re-attached the two wires to the door switch. Slid the dryer into position, inserted the plug back into the outlet. Turmed it on, and now the dryer runs like new again. My Daughter is happy again. You will want to have a vac handy because it is unbelievable how much lint and dust are in the cabinet. I also took the filter bracket apart and cleaned it too.
Parts Used:
-
William from Flowery Branch, GA
-
Difficulty Level:Easy
-
Total Repair Time:30 - 60 mins
-
Tools:Pliers, Screw drivers, Wrench (Adjustable)
0 of 1 people
found this instruction helpful.
Was this instruction helpful to you?
Thank you for voting!
clothes getting caught between drum and front of machine leaving rust marks
* Clean off top of stackable dryer and remove top lid (pops off w/ screwdriver)
* Disconnect power supply and control wiring (right side under top lid)
* Remove left and right single screws securing front face of dryer
* Pop off dryer face w/ screwdriver
* Remove existing top glide from dryer face (peels off, use screwdriver or chisel/scraper to remove residue from felt and glue)
* Test fit new top glide
* Apply adhesive (included) to dryer face rim
* Clamp with 4 or so spring clamps and allow adhesive to set up (I waited about 30 minutes).
* Clean and inspect inside of dryer while the front face is off
* Clean dryer vent assembly (attached to dryer face)
* Reassemble and test easy rotation of the drum prior to use
* Disconnect power supply and control wiring (right side under top lid)
* Remove left and right single screws securing front face of dryer
* Pop off dryer face w/ screwdriver
* Remove existing top glide from dryer face (peels off, use screwdriver or chisel/scraper to remove residue from felt and glue)
* Test fit new top glide
* Apply adhesive (included) to dryer face rim
* Clamp with 4 or so spring clamps and allow adhesive to set up (I waited about 30 minutes).
* Clean and inspect inside of dryer while the front face is off
* Clean dryer vent assembly (attached to dryer face)
* Reassemble and test easy rotation of the drum prior to use
Parts Used:
-
John from Tomahawk, WI
-
Difficulty Level:Easy
-
Total Repair Time:30 - 60 mins
-
Tools:Screw drivers
0 of 1 people
found this instruction helpful.
Was this instruction helpful to you?
Thank you for voting!