




















ET8FTEXSQ01 Whirlpool Refrigerator - Instructions
Keep searches simple. Use keywords, e.g. "leaking", "pump", "broken" or "fit".
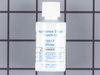
Scratches in Surface
This product comes in a bottle with a brush like Liquid Paper. It goes on incredibly easy. A second coat might be needed. I wanted to prevent rust from setting in so I covered the scratches and dings. The paint is a little brighter since my washer is 10 years old but it still looks great.
Parts Used:
-
Michelle from Richardson, TX
-
Difficulty Level:Really Easy
-
Total Repair Time:Less than 15 mins
83 of 227 people
found this instruction helpful.
Was this instruction helpful to you?
Thank you for voting!
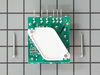
no auto defrost
Quoted $275 to fix, paid $65 for the part , Installed the new part in about 15 min. very easy, removed 2 small screws, and plugged in new part.
Parts Used:
-
Matthew from Miller Place, NY
-
Difficulty Level:Really Easy
-
Total Repair Time:Less than 15 mins
-
Tools:Socket set
15 of 23 people
found this instruction helpful.
Was this instruction helpful to you?
Thank you for voting!
Motor slowing down and speeding up off and on
Unplugged the machine removed the bottom plate and back plate and ice maker.Removed 2 wires to motor and ground wire.Removed 2 mounting nuts for motor,installed new motor and used old fan blade for new motor .Reinstalled in reverse order plugged in and tested fine.
Parts Used:

-
James from Aubrey, TX
-
Difficulty Level:Easy
-
Total Repair Time:15 - 30 mins
-
Tools:Nutdriver, Screw drivers
12 of 16 people
found this instruction helpful.
Was this instruction helpful to you?
Thank you for voting!
installed ice maker
From the time I started to finish I worked 3 hours, this included installing the new ice maker, cutting into the cold water line in the basement and installing a t with a 6inch piece of pipe with a compression valve to connect to the small cooper tube, this is worth your time to do it this way, its a lot better connection than the small pierce valves that come with the kit, they will leak over time. I installed the filter in the waterline in the basement for easy access
Parts Used:

-
Dennis from Spring Valley, MN
-
Difficulty Level:Easy
-
Total Repair Time:15 - 30 mins
-
Tools:Nutdriver, Pliers, Screw drivers, Wrench set
13 of 19 people
found this instruction helpful.
Was this instruction helpful to you?
Thank you for voting!
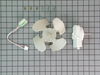
Loud noise
There was a loud noise coming from the fridge - we ordered the new part it came a lot sooner than we excepted and we replaced it in about 20 minutes- the hardest part was my husband getting his hand in there to put the screws in- but a very easy fix.
Parts Used:
-
Britney from Wilmington, OH
-
Difficulty Level:Easy
-
Total Repair Time:15 - 30 mins
-
Tools:Socket set
11 of 13 people
found this instruction helpful.
Was this instruction helpful to you?
Thank you for voting!
Didn't know if I needed Left or Right.
The item is listed as R, meaning right hand side. If you need it for the left hand side, simple turn it over. It is designed to work on both sides of the door.
Parts Used:

-
Joyce from Kerrville, TX
-
Difficulty Level:Really Easy
-
Total Repair Time:Less than 15 mins
11 of 14 people
found this instruction helpful.
Was this instruction helpful to you?
Thank you for voting!
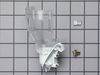
socket melted with bulb in it.
-
martin l. from JACKSONVILLE,, IL
-
Difficulty Level:Really Easy
-
Total Repair Time:Less than 15 mins
12 of 18 people
found this instruction helpful.
Was this instruction helpful to you?
Thank you for voting!
Freezer not coolling properly. Lower temp. 2 degrees upper temp. 60 degrees.
Take bottom racks and baskets out of freezer. Remove back sheet metal panel, 8 screws. Remove motor and bracket, 2 screws. Umplug wires on motor. Remove two more screws to take mounting bracket off motor. Install in reverse order. Simple job. Maybe 20 minutes. Besure to shut freezer off before startin work.
Parts Used:
-
John from Blairsville, GA
-
Difficulty Level:Really Easy
-
Total Repair Time:15 - 30 mins
-
Tools:Nutdriver
10 of 12 people
found this instruction helpful.
Was this instruction helpful to you?
Thank you for voting!
water collecting under the vegatable drawers
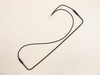
I replaced the bi-metal thermostat. Very easy fix. It took a couple of days and the water stopped collecting at the bottom.I am very pleased with the web site.
Parts Used:
-
Gary from BILLERICA, MA
-
Difficulty Level:Very Easy
-
Total Repair Time:30 - 60 mins
-
Tools:Screw drivers
9 of 10 people
found this instruction helpful.
Was this instruction helpful to you?
Thank you for voting!
There was no light on in refrig area
Just replaced the switch, but unfortunately that was not the problem; nor was it the bulb....so I am back to square one.
But Parts Select is a great place to order from. Thank you.
But Parts Select is a great place to order from. Thank you.
Parts Used:

-
Lori from Chuluota, FL
-
Difficulty Level:Easy
-
Total Repair Time:Less than 15 mins
-
Tools:Screw drivers
12 of 19 people
found this instruction helpful.
Was this instruction helpful to you?
Thank you for voting!
The Freezer defrosted and everything on the top and the bottom spoiled
i had used your web site before and i read several problems that your readers had. i went to the back of the unit, removed the bottom cover and right there the i found the run capacitor and i chaged it. since i had only ordered this part to save money i went back and ordered the Start Device which when i took it off it was completely burned. the replacement part came labeled with 2 different compressor #, so i picked the one that i had and unpluged each wire. the part may differ from the one that it's in the unit but it worked when i pluged everything back on. it also helps to take a picture of everything before removing the wires in case you have to leave it and come back later. i hope to use this refrigerator another 10 years. thank you all for your help.
Parts Used:

-
Jorge from Miami, FL
-
Difficulty Level:Easy
-
Total Repair Time:15 - 30 mins
-
Tools:Nutdriver
10 of 16 people
found this instruction helpful.
Was this instruction helpful to you?
Thank you for voting!
fan making bad bearing noise
r&r fan blade and motor. with the parts you supplied it was easy. the parts were perrrrfect. thank you very much. job well done. bruce
Parts Used:
-
Bruce from Malvern, OH
-
Difficulty Level:Easy
-
Total Repair Time:30 - 60 mins
-
Tools:Nutdriver, Screw drivers, Socket set
8 of 11 people
found this instruction helpful.
Was this instruction helpful to you?
Thank you for voting!
light not working in fridge
It was so easy!
Thanks for the rush to my home on the part.
I just unscrewed the plate that locks in the light switch (screwdriver) and unplugged the old faulty part and plugged in the new switch, screwed the cover back on and I was done!
Easy!
And I am not Mr. Fix-it!
Thanks for the rush to my home on the part.
I just unscrewed the plate that locks in the light switch (screwdriver) and unplugged the old faulty part and plugged in the new switch, screwed the cover back on and I was done!
Easy!
And I am not Mr. Fix-it!
Parts Used:
-
Michael from East Meadow, NY
-
Difficulty Level:Really Easy
-
Total Repair Time:Less than 15 mins
-
Tools:Screw drivers
7 of 8 people
found this instruction helpful.
Was this instruction helpful to you?
Thank you for voting!
Broken door handle
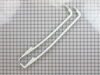
I removed screws, removed handles, replaced screws and both handles.
Parts Used:
-
Larry from Midlothian, MD
-
Difficulty Level:Really Easy
-
Total Repair Time:Less than 15 mins
-
Tools:Screw drivers
7 of 9 people
found this instruction helpful.
Was this instruction helpful to you?
Thank you for voting!
The old motor has built in wire harness. The new motor has connectors on it.
Remove and clean out everything from the freezer and unplug the refrigerator. Take out the wire shelf in the freezer. (The fan motor is behind the back wall of the freezer, SO YOU CAN KEEP THE REFRIGERATOR CLOSED). Pop off the little cover on the center of the plastic shroud. Remove the little screw and carefully remove the plastic shroud. Remove the plastic cover for the optional ice maker on the upper left corner of the back wall. Take out the two screws in the upper corners on the back wall of the freezer and the last two screws holding the fan motor. The fan motor won't drop, remove the back wall and you will see two screws holding the motor mount. Remover those two screws, and pop the bracket out and separate.Take the two rubber motor mounts off the ends of the old motor and install them on the new motor. (Now you will have to cut the wires off the old motor), unplug the little wire harness, strip the ends and crimp on wire connectors to plug them onto your new motor. Its an AC motor so it shouldn't matter which hot goes on which of the two terminals. JUST MAKE SURE THE GROUND IS CORRECT! (After reinstalling the motor, plug in the refrigerator, turn it on before installing the shroud and make sure the fan is blowing outward. If all is correct, turn the refrigerator off, unplug and finish assembling the freezer. I found the new motor seems to run more efficiently than the old one.
Parts Used:
-
Leo from EAGLE, WI
-
Difficulty Level:A Bit Difficult
-
Total Repair Time:30 - 60 mins
-
Tools:Nutdriver, Pliers, Screw drivers
6 of 6 people
found this instruction helpful.
Was this instruction helpful to you?
Thank you for voting!