




















ER8GHKXMQ02 Whirlpool Refrigerator - Instructions
Keep searches simple. Use keywords, e.g. "leaking", "pump", "broken" or "fit".
ordered a new ice maker, new refrigerator did not come with one.
I watched the video that was included with my on line order, it was helpful, although different model shown . I would say it was not difficult to install, the enclosed instructions were a bit confusing.
Parts Used:

-
Scott from ROCHESTER, NY
-
Difficulty Level:Easy
-
Total Repair Time:30 - 60 mins
-
Tools:Nutdriver, Screw drivers, Wrench (Adjustable)
2 of 2 people
found this instruction helpful.
Was this instruction helpful to you?
Thank you for voting!
Overload was open
New part was similar, except contact blade was for a full 1/4", my model utilizes 1/8". So I cut the blade in half with a hacksaw, filed off the rough edges and reassemblied the connector; attached it to the compressor
Now being a retired electronic engineer; who's great idea was it to hide a klixon inside the connector?
Now being a retired electronic engineer; who's great idea was it to hide a klixon inside the connector?
Parts Used:

-
richard from galena, KS
-
Difficulty Level:A Bit Difficult
-
Total Repair Time:30 - 60 mins
-
Tools:Screw drivers
4 of 8 people
found this instruction helpful.
Was this instruction helpful to you?
Thank you for voting!
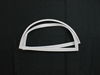
Needed replacement of freezer door gasket
Item #2188462A fit perfectly on my Roper Model #RT14BKXKQ05 MFG DATE 08/05.
I just unscrewed the small screws that held the existing gasket, then I held the new gasket in place with painter tape and screwed it to the door, then removed tape.
I just unscrewed the small screws that held the existing gasket, then I held the new gasket in place with painter tape and screwed it to the door, then removed tape.
Parts Used:
-
MOSES from Starkville, MS
-
Difficulty Level:Really Easy
-
Total Repair Time:30 - 60 mins
-
Tools:Nutdriver
2 of 2 people
found this instruction helpful.
Was this instruction helpful to you?
Thank you for voting!
ice maker
-
Ann from MC CUNE, KS
-
Difficulty Level:Really Easy
-
Total Repair Time:30 - 60 mins
2 of 2 people
found this instruction helpful.
Was this instruction helpful to you?
Thank you for voting!
install ice maker with all parts for refridgerator with no ice cube hardware on it.
-
Vincent from THE VILLAGES, FL
-
Difficulty Level:Really Easy
-
Total Repair Time:1- 2 hours
-
Tools:Nutdriver, Pliers, Screw drivers, Socket set, Wrench (Adjustable)
2 of 2 people
found this instruction helpful.
Was this instruction helpful to you?
Thank you for voting!
freezer (later fridge too) wouldn't stay cold~
****Make are you order Capacitor & Starter relay too (we ordered separtely so had to pay shipping twice)**** Super easy just open access panel on back near compressor and remove retention clip with fingers, remove & replace both capacitor & starter, put clip and access panel back on, plug in and allow 8 hours to cool! Works like new again! Hope it goes another 10 years
Parts Used:

-
David from MARYLAND HTS, MO
-
Difficulty Level:Very Easy
-
Total Repair Time:30 - 60 mins
-
Tools:Nutdriver
2 of 3 people
found this instruction helpful.
Was this instruction helpful to you?
Thank you for voting!
Broke light switch while cleaning
use kitchen knife to pry out. replaced switch assemble and pressed back into place. Could not have done this with out help from previous customers. Thanks
Parts Used:

-
Gail from Golden, CO
-
Difficulty Level:Really Easy
-
Total Repair Time:Less than 15 mins
2 of 3 people
found this instruction helpful.
Was this instruction helpful to you?
Thank you for voting!
none
-
Joseph from BONITA SPGS, FL
-
Difficulty Level:Really Easy
-
Total Repair Time:Less than 15 mins
-
Tools:Screw drivers
2 of 3 people
found this instruction helpful.
Was this instruction helpful to you?
Thank you for voting!
The plastic water fill tube got cracked when we moved. I called a parts company and they told me they couldn't just sell me the tube I would have to buy a whole kit for about $50 dollars. I decided to glue the tube. It worked for a while then it started leaking. So I thought I would have to buy
I hand screwed the fill tube into the water tube and stuck it into the freezer hole. I screwed the fill tube to the back of the refrigerator.
Thanks so much! You saved me a bundle!!
Thanks so much! You saved me a bundle!!
Parts Used:

-
Joseph from Chesterfield, MO
-
Difficulty Level:Really Easy
-
Total Repair Time:Less than 15 mins
-
Tools:Screw drivers
3 of 6 people
found this instruction helpful.
Was this instruction helpful to you?
Thank you for voting!
I broke the glass shelf that covers the crisper.
I placed the glass into the frame. I attempted to slide the frame into the refrigerator over the two crisper drawers. It wouldn't go.
My son came to my rescue. "Mother, the drawers slide into the frame". He took the drawers out, put the frame in the refrigerator, placed the glass cover into the frame, then slide the drawers back into the rungs made for them in the frame. Easy peasy! ;
Ordering was made smooth with a good program for finding parts.
Thank you.
My son came to my rescue. "Mother, the drawers slide into the frame". He took the drawers out, put the frame in the refrigerator, placed the glass cover into the frame, then slide the drawers back into the rungs made for them in the frame. Easy peasy! ;
Ordering was made smooth with a good program for finding parts.
Thank you.
Parts Used:

-
Kathryn from CHARLESTON, WV
-
Difficulty Level:Easy
-
Total Repair Time:Less than 15 mins
2 of 3 people
found this instruction helpful.
Was this instruction helpful to you?
Thank you for voting!
3 screws
Ice maker fit perfectly over 2 top screws. I tightened them and put the one on the bottom. I was done in less than 10minutes. Everything fit perfectly as expected. Couldn't have been eaiser. Parts Select is my go to online store.
Parts Used:
-
Michael from SALINA, KS
-
Difficulty Level:Very Easy
-
Total Repair Time:Less than 15 mins
-
Tools:Nutdriver
1 person
found this instruction helpful.
Was this instruction helpful to you?
Thank you for voting!
door hinge broke.

-
Bernard from DONALDSONVLLE, LA
-
Difficulty Level:Really Easy
-
Total Repair Time:15 - 30 mins
-
Tools:Nutdriver, Screw drivers
2 of 4 people
found this instruction helpful.
Was this instruction helpful to you?
Thank you for voting!
Fridge won't start
When you plug in the fridge it will begin to make noise, but never get cool. When you open the door it will stop and will not turn back on.
This part is listed as one that can fix the problem, but the installation video does not match my fridge.
I've replaced the capacitor (PS11757023), the compressor start relay (PS11740412), and condenser fan (PS1957416) and none of them have fixed the problem.
I really don't want to throw this fridge out. Please help! justin@jplt.com
This part is listed as one that can fix the problem, but the installation video does not match my fridge.
I've replaced the capacitor (PS11757023), the compressor start relay (PS11740412), and condenser fan (PS1957416) and none of them have fixed the problem.
I really don't want to throw this fridge out. Please help! justin@jplt.com
Parts Used:
-
Justin from BROOKLYN, NY
-
Difficulty Level:Very Difficult
-
Total Repair Time:15 - 30 mins
-
Tools:Pliers, Screw drivers
1 person
found this instruction helpful.
Was this instruction helpful to you?
Thank you for voting!
Wasn't getting or staying cold enough
Watched the installation video and was able to make repair easily
Parts Used:
-
Christopher from CASTAIC, CA
-
Difficulty Level:Really Easy
-
Total Repair Time:15 - 30 mins
-
Tools:Nutdriver, Screw drivers
1 person
found this instruction helpful.
Was this instruction helpful to you?
Thank you for voting!
Connection leaked as tube entered freezer
Followed video and had one problen, the metal pipe would not release as shown,so I used a hacksaw between the plastic and metal pipe, removing the metal pipe from inside as the video shows. Good instructions.
Parts Used:
-
Robert from MERRIMACK, NH
-
Difficulty Level:Very Easy
-
Total Repair Time:15 - 30 mins
1 person
found this instruction helpful.
Was this instruction helpful to you?
Thank you for voting!