




















ECBP70WK2WW General Electric Range - Instructions
Keep searches simple. Use keywords, e.g. "leaking", "pump", "broken" or "fit".
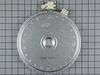
Outer burner was not working
Very simple repair. Remove two screws to lift the range top. Then remove the two screws holding the element in place. Disconnect the wires from the old element, connect the wires to the new element. Reverse the procedure and you are done. Total time is anywhere from 15 to 30 minutes.
Parts Used:
-
Kevin from Leominster, MA
-
Difficulty Level:Easy
-
Total Repair Time:15 - 30 mins
-
Tools:Nutdriver, Screw drivers
2 of 2 people
found this instruction helpful.
Was this instruction helpful to you?
Thank you for voting!
Element would not respond to changes in temperature setting
Turn off power to cook top. Remove 2 screws that hold the cook top to countertop. Lift complete cook top from counter and place diagonally across opening. Remove 10 screws that hold glass top to the component cabinet. Make a diagram of wiring to element. Disconnect wires. Remove 2 mounting brackets from bottom of old element and position them on new element and screw tight. Wire new element as diagrammed earlier. Replace glass top on component cabinet and reinstall 10 screws. Place unit back into counter opening and secure with 2 straps. Turn power back on. Stand back and enjoy your accomplishment.
Parts Used:
-
douglas from chance, VA
-
Difficulty Level:Easy
-
Total Repair Time:15 - 30 mins
-
Tools:Nutdriver, Pliers, Screw drivers
3 of 5 people
found this instruction helpful.
Was this instruction helpful to you?
Thank you for voting!
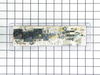
Oven temp wouldn't regulate.
-
Ronald from Crumpler, NC
-
Difficulty Level:Very Easy
-
Total Repair Time:15 - 30 mins
-
Tools:Nutdriver, Pliers, Screw drivers
2 of 2 people
found this instruction helpful.
Was this instruction helpful to you?
Thank you for voting!
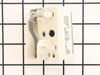
front lift burner not working and surface light on with everything off
unplugged the range removed 4 screws from back top cover then took the knob off controller removed 2 screws from behind the knob removed 1 wirer at a time and placed it on the new controller in same order the wires came off put everything back to gather did not fix the problem .
Parts Used:
-
kevin from GAYLORD, MI
-
Difficulty Level:Really Easy
-
Total Repair Time:15 - 30 mins
-
Tools:Nutdriver, Screw drivers
2 of 2 people
found this instruction helpful.
Was this instruction helpful to you?
Thank you for voting!
Defective switch
Replaced element control switches
Parts Used:
-
Mary from EDENTON, NC
-
Difficulty Level:Easy
-
Total Repair Time:15 - 30 mins
-
Tools:Screw drivers, Socket set
2 of 2 people
found this instruction helpful.
Was this instruction helpful to you?
Thank you for voting!
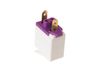
The indicator light stopped working
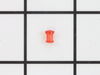
I knew the lens (which also holds the light) was broken. I also ordered the light. I flipped the circuit breaker, raised the stove top and removed the 6 nut-head screws holding the cover plate. A nut driver would have been helpful, but I got by with a 6" crescent wrench. I removed the cover. I unplugged the two wires from the old light and plugged in the new one. I inserted the new lens and slipped the light over it. I flipped the circuit breaker on to make sure it worked. After flipping the circuit breaker off, I replaced the cover plates and the screws and lowered the stove top. I flipped the circuit breaker on. It worked!
Parts Used:
-
Charles from Damascus, MD
-
Difficulty Level:Easy
-
Total Repair Time:15 - 30 mins
-
Tools:Wrench (Adjustable)
3 of 5 people
found this instruction helpful.
Was this instruction helpful to you?
Thank you for voting!
Oven drawer open and close incorrectly
First I removed the oven drawer. Verified that the support clips would rest correctly on rail, then review installation document with supports to locate alternate location for replacement supports. I did have to personally locate 2 fastners not provided with the supports ot complete installation. After installation, oven drawer opens and closes smoothly.
Parts Used:

-
James from Goldsboro, NC
-
Difficulty Level:Easy
-
Total Repair Time:Less than 15 mins
-
Tools:Screw drivers
2 of 2 people
found this instruction helpful.
Was this instruction helpful to you?
Thank you for voting!
lights blown out

-
Gerald from WINTERVILLE, GA
-
Difficulty Level:Very Easy
-
Total Repair Time:Less than 15 mins
6 of 14 people
found this instruction helpful.
Was this instruction helpful to you?
Thank you for voting!
Replace Thermostat
Pull oven out away from the wall, unplugged from outlet, removed center cover by removing 5 sheet metal screws. disconnected thermostat sensor from control cable. Opened oven door and removed screw that holds thermostat sensor. Pulled thermostat sensor out replaced with new sensor. Plugged sensor in to control cable. Replace panel and screws. Then my wife made me clean the oven. I recommend making the repair when your wife is not home.
Parts Used:

-
Russell from Morgantown, WV
-
Difficulty Level:Really Easy
-
Total Repair Time:Less than 15 mins
-
Tools:Socket set
2 of 2 people
found this instruction helpful.
Was this instruction helpful to you?
Thank you for voting!
My large burner had "burnt out" and would not turn on
I removed the screws from the underside of the stovetop, lifted up the top, propped it up to keep it from falling (using a large book), and removed the old burner by unscrewing it from the top and removing the wire connections. I then screwed the new burner into the top, and attached the wires back to the burner, dropped the top down (gently and carefully, of course), and screwed the top back down to the rest of the stove. It was fairly quick and painless. Although, putting the stove back into his position was not easy, but that was no fault of the stove!!
Parts Used:
-
Michael from Orlando, FL
-
Difficulty Level:Easy
-
Total Repair Time:30 - 60 mins
-
Tools:Pliers, Screw drivers
2 of 2 people
found this instruction helpful.
Was this instruction helpful to you?
Thank you for voting!
element burned out
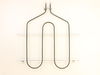
couldn't get exact fit--out of production. mounting bracket at back of range for new element too small. took bracket off old element. cut down bracket on new element with tin snips, drilled holes thru it and old bracket and screwed together. at this point the new element was to long & touched oven door. removed spacers that came with new element (used old support to attached to roof of oven) and pried elements apart (which made element wider & shorter). working good.
Parts Used:
-
raleigh from gresham, OR
-
Difficulty Level:A Bit Difficult
-
Total Repair Time:30 - 60 mins
-
Tools:Nutdriver, Pliers, Screw drivers
2 of 2 people
found this instruction helpful.
Was this instruction helpful to you?
Thank you for voting!
Oven could not be turned off once settings were turned on except by unplugging hookup.
Took back cover panel off (upper) and removed the 4 1/4 inch nut screws. Used nut driver and removed the 4 screws holding control panel in place. Put new panel in place and unhooked electrical connections and installed on new panel. Plugged stove back in and checked operation. All OK, so then put back cover on and everybody is happy.
Parts Used:
-
Charles from BENNETTSVILLE, SC
-
Difficulty Level:Really Easy
-
Total Repair Time:30 - 60 mins
-
Tools:Nutdriver
2 of 2 people
found this instruction helpful.
Was this instruction helpful to you?
Thank you for voting!
Stove overheated with an F2 error
Removed screws holding temp sensor, pulled wire out from behind wall until found connector, disconnected old sensor.
Measured resistance of old sensor and compared with new sensor, they measured nearly the same. Installed the new sensor and tested the stove. Came up to temp ok. No problem since, about 2 weeks.
Measured resistance of old sensor and compared with new sensor, they measured nearly the same. Installed the new sensor and tested the stove. Came up to temp ok. No problem since, about 2 weeks.
Parts Used:
-
Richard from PHOENIX, AZ
-
Difficulty Level:Easy
-
Total Repair Time:15 - 30 mins
-
Tools:Nutdriver
2 of 2 people
found this instruction helpful.
Was this instruction helpful to you?
Thank you for voting!
Burned out broiler element.
Pulled the stove out from between the cabinets, used a blade screwdriver to pop the oven door retainers down and lifted the oven door out, removed the racks. used a 1/4'' nut driver to remove the 5 screws holding the broiler in place. From the time I unplugged the stove from the outlet until I plugged the stove back in was 15 min. I would suggest wearing gloves because the metal frame around the burner element has sharp edges.
Parts Used:
-
Jack from YORK, PA
-
Difficulty Level:Really Easy
-
Total Repair Time:15 - 30 mins
-
Tools:Nutdriver, Pliers, Screw drivers
2 of 2 people
found this instruction helpful.
Was this instruction helpful to you?
Thank you for voting!
Just didn't work no pwr to it
Killed braker first, removed four screws from back, then unplugged all the wiring, then removed four screw that hold the unit on stove, pealed off the face decal, put that on the new on and just reversed the take off press.
Parts Used:
-
Jerry from HOPEWELL, VA
-
Difficulty Level:Really Easy
-
Total Repair Time:15 - 30 mins
-
Tools:Nutdriver, Screw drivers
2 of 2 people
found this instruction helpful.
Was this instruction helpful to you?
Thank you for voting!