




















E32AF75FPS1 Electrolux Freezer - Instructions
Keep searches simple. Use keywords, e.g. "leaking", "pump", "broken" or "fit".
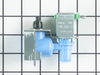
Water Valve was leaking water and not making ice
I unplugged the fridge and unscrewed the back cover,unscrewwd the two screws holding the water valve in place and the water line to the ice maker and the electrical connection and install the new water valve,then buttoned everything back up and plugged the fridge back in and it is working great,making ice as normal.
Parts Used:
-
timothy from georgetown, TN
-
Difficulty Level:Really Easy
-
Total Repair Time:15 - 30 mins
-
Tools:Pliers
13 of 28 people
found this instruction helpful.
Was this instruction helpful to you?
Thank you for voting!
Freezer was freezing solid
I first replaced the defrost timer about a week prior and it did not correct the problem. I then ordered the thermostat from partselect and within 15 minutes had the part installed. My refridgerator has been running correctly for a couple weeks.
Parts Used:
-
Matt from Cincinnati, OH
-
Difficulty Level:Easy
-
Total Repair Time:Less than 15 mins
-
Tools:Pliers
6 of 7 people
found this instruction helpful.
Was this instruction helpful to you?
Thank you for voting!
Fridge made a hellacious noise and wasn't cooling well
From discussions with friends, I determined the problem might be easy to fix. The fridge made a lot of noise, but the compressor DID come on, and inside the freezer was cold, but the main fridge was warming.
After unplugging the fridge, I removed the fan assembly in the freezer (there were about 4 nuts and a couple of plugs to uncouple.
I could see right away the fan blades has broken off, but the motor looked good. The new new fan pushed easily onto the shift and fit perfectly in the housing.
I reinstalled the fan assembly, plugged in the fridge, and right away heard the new fan come on - very quietly. What was a roar became a whisper and the fridge was down to 38 degrees with a few hours.
After unplugging the fridge, I removed the fan assembly in the freezer (there were about 4 nuts and a couple of plugs to uncouple.
I could see right away the fan blades has broken off, but the motor looked good. The new new fan pushed easily onto the shift and fit perfectly in the housing.
I reinstalled the fan assembly, plugged in the fridge, and right away heard the new fan come on - very quietly. What was a roar became a whisper and the fridge was down to 38 degrees with a few hours.
Parts Used:

-
Bruce from MARTINEZ, CA
-
Difficulty Level:Really Easy
-
Total Repair Time:Less than 15 mins
-
Tools:Nutdriver
5 of 5 people
found this instruction helpful.
Was this instruction helpful to you?
Thank you for voting!
Freezer wouln't start
First I removed the clamp, pulled out the part, and diconnected the two wires on the side and a small screw. Reconnected the new part with the small screw, connected the wires and plugged the part back to the side of the motor. Whaa La, Done.
Parts Used:
-
Ivette from Grand Island, NY
-
Difficulty Level:Really Easy
-
Total Repair Time:Less than 15 mins
-
Tools:Screw drivers
7 of 11 people
found this instruction helpful.
Was this instruction helpful to you?
Thank you for voting!
Replace ice maker which was splashing water
Turn off ice maker
Slide wire harness shield off connector
Disconnected harness
Loosened 2 wall screws
Remove old ice maker
Installed new one reversing process
Slide wire harness shield off connector
Disconnected harness
Loosened 2 wall screws
Remove old ice maker
Installed new one reversing process
Parts Used:
-
John from PHOENIX, AZ
-
Difficulty Level:Really Easy
-
Total Repair Time:15 - 30 mins
-
Tools:Screw drivers, Wrench set
5 of 5 people
found this instruction helpful.
Was this instruction helpful to you?
Thank you for voting!
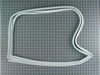
Original gasket was not sealing properly. Appears to be original faulty installation
After receiving the part in the mail I removed it from the box and laid it flay on the floor. I had to use a hair dryer to CAREFULLY work it flat from the shipping. This took about an hour and a glass of scotch. I then let it sit over night to get the gasket as flat as possible. The next day I unloaded the freezer, unplugged it, and pulled the old gasket off by removing all the screws. I carefully slide the seal out of the track and did not remove the cover from the door. I left the door open for a couple hours to completely melt all of the ice and clean out the interior. I put the top and bottom of the seal in the track and carefully worked the sides in. It helps if you use a few screws to hold the gasket in place. Then easily pull the gasket to position it correctly. Using a screw gun with a clutch will help since there are quite a few screws. Check the seal by closing the door and see how it seals. It may be necessary to use the hair dryer to get the seal to pull up to the freezer body. Close the door and plug it it. Wait a few hours before putting in any food. Take your time and having a helper will make it go quicker.
Parts Used:
-
Keith from BOSSIER CITY, LA
-
Difficulty Level:Easy
-
Total Repair Time:30 - 60 mins
-
Tools:Screw drivers
5 of 5 people
found this instruction helpful.
Was this instruction helpful to you?
Thank you for voting!
Icemaker stopped making ice and i knew it wasnt the mechanism since I could hear that working when I unplugged and plugged the unit back on.
I found a couple of videos online of a similar product fix to get a lay of the land. When I got the part, I unplugged the unit and turned off the water. It was easy to take off the back panel and remove the old water intake valve to swap it out for the new one. Once I attached everything again I could see that the valve was taking up water but it didnt seem to be going all the way to the icemaker. I gave it some time and by the next day, there was fresh ice!
Parts Used:
-
Jennifer from BUFFALO, NY
-
Difficulty Level:Really Easy
-
Total Repair Time:15 - 30 mins
-
Tools:Screw drivers
5 of 6 people
found this instruction helpful.
Was this instruction helpful to you?
Thank you for voting!
I had a broken fan blade due to ice build up from a leaking ice maker.
1. I took out one screw on the ice maker and loosened the other two screws and unplugged and removed the ice maker.
2. Next I took out 2 screws from the bottom of the auger drive box and unplugged the wiring harness and removed the box. The wiring harness was a little tricky. The lock on the plug pushes in to unlock even though it looks like it pulls out,.
3.next you must remove 2 screws from the left side bracket that holds the auger box and remove the bracket.
4.Now take out 8 screws that hold the back panel in place and remove the back panel.
5. now your looking at the evaporator fan blade and motor. The simple way to replace the fan blade is to unplug the motor and remove it from the freezer. It just sits in with nothing holding it. The fan requires a little pressure but should pull right off. Install new fan blade and put everything back in the same order it was removed.
2. Next I took out 2 screws from the bottom of the auger drive box and unplugged the wiring harness and removed the box. The wiring harness was a little tricky. The lock on the plug pushes in to unlock even though it looks like it pulls out,.
3.next you must remove 2 screws from the left side bracket that holds the auger box and remove the bracket.
4.Now take out 8 screws that hold the back panel in place and remove the back panel.
5. now your looking at the evaporator fan blade and motor. The simple way to replace the fan blade is to unplug the motor and remove it from the freezer. It just sits in with nothing holding it. The fan requires a little pressure but should pull right off. Install new fan blade and put everything back in the same order it was removed.
Parts Used:
-
gary from ARANSAS PASS, TX
-
Difficulty Level:Easy
-
Total Repair Time:30 - 60 mins
-
Tools:Nutdriver
5 of 7 people
found this instruction helpful.
Was this instruction helpful to you?
Thank you for voting!
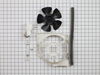
fan motor quit working
A little difficult getting out due to restricted space, I took off the fan blade, that gave extra working room. Then it went well going back together,and it all worked as advertised. Thanks. p
Parts Used:
-
Phillip from SUNDANCE, WY
-
Difficulty Level:Really Easy
-
Total Repair Time:30 - 60 mins
-
Tools:Nutdriver, Pliers, Screw drivers, Socket set, Wrench (Adjustable)
4 of 4 people
found this instruction helpful.
Was this instruction helpful to you?
Thank you for voting!
Warter valvr cracked
It was real easy but I still have problem making ice cubs
Fell problem is in the ice maker went it dose make cubs they don,t dump
Fell problem is in the ice maker went it dose make cubs they don,t dump
Parts Used:
-
Louis from Damascus, PA
-
Difficulty Level:Really Easy
-
Total Repair Time:15 - 30 mins
-
Tools:Nutdriver
7 of 13 people
found this instruction helpful.
Was this instruction helpful to you?
Thank you for voting!
8 loud pops and then dump ice .
Turn off power. Remove ice tray. Back out the two screws with nut driver and just lift ice maker off screws. Do not bend the water fill tube in the back . Now unplug the wire and remove ice maker .
To replace, match the color of wires on plug. Adjust wires in place and water fill tube and back on to the screws. Hold in place and snug screws. Turn power back on. In 4 to 5 hours your ice will start .
FED-EX UT to MN was 13 days to deliver .
To replace, match the color of wires on plug. Adjust wires in place and water fill tube and back on to the screws. Hold in place and snug screws. Turn power back on. In 4 to 5 hours your ice will start .
FED-EX UT to MN was 13 days to deliver .
Parts Used:
-
Douglas from INVER GROVE, MN
-
Difficulty Level:Very Easy
-
Total Repair Time:Less than 15 mins
-
Tools:Nutdriver
4 of 4 people
found this instruction helpful.
Was this instruction helpful to you?
Thank you for voting!
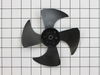
Broken fan blade
I remove the old fan by pushing it off the spindle toward the evaporator and put the new one on by holding it on the right side and guiding it on the spindle from the left side, very easy task
Parts Used:
-
Dennis from WHITEHALL, NY
-
Difficulty Level:Very Easy
-
Total Repair Time:Less than 15 mins
4 of 5 people
found this instruction helpful.
Was this instruction helpful to you?
Thank you for voting!
Every thing went smooth
But I have back ground mechanical skills, I did see the video one time, and everything went smooth......
Parts Used:
-
Micu from MOJAVE, CA
-
Difficulty Level:Really Easy
-
Total Repair Time:15 - 30 mins
-
Tools:Screw drivers, Socket set
4 of 5 people
found this instruction helpful.
Was this instruction helpful to you?
Thank you for voting!
Ice Maker ffss2614qpo
Looked it up on how to, follow the video
. Very easy 1-2-3 it was out and new one in..........??.
. Very easy 1-2-3 it was out and new one in..........??.
Parts Used:
-
Dante from SOUTHOLD, NY
-
Difficulty Level:Really Easy
-
Total Repair Time:15 - 30 mins
-
Tools:Nutdriver, Screw drivers
4 of 5 people
found this instruction helpful.
Was this instruction helpful to you?
Thank you for voting!
freezer would frost up and not get cold enough to keep frozen.
Removed shelves ,removed panel on interior back wall with Philips screwdriver ,unplugged wire terminals slid thermostat off coil ,then reversed process to complete installation.
Parts Used:
-
Richard from SLIDELL, LA
-
Difficulty Level:Very Easy
-
Total Repair Time:15 - 30 mins
-
Tools:Screw drivers
3 of 3 people
found this instruction helpful.
Was this instruction helpful to you?
Thank you for voting!