




















DVM1850SM3SS General Electric Microwave - Instructions
Keep searches simple. Use keywords, e.g. "leaking", "pump", "broken" or "fit".
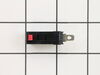
Microwave would run but not heat
Removed the control panel, one screw at the top. Removed 2 screws on the door switch holder and removed the door switch. VERY EASY.
Parts Used:
-
Timothy from MAYSVILLE, GA
-
Difficulty Level:Really Easy
-
Total Repair Time:Less than 15 mins
-
Tools:Screw drivers
1 person
found this instruction helpful.
Was this instruction helpful to you?
Thank you for voting!
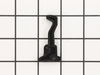
One of the 2 door latches broke
Very easy replacement by taking off the plastic trim and than the front portion of the door. Unscrew the 2 screws holding the door handle. Both pieces just snap off from clips. Next pull the spring off the latch and slide the pin that secures the latch to the door. Install everything by reversing your procedures when taking apart completing the repair.
Parts Used:
-
Duane from BUCKEYE, AZ
-
Difficulty Level:Really Easy
-
Total Repair Time:Less than 15 mins
-
Tools:Pliers, Screw drivers
1 person
found this instruction helpful.
Was this instruction helpful to you?
Thank you for voting!
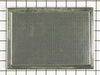
Error message on readout said to change the filter
First I removed the two screws that held the filter cover in place, lifted out the old and replaced it with the new filter. Put the filter cover back on and replaced the two screws that hold it in place, and it was done in less than 5 minutes.
Parts Used:
-
Bonnie from Vandalia, IL
-
Difficulty Level:Really Easy
-
Total Repair Time:Less than 15 mins
-
Tools:Screw drivers
1 person
found this instruction helpful.
Was this instruction helpful to you?
Thank you for voting!
Broken lens
remove two screws bend out flaps remove broken glass install new glas bend flaps back to hold glass install two screws. Done.
Parts Used:
-
Norman from Voorheesville, NY
-
Difficulty Level:Really Easy
-
Total Repair Time:Less than 15 mins
-
Tools:Screw drivers
1 person
found this instruction helpful.
Was this instruction helpful to you?
Thank you for voting!
Water dipenser valve leaking.
-
Lawrence from Cincinnati, OH
-
Difficulty Level:Really Easy
-
Total Repair Time:Less than 15 mins
2 of 4 people
found this instruction helpful.
Was this instruction helpful to you?
Thank you for voting!
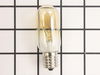
Under the microwave there are two light bulbs that light up the top of the oven/range.
Last week I removed the glass cover that was held in by one screw and removed the burnt out light bulb. I ordered the bulb and left the glass cover off until the bulb arrived. I had to wait until this evening to put the glass cover back on and fasten the screw because I have a window right next to the oven and the sun streaming in made it too difficult for me to see how to put the glass back in and replace the screw.
Parts Used:
-
Janet from TREASURE IS, FL
-
Difficulty Level:Very Easy
-
Total Repair Time:Less than 15 mins
-
Tools:Screw drivers
1 person
found this instruction helpful.
Was this instruction helpful to you?
Thank you for voting!
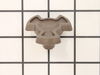
part was cracked
-
BRUCE from MONROE TWP, NJ
-
Difficulty Level:Very Easy
-
Total Repair Time:Less than 15 mins
1 person
found this instruction helpful.
Was this instruction helpful to you?
Thank you for voting!
The center of turn table broke. A small plastic part that goes under the glass in center.
We took out the broken part, it came right out,and put new part .
Parts Used:
-
Kathy from LEWISTON, MI
-
Difficulty Level:Really Easy
-
Total Repair Time:Less than 15 mins
1 person
found this instruction helpful.
Was this instruction helpful to you?
Thank you for voting!
Broken light lense
Removed one screw, installed new lense in lense frame, rescrewed. Done.
Parts Used:
-
George from Marana, AZ
-
Difficulty Level:Really Easy
-
Total Repair Time:Less than 15 mins
-
Tools:Screw drivers
2 of 5 people
found this instruction helpful.
Was this instruction helpful to you?
Thank you for voting!
Replace charcoal filter
-
Clyde from Audubon, PA
-
Difficulty Level:Really Easy
-
Total Repair Time:Less than 15 mins
-
Tools:Screw drivers
1 of 2 people
found this instruction helpful.
Was this instruction helpful to you?
Thank you for voting!
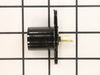
Bulb broke in light socket
Tyring to get bulb out i ruined the light socket. Unscrewed the bottom cover of microware. Took out screw holding light socket, removed wires to socket with pliers, intsalled new socket. It was a piece of cake and the part was a perfect match.
Parts Used:
-
Douglas from Ludington, MI
-
Difficulty Level:Easy
-
Total Repair Time:Less than 15 mins
-
Tools:Pliers, Screw drivers
1 of 2 people
found this instruction helpful.
Was this instruction helpful to you?
Thank you for voting!
bulb burned out -cracked holder lamp
pluged wires back on ,placed lamp holder and bulb back and replaced screws
Parts Used:
-
Terry from Justice, IL
-
Difficulty Level:Easy
-
Total Repair Time:Less than 15 mins
-
Tools:Screw drivers
1 of 2 people
found this instruction helpful.
Was this instruction helpful to you?
Thank you for voting!
broken turntable coupler
removed the bottom panel (6 screws), disconnected the two power terminals, and losened the turntable motor. installed the coupler from inside the microwave, replaced the motor, re-connected the power terminals, and bottom panel.
Parts Used:
-
Ronald from Pinehurst, NC
-
Difficulty Level:Easy
-
Total Repair Time:Less than 15 mins
-
Tools:Screw drivers
1 of 2 people
found this instruction helpful.
Was this instruction helpful to you?
Thank you for voting!
Burned out bulb
-
John from Waterford, WI
-
Difficulty Level:Very Difficult
-
Total Repair Time:More than 2 hours
-
Tools:Nutdriver, Pliers, Screw drivers, Socket set, Wrench (Adjustable), Wrench set
1 of 2 people
found this instruction helpful.
Was this instruction helpful to you?
Thank you for voting!
The bulbs burned out, the glass lens cracked and the light socket broke when trying to remove the bulb
Replaced the sockets, lens and bulbs. The first time the new bulb was touching the lens and the heat broke the lens and burnt out the bulb. The second time I adjusted the socket so that the bulb does not touch the lens.
Impressed by how quickly the parts arrived after the order was submitted. Two days.
Thank you.
Impressed by how quickly the parts arrived after the order was submitted. Two days.
Thank you.
Parts Used:
-
Warren from Council Bluffs, IA
-
Difficulty Level:Easy
-
Total Repair Time:15 - 30 mins
-
Tools:Screw drivers
1 of 2 people
found this instruction helpful.
Was this instruction helpful to you?
Thank you for voting!