




















DV206AES Samsung Dryer - Instructions
Keep searches simple. Use keywords, e.g. "leaking", "pump", "broken" or "fit".
Dryer did not function
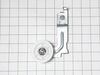
I removed the dryer vent and cover to take a look at the inside of unit. Then I saw that wheel on the pulley was damaged and belt was tangled up. I simply replaced the pulley and placed the belt back. Samsung advised that I replace the unit, but myself $800+ on a new unit.
Parts Used:

-
Jonathan from PEMBROKE PNES, FL
-
Difficulty Level:Easy
-
Total Repair Time:15 - 30 mins
-
Tools:Nutdriver, Screw drivers, Socket set
2 of 2 people
found this instruction helpful.
Was this instruction helpful to you?
Thank you for voting!
Heating coil went ..
Dryer was pretty easy to disassemble. The video helped, especially when re-routing the drive belt. Would definitely but from Parts Select again!
Parts Used:

-
Peter from TROY, NY
-
Difficulty Level:A Bit Difficult
-
Total Repair Time:30 - 60 mins
-
Tools:Nutdriver, Screw drivers
2 of 2 people
found this instruction helpful.
Was this instruction helpful to you?
Thank you for voting!
squeeky (like a loose belt) and loose sounding
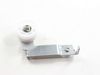
This repair is easy. The only drag to this repair is you need to almost completely dismantle the dryer just to get to it. So keep track of your screws.........Look on you tube for videos to dismantle the dryer, you will need to take this down to the drum to change....Once I replaced the pulley, it was about 30 minutes later the dryer was operational again.
Parts Used:

-
Matt from RIVERBANK, CA
-
Difficulty Level:Easy
-
Total Repair Time:30 - 60 mins
-
Tools:Nutdriver, Screw drivers
2 of 2 people
found this instruction helpful.
Was this instruction helpful to you?
Thank you for voting!
Dryer was blowing cold air
Disassembled and tested each part with a multi-meter. Found that the thermostat and fuse were bad. Replaced parts and it is working again.
Parts Used:

-
Brian from KNOXVILLE, TN
-
Difficulty Level:Easy
-
Total Repair Time:30 - 60 mins
-
Tools:Screw drivers
2 of 3 people
found this instruction helpful.
Was this instruction helpful to you?
Thank you for voting!
Drum stopped turning.
Followed the video on the website and finished it in a short time. Now it works like a new dryer.
Parts Used:

-
Dequince Atkinson from PLATTSBURG, MO
-
Difficulty Level:Really Easy
-
Total Repair Time:30 - 60 mins
-
Tools:Screw drivers
2 of 3 people
found this instruction helpful.
Was this instruction helpful to you?
Thank you for voting!
Dryer not drying
Unplugged the dryer for safety. Unattached top of dryer from door with putty tool. Took front of dryer off. Unplugged door. Took off bracket to heating element case. Pulled out case. Replaced the thermostat. Then put all back together and tested the dryer. Works like a charm.
Parts Used:

-
Dawn from CAMBY, IN
-
Difficulty Level:Really Easy
-
Total Repair Time:15 - 30 mins
-
Tools:Screw drivers
3 of 6 people
found this instruction helpful.
Was this instruction helpful to you?
Thank you for voting!
The drum wrapper on our dryer was coming apart in the back, causing the metal drum to tear apart and causing the drum to not roll properly.
I had to take the whole thing apart to replace the drum wrapper. I followed this very helpful YouTube video for the step-by-step instructions on disassembly.
https://www.youtube.com/watch?v=9ul2BIvVEVU&t=428s
Once the new drum was installed, I followed the steps in reverse to put everything back together.
https://www.youtube.com/watch?v=9ul2BIvVEVU&t=428s
Once the new drum was installed, I followed the steps in reverse to put everything back together.
Parts Used:

-
Brendan from CASPER, WY
-
Difficulty Level:Easy
-
Total Repair Time:1- 2 hours
-
Tools:Screw drivers
2 of 3 people
found this instruction helpful.
Was this instruction helpful to you?
Thank you for voting!
Drum don’t turn
-
Orlando from LAWRENCEVILLE, GA
-
Difficulty Level:Really Easy
-
Total Repair Time:30 - 60 mins
-
Tools:Screw drivers
3 of 6 people
found this instruction helpful.
Was this instruction helpful to you?
Thank you for voting!
making a clunky noise, taking longer to dry
removed the top cover, remove control panel,remove door, remove belt assy, and pull out old drum and installed new drum. Used only a phillips screw driver and took approx. 30 min. Dryer is quit and drying better.
Parts Used:
-
Jesse from FULLERTON, CA
-
Difficulty Level:Really Easy
-
Total Repair Time:30 - 60 mins
-
Tools:Screw drivers
1 person
found this instruction helpful.
Was this instruction helpful to you?
Thank you for voting!
Dryer would not spin
The design of my dryer is a bit different from the video on PartSelect - but it is very close. And if you watch the really good video on PartSelect plus a few others on Youtube you can figure out how Samsung in general designs the different components. You can fix this yourself definitely.
Cost of part to fix - about $50.
Repairman - didn't even ask. Would probably be $300-400.
Cost of replacement $1,000.
I rated the repair "A bit difficult" only because this is the first time I have ever repaired an appliance. If I were to repair this one again, I'd rate it as Easy.
I'm really thankful for the PartSelect video. This makes DIY repairs possible.
Thanks.
Cost of part to fix - about $50.
Repairman - didn't even ask. Would probably be $300-400.
Cost of replacement $1,000.
I rated the repair "A bit difficult" only because this is the first time I have ever repaired an appliance. If I were to repair this one again, I'd rate it as Easy.
I'm really thankful for the PartSelect video. This makes DIY repairs possible.
Thanks.
Parts Used:
-
John from EARLYSVILLE, VA
-
Difficulty Level:A Bit Difficult
-
Total Repair Time:More than 2 hours
-
Tools:Screw drivers
1 person
found this instruction helpful.
Was this instruction helpful to you?
Thank you for voting!
Motor replacement
I'll make this quick. To access the motor you need to take half of the drier apart. I cut a access door on the side where the motor is with a small electric saw. It gave me clear access to the motor. You still need to take the front cover off to remove the blower wheel . One more thing, make sure to have the belt back on when testing, otherwise the motor wont start. It took me about an hour and 15 minutes
Parts Used:

-
Larry from TRUMBULL, CT
-
Difficulty Level:A Bit Difficult
-
Total Repair Time:30 - 60 mins
1 person
found this instruction helpful.
Was this instruction helpful to you?
Thank you for voting!
Original belt broke after nylon tension pulley bearing froze.
Thank you
partselect.com for a much better heavy duty belt than the original. Way over priced, but well worth it. After watching the video & following it step-by-step, I now have a perfectly running dryer. P.S. don't forget to plug back in the (3) wire harnesses. The entire experience was a great feeling of accomplishment. Thanks again partselect.com
partselect.com for a much better heavy duty belt than the original. Way over priced, but well worth it. After watching the video & following it step-by-step, I now have a perfectly running dryer. P.S. don't forget to plug back in the (3) wire harnesses. The entire experience was a great feeling of accomplishment. Thanks again partselect.com
Parts Used:
-
John m from GRAPEVIEW, WA
-
Difficulty Level:Really Easy
-
Total Repair Time:30 - 60 mins
2 of 4 people
found this instruction helpful.
Was this instruction helpful to you?
Thank you for voting!
Dryer not heating
Removed top of dryer, control panel, front (door) panel. Removed screw holding heating element and housing assembly in place, and removed wiring connections. Attached wiring to new heating element and housing assembly, installed screw to hold in place, replaced front (door) panel, control panel, and top of dryer.
Parts Used:

-
David from Colorado Springs, CO
-
Difficulty Level:A Bit Difficult
-
Total Repair Time:30 - 60 mins
-
Tools:Screw drivers
1 of 2 people
found this instruction helpful.
Was this instruction helpful to you?
Thank you for voting!
Dryer won't start
Ordered part on 8/24/22. Received wrong part twice now. It is 9/10/22 and I am waiting for the third. Right part number on package but it contains the wrong part. Beyond mad!
Parts Used:

-
Paul from ANDES, NY
-
Difficulty Level:Really Easy
-
Total Repair Time:30 - 60 mins
-
Tools:Screw drivers
1 of 2 people
found this instruction helpful.
Was this instruction helpful to you?
Thank you for voting!
dryer leveling legs were missing

-
Jordan, from NIOTA, TN
-
Difficulty Level:Easy
-
Total Repair Time:Less than 15 mins
1 of 2 people
found this instruction helpful.
Was this instruction helpful to you?
Thank you for voting!