




















DU4500XR1 Whirlpool Dishwasher - Instructions
Keep searches simple. Use keywords, e.g. "leaking", "pump", "broken" or "fit".
The rubber around the cap assembly was torn
I pulled the basket out, pulled the cap and connector assembly off with ease, no tools needed, it comes right up, and put the new one on. Put the basket back in and it works great now!
Parts Used:

-
Steve from TUCSON, AZ
-
Difficulty Level:Very Easy
-
Total Repair Time:Less than 15 mins
1 person
found this instruction helpful.
Was this instruction helpful to you?
Thank you for voting!
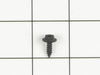
Lost Screws from lower access covers for my Dishwasher
Reassembled lower access covers using the new screws purchased from parts direct, perfect fit replacement. Hardest part remembering how they fit Dishwasher.
Parts Used:
-
Johnny from LEVITTOWN, PA
-
Difficulty Level:Very Easy
-
Total Repair Time:Less than 15 mins
-
Tools:Nutdriver
1 person
found this instruction helpful.
Was this instruction helpful to you?
Thank you for voting!
broken rollers
simple, simple, simple ! popped off the old ones, snapped on the new ones. Thanks !
Parts Used:

-
Phil from Ft Lauderdale, FL
-
Difficulty Level:Really Easy
-
Total Repair Time:Less than 15 mins
1 person
found this instruction helpful.
Was this instruction helpful to you?
Thank you for voting!
broken wheel
I snapped the old ones off & snapped on the new ones. It couldn't have been easier!
Parts Used:
-
Dorothy from La Canada, CA
-
Difficulty Level:Really Easy
-
Total Repair Time:Less than 15 mins
-
Tools:Pliers
1 person
found this instruction helpful.
Was this instruction helpful to you?
Thank you for voting!
broken wheel on lower rack
i used a screwdriver to pry off the old wheels then snapped on the new ones.
This was the easiest repair I have ever made on an appliance.
This was the easiest repair I have ever made on an appliance.
Parts Used:
-
Donald from Washington, MO
-
Difficulty Level:Really Easy
-
Total Repair Time:Less than 15 mins
-
Tools:Screw drivers
1 person
found this instruction helpful.
Was this instruction helpful to you?
Thank you for voting!
dishwasher bottom basket wheels came off
One day after placing my order, replacement wheels arrived. I used a screwdriver to pop each (4 total) old set of tandem wheels off the basket basket and poped each new set on.
Parts Used:
-
Jack from Tampa, FL
-
Difficulty Level:Really Easy
-
Total Repair Time:Less than 15 mins
-
Tools:Screw drivers
1 person
found this instruction helpful.
Was this instruction helpful to you?
Thank you for voting!
Worn wheels on lower rack
-
James from Jupiter, FL
-
Difficulty Level:Really Easy
-
Total Repair Time:Less than 15 mins
1 person
found this instruction helpful.
Was this instruction helpful to you?
Thank you for voting!
Door hinge broke
All pieces just snap off and the new one just snap right back in place.
Remeber take a little time to do your repair correctly.
It is cheaper to repair an appliance than it is to replace.
Remeber take a little time to do your repair correctly.
It is cheaper to repair an appliance than it is to replace.
Parts Used:

-
David from Vancouver, WA
-
Difficulty Level:Easy
-
Total Repair Time:Less than 15 mins
7 of 19 people
found this instruction helpful.
Was this instruction helpful to you?
Thank you for voting!
Soap door wouldn't open.
I looked online to see a video. Dad to pop lid off soap dispenser. Slide a plastic part to the left n the spring slide off. Video showed how to place prongs on spring . Then had to lift the upper part of spring to lift onto plastic part of soap dispenser. That was it.
Unfortunately it still doesn't work. I asked Ina email to your company for any suggestions, No reply.
Unfortunately it still doesn't work. I asked Ina email to your company for any suggestions, No reply.
Parts Used:

-
Anthony from CLEVELAND, OH
-
Difficulty Level:Really Easy
-
Total Repair Time:Less than 15 mins
1 person
found this instruction helpful.
Was this instruction helpful to you?
Thank you for voting!
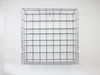
original dishrack had become rusty
-
Tom from Peoria, AZ
-
Difficulty Level:Really Easy
-
Total Repair Time:Less than 15 mins
2 of 4 people
found this instruction helpful.
Was this instruction helpful to you?
Thank you for voting!
Rack Was Rusting Out
Kit didn't have the center conical piece. Easy to switch tho. I am impressed at the speed of which the part arrived.
Parts Used:
-
William from Rochester, IL
-
Difficulty Level:Really Easy
-
Total Repair Time:15 - 30 mins
2 of 4 people
found this instruction helpful.
Was this instruction helpful to you?
Thank you for voting!
lower rack started to rust through coating
Since there were no printed instructions, we looked at the photo schematic.
Reassembly using the photo was easy by putting the old rack alongside the new one and adjusting the new rack spacing to match the old one.
We also had new wheels which snapped on.
We were delighted to repair and replace this good, older dishwasher rather than purchase a new one!
Reassembly using the photo was easy by putting the old rack alongside the new one and adjusting the new rack spacing to match the old one.
We also had new wheels which snapped on.
We were delighted to repair and replace this good, older dishwasher rather than purchase a new one!
Parts Used:
-
Carol from St Johnsbury, VT
-
Difficulty Level:Easy
-
Total Repair Time:15 - 30 mins
-
Tools:Screw drivers
3 of 7 people
found this instruction helpful.
Was this instruction helpful to you?
Thank you for voting!
THE LOWER RACK WAS CORRODING IN SPOTS AND WAS RUSTING
THERE WERE NO INSTRUCTIONS INCLUDED, COULDN'T FIGURE 0UT HOW TO INSTALL THE NEW ROLLERS ON THE NEW RACK FINALLY INSTALLED THE OLD ROLLERS ON THE NEW RACK AND THEY WERE MUCH EASIER TO INSTALL I DONT UNDERSTAND
WHY THE NEW ROLLERS WERE THE SAME AS THE OLD ROLLERS
EXCEPT FOR THE COST.
WHY THE NEW ROLLERS WERE THE SAME AS THE OLD ROLLERS
EXCEPT FOR THE COST.
Parts Used:
-
JOHN from JUPITER, FL
-
Difficulty Level:Easy
-
Total Repair Time:30 - 60 mins
1 person
found this instruction helpful.
Was this instruction helpful to you?
Thank you for voting!
Lack of assembly instructions
YouTube was very helpful
New racks works better that way expected. Rearrange ment maximized loading
New racks works better that way expected. Rearrange ment maximized loading
Parts Used:

-
Ray from Lufkin, TX
-
Difficulty Level:Easy
-
Total Repair Time:1- 2 hours
-
Tools:Screw drivers
1 person
found this instruction helpful.
Was this instruction helpful to you?
Thank you for voting!
Bottom tray wheels would catch on old door gasket making it difficult to remove and insert.
Followed the exellent instructions, the flange kit really solves the problem of lower rack wheel catching on the seal. Superior replacement parts compared to previouse repair two years ago.
Parts Used:

-
charles from sacramento, CA
-
Difficulty Level:Really Easy
-
Total Repair Time:30 - 60 mins
-
Tools:Socket set
2 of 4 people
found this instruction helpful.
Was this instruction helpful to you?
Thank you for voting!