



















DE24CT Maytag Dryer - Instructions
Keep searches simple. Use keywords, e.g. "leaking", "pump", "broken" or "fit".
Dryer was noisy and stalling. Taking twice as long to dry clothes and using more electricity
I had my oldest son who was home from college help me. We removed the front face of the dryer and put the unit on it's back. We removed the door switch and the blower unit. I didn't get a good look at how the belt was routed when we removed the drum but was able to figure it out when we put it back together. Not only was the belt frayed and dry rotted, the blower squirrel cage was free-wheeling on the shaft. I found a tab of metal I was able to insert in the flat of the shaft between the cage bushing and the shaft and I put the squeeze ring and snap ring back in place. We also discovered the source of much of the rattling noise we had grown accustomed to was actually change pieces trapped under the drum ribs. We removed them and put the ribs back in place and we installed the new belt and figured out how the belt routed around the shaft and tensioning pulley. We cleaned all the trapped lint out of the dryer and reassembled the unit. It now works like new. Thanks!
Parts Used:
-
RIchard from New Era, MI
-
Difficulty Level:A Bit Difficult
-
Total Repair Time:30 - 60 mins
-
Tools:Nutdriver, Pliers, Screw drivers, Socket set
2 of 2 people
found this instruction helpful.
Was this instruction helpful to you?
Thank you for voting!
Old lint filter was worn out
No tools required, just insert the new lint filter in place of the old one. My dryer is about 20 years old. I think I was lucky to even be able to find a replacement lint filter.
Parts Used:

-
Ellen from Sharon, MA
-
Difficulty Level:Really Easy
-
Total Repair Time:Less than 15 mins
2 of 2 people
found this instruction helpful.
Was this instruction helpful to you?
Thank you for voting!
Initially the dryer made a loud rumble during startup, It progressed until the noise was continuous during operation.
Because of the nature of the noise, and knowing nothing of appliance repair, I assumed that there was a loose belt. I figured that the belt would be accessible from the rear of the machine. After much disassembly, I discovered that the belt was in fine shape and not the problem. But every time I spun the drum, I could still hear the rumbling sound. Eventually, I discovered that the from paned of the dryer is the easiest to remove. Once I removed that, I discovered the blower fan housing. A few screws later and I could see that the plastic fan center was worn out. I had a part number so I simply did a quick internet search and found several sites that stocked it. PartSelect had the best price and the best shipping prices as well. I placed the order on Saturday afternoon. I got the confirmation immediately, and the shipping information on Monday. On Wednesday the part was waiting at my door! It took about 15 minutes to re-assemble the dryer and now, about 18 loads later, it's perfect!
Thank you PartSelect!!!!
Joe G
Thank you PartSelect!!!!
Joe G
Parts Used:
-
Joseph from Ontario, NY
-
Difficulty Level:Easy
-
Total Repair Time:1- 2 hours
-
Tools:Nutdriver, Screw drivers, Socket set
2 of 2 people
found this instruction helpful.
Was this instruction helpful to you?
Thank you for voting!
Dryer rattled in operation
Unplug the dryer. Remove two screws to remove the front drum housing. Remove 4 screws to remove the front drum housing. The front panel and front drum housing do not need to be unwired to work on the blower. Loosen wire harnesses and move panel and housing out of the way. Remove 2 spring clips holding the blower assembly to the motor shaft. Remove blower. Install new blower and re-assemble in the reverse order. The other stories written on the subject were spot on. This repair also made the clothes dry more quickly. I did not realize that long before the ryer made noise, there was a reduction in air flow. A simple vacuum switch to monitor air flow would tell you when there is a problem or that the filter/duct needs to be cleaned.
Parts Used:
-
Robert from Mentor, OH
-
Difficulty Level:Easy
-
Total Repair Time:30 - 60 mins
-
Tools:Nutdriver, Pliers, Screw drivers
2 of 2 people
found this instruction helpful.
Was this instruction helpful to you?
Thank you for voting!
Rattling noise and slow drying.
Turn off circuit breaker or unplug. Remove two screws 4 inches from bottom front panel of cabinet with stubby phillips head. Pull panel towards you about 30 degrees; then wiggle it down, to free two steel spring clips holding it to cabinet. Pull off red and yellow wire from door switch. Now set front panel aside. Blower assembly is facing you at lower left. Open the housing by removing six small screws from cover and one attached to dryer base. Remove spring clip from end of shaft. (A circlip pliers helps to prevent it from springing off somewhere.). Squeeze spring retainer surrounding blower wheel shaft with regular pliers, and wiggle the blower off. Replace in reverse order. Be sure insulation around blower wheel housing seats properly into front panel. This keeps the hot air flowing up past the lint trap.
Easy job, about half hour. Mine took longer, because I had removed the belt and drum, thinking the noise came from bad drum support rollers. It was just the plastic blower wheel shaft seat, which had worn itself round. Cost $20 (including shipping) and my 29-year old Maytag is as good as new--at least for now.
Easy job, about half hour. Mine took longer, because I had removed the belt and drum, thinking the noise came from bad drum support rollers. It was just the plastic blower wheel shaft seat, which had worn itself round. Cost $20 (including shipping) and my 29-year old Maytag is as good as new--at least for now.
Parts Used:
-
Laurence from Leesburg, VA
-
Difficulty Level:Easy
-
Total Repair Time:15 - 30 mins
-
Tools:Pliers, Screw drivers, Socket set
2 of 2 people
found this instruction helpful.
Was this instruction helpful to you?
Thank you for voting!
Lint Filter had a hole on it.
-
Eduardo from Miami, FL
-
Difficulty Level:Really Easy
-
Total Repair Time:Less than 15 mins
2 of 2 people
found this instruction helpful.
Was this instruction helpful to you?
Thank you for voting!
squeaky sound when drying
Removed front panel and tumbler, replaced roller axle,
wheel, and front glides. Anybody can do this.
wheel, and front glides. Anybody can do this.
Parts Used:
-
Chris from Sherman, TX
-
Difficulty Level:Easy
-
Total Repair Time:30 - 60 mins
-
Tools:Pliers, Screw drivers, Wrench set
3 of 5 people
found this instruction helpful.
Was this instruction helpful to you?
Thank you for voting!
Old lint filter had a hole in it about the size of a thumb
Took longer to open the box that it did to drop the new lint filter into the dryer. Washed a load of clothes and the new dryer filter worked great
Thanks.
R. Bonker
Thanks.
R. Bonker
Parts Used:
-
Rebecca from Guthrie Center, IA
-
Difficulty Level:Really Easy
-
Total Repair Time:Less than 15 mins
2 of 2 people
found this instruction helpful.
Was this instruction helpful to you?
Thank you for voting!
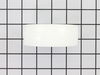
Dryer making strange thumping noise
Removed back panel of machine which exposed badly worn idler pulley. Have had problem before on another dryer so I was sure what problem was before I started. Removed snap washer and cloth washer and then bad pulley.(It was very worn and wobbly).Cleaned shaft with small piece of emery paper and put two drops of oil on shaft and replaced old pulley with new one.Put back washer and snap washer.Drive belt had slipped away from its proper position so I had to remove the front panel of the dryer to place the belt back and realign it on the drum and around the new pulley and the motor drive shaft. Not really that difficult.....Machine now runs like it's brand new.....
Parts Used:
-
William from New Bern, NC
-
Difficulty Level:Easy
-
Total Repair Time:15 - 30 mins
-
Tools:Pliers, Screw drivers
3 of 5 people
found this instruction helpful.
Was this instruction helpful to you?
Thank you for voting!
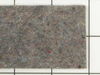
Squeaky when in use, after replacing the drum pads.
I followed the videos provided, the only think I would added is cleaning the riding surface of the drum. In my case the drum had gunk on it from the old pads, witch got on the new pads causing it to continued to make noise.
It would be wise to also get the felt and belt, to replace them all the first time.
It would be wise to also get the felt and belt, to replace them all the first time.
Parts Used:
-
Greg from CAVE CREEK, AZ
-
Difficulty Level:Very Easy
-
Total Repair Time:1- 2 hours
-
Tools:Screw drivers
2 of 2 people
found this instruction helpful.
Was this instruction helpful to you?
Thank you for voting!
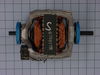
Drum would not turn, drive motor humming loudly and unable to turn drum/blower wheel
The repair video is terrific and many others here have thoroughly described the steps involved to replace the drive motor.
The biggest hurdle for me was that the motor came with a new switch that required a different wiring configuration. No wiring diagram was included. Several others had posted questions about wiring in the Q&A and unfortunately PartSelect kept copy/pasting the same confusing and incomplete answer over and over:
"The Yellow goes to T6, Red to T5 Black to T2, blue to T1 and the white you will remove the blue jumper lead between the switch terminal 4 and 1/4" protector tab, connect the grey harness lead to the 1/4" protector tab."
Reading that doesn't tell me what to do with the white wire, doesn't address that my blue and white wires were crimped into the same connector from the factory, doesn't address that I had 2 black wires crimped into the same connector from the factory, and doesn't address a factory ground wire that connected the frame of the OEM motor to the bracket that the motor sits in.
With all the other excellent info supplied by PartSelect, this was surprising and frustrating. The sales dept ignored an emailed question from me, and the Q&A section didn't allow me to post a question.
Searching the internet, I found a wiring diagram on aceappliancesd dot com that addressed my dryer's OEM wiring configuration. Here's what I ended up with:
TI - Blue and white, crimped together into a single connector
T2 - Black & black, crimped together into a single connector (the wiring diagram I found said this should be black & brown, but they both look black to me)
T5 - Red
T6 - Yellow
1/4" Thermal protector tab - Grey (from the harness)
The new motor switch had a grounding tab with nothing connected to it. I removed the screw holding that tab into the switch and connected the (also grey) OEM short ground wire from the motor frame to the mounting bracket.
I had to cut 2 of the pieces of tape holding the OEM wiring harness together in order to get enough slack for all the connections to reach. If you do this too, make sure all the wires are still clear of the moving parts and the hot bits. You may need to retape the wires together at a different location to keep things tidy.
I also laid the belt over the drum and put 2 pieces of tape over it to hold it in place while I got the drum positioned, then I reached through the back access panel to loop the belt around the motor pulley and idler. Once that's done, just reach over the top of the drum and peel the tape off. I found that much easier than trying to loop the belt by reaching through and past the drum.
The biggest hurdle for me was that the motor came with a new switch that required a different wiring configuration. No wiring diagram was included. Several others had posted questions about wiring in the Q&A and unfortunately PartSelect kept copy/pasting the same confusing and incomplete answer over and over:
"The Yellow goes to T6, Red to T5 Black to T2, blue to T1 and the white you will remove the blue jumper lead between the switch terminal 4 and 1/4" protector tab, connect the grey harness lead to the 1/4" protector tab."
Reading that doesn't tell me what to do with the white wire, doesn't address that my blue and white wires were crimped into the same connector from the factory, doesn't address that I had 2 black wires crimped into the same connector from the factory, and doesn't address a factory ground wire that connected the frame of the OEM motor to the bracket that the motor sits in.
With all the other excellent info supplied by PartSelect, this was surprising and frustrating. The sales dept ignored an emailed question from me, and the Q&A section didn't allow me to post a question.
Searching the internet, I found a wiring diagram on aceappliancesd dot com that addressed my dryer's OEM wiring configuration. Here's what I ended up with:
TI - Blue and white, crimped together into a single connector
T2 - Black & black, crimped together into a single connector (the wiring diagram I found said this should be black & brown, but they both look black to me)
T5 - Red
T6 - Yellow
1/4" Thermal protector tab - Grey (from the harness)
The new motor switch had a grounding tab with nothing connected to it. I removed the screw holding that tab into the switch and connected the (also grey) OEM short ground wire from the motor frame to the mounting bracket.
I had to cut 2 of the pieces of tape holding the OEM wiring harness together in order to get enough slack for all the connections to reach. If you do this too, make sure all the wires are still clear of the moving parts and the hot bits. You may need to retape the wires together at a different location to keep things tidy.
I also laid the belt over the drum and put 2 pieces of tape over it to hold it in place while I got the drum positioned, then I reached through the back access panel to loop the belt around the motor pulley and idler. Once that's done, just reach over the top of the drum and peel the tape off. I found that much easier than trying to loop the belt by reaching through and past the drum.
Parts Used:
-
Peter from REDONDO BEACH, CA
-
Difficulty Level:A Bit Difficult
-
Total Repair Time:1- 2 hours
-
Tools:Pliers, Screw drivers, Socket set
2 of 2 people
found this instruction helpful.
Was this instruction helpful to you?
Thank you for voting!
My Blower wheel had broken at the center where it attached to the axle. It made a rattling sound and no air was being blown into the drum to dry the clothes. There was also a loud skidding sound that turned out to be due to a worn felt seal.
I took off the front of the dryer with the screws at the bottom. I removed what wires would easily come off and took a picture to remember where they go. Then I took of the front panel and had to take off the cover for the blower wheel. Some screws were difficult to reach because they were in a very tight space. I used a combination of needle nose pliers and a hex screw bit to loose hared to reach hex screws.
For the felt seal on the front panel, I used a flathead screwdriver to remove the old seal and replace the new seal. The most tricky thing was making sure the seal was laying right along the drum when putting the front panel back on. Once back together, the skidding sound disappeared.
Replacing the blower wheel is pretty easy once I got past the difficult screws holding the cover down. I used snap ring pliers to remove the snap ring then put the new blower wheel on and put it all back together. I found that the tip diameter of the snap ring pliers needed to be less than 0.05'' to fit into the snap ring holes of both the snap rings for the roller wheels and the blower wheel.
For the felt seal on the front panel, I used a flathead screwdriver to remove the old seal and replace the new seal. The most tricky thing was making sure the seal was laying right along the drum when putting the front panel back on. Once back together, the skidding sound disappeared.
Replacing the blower wheel is pretty easy once I got past the difficult screws holding the cover down. I used snap ring pliers to remove the snap ring then put the new blower wheel on and put it all back together. I found that the tip diameter of the snap ring pliers needed to be less than 0.05'' to fit into the snap ring holes of both the snap rings for the roller wheels and the blower wheel.
Parts Used:
-
Spencer from COLUMBIA, SC
-
Difficulty Level:Easy
-
Total Repair Time:30 - 60 mins
-
Tools:Pliers, Screw drivers, Socket set
2 of 2 people
found this instruction helpful.
Was this instruction helpful to you?
Thank you for voting!
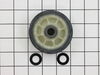
Dryer was leaving black marks on the clothes, and was very noisy.
The video was excellent and made for an easy repair. Would highly recommend.
Parts Used:
-
Fred from GREENCASTLE, PA
-
Difficulty Level:Easy
-
Total Repair Time:30 - 60 mins
-
Tools:Nutdriver, Screw drivers
2 of 2 people
found this instruction helpful.
Was this instruction helpful to you?
Thank you for voting!
Dryer Barrel was not turning
Looked in one of the back removable panels and saw the broken belt. Took the machines front panel off per a You Tube video and saw the repair was simple but too the time to vacuum out a large amount of Lint Debris that had accumulated over the past 34 years all over the inside of the machine which is dangerous.. After cleaning it all up I simply put the new belt on and put everything back together and it all works nicely again!
Parts Used:
-
Frank from HAWTHORNE, NJ
-
Difficulty Level:Easy
-
Total Repair Time:1- 2 hours
-
Tools:Nutdriver, Screw drivers, Socket set
2 of 2 people
found this instruction helpful.
Was this instruction helpful to you?
Thank you for voting!
Original tumbler/motor belt broke. Gas Dryer
I UNPLUGGED TH UNIT.Removed the 2 screws holding the front panel in place, disconnected the electrical leads on the panel. These screws are located on each side of the panel 3 in. from the bottom. Removed the 4 screws holding the shroud. Disconnected the ground wire on the shroud & set both aside. Installed the new belt per the diagram & instructions. Turned the tumbler by hand a few times to verify proper installation. Re-installed the shroud & front panel including reconnecting the leads & ground wire. You need to use both hands in a tight space to install the belt on the pulley & guide(a littledificult) The new belt fit perfectly & the instructions were easy to follow & accurate.
Parts Used:
-
Joseph from HALETHORPE, MD
-
Difficulty Level:A Bit Difficult
-
Total Repair Time:30 - 60 mins
-
Tools:Nutdriver, Screw drivers
2 of 2 people
found this instruction helpful.
Was this instruction helpful to you?
Thank you for voting!