




















CWE23SSHSS General Electric Refrigerator - Instructions
Keep searches simple. Use keywords, e.g. "leaking", "pump", "broken" or "fit".
Refrigerator light wouldn't come on.
After replacing the light bulb and still no light I manually pushed the light switch button. Intermittently the light would come on then go out. I removed the power plug from the power source then replaced the light switch. I plugged the refrigerator back in and now I open the door the light comes on and stays on until the door is closed.
Parts Used:

-
Daniel from Crown Point, IN
-
Difficulty Level:Easy
-
Total Repair Time:15 - 30 mins
-
Tools:Pliers, Screw drivers
4 of 5 people
found this instruction helpful.
Was this instruction helpful to you?
Thank you for voting!
Difficulty in removing the old switch
The old switch was hard to remove. Thinking that I may have to loosen the wires I used a socket wrench to remove a clamp. This was unnecessary. In the end the switch did come out using a large size screwdriver. The problem was that the expanding plastic tongue is not visible from the ouside so you have to try to feel your way around. If i had ordered the replacement before and not afterwards I would have seen this before hand.
Parts Used:
-
James from Federal Way, AL
-
Difficulty Level:A Bit Difficult
-
Total Repair Time:30 - 60 mins
-
Tools:Screw drivers, Socket set
5 of 8 people
found this instruction helpful.
Was this instruction helpful to you?
Thank you for voting!
Interior Light did not go on due to faulty switch
I ordered two switches, replaced both with a knife in 10 minutes. Interior light works, thanks.
Parts Used:
-
Robert from Coto de Caza, CA
-
Difficulty Level:Really Easy
-
Total Repair Time:Less than 15 mins
4 of 6 people
found this instruction helpful.
Was this instruction helpful to you?
Thank you for voting!
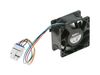
Insufficient cooling upper food storage area
Pulled out bottom crisper drawers. Removed drawer slides. Removed side plastic panels, then removed back panel which exposed the fan. Removed fan and replaced with new fan. Had to use the heat gun because there was ice buildup on left corner of rear panel. Reassembled in reverse order. There is several excellent videos on You Tube.
Parts Used:
-
James from ATHENS, AL
-
Difficulty Level:Really Easy
-
Total Repair Time:30 - 60 mins
-
Tools:Screw drivers
3 of 3 people
found this instruction helpful.
Was this instruction helpful to you?
Thank you for voting!
Wate Dispenser Not Working
Safety first, unplug fridge. Had to remove the top access panel, which consisted of 5 screws. Got access to the door switches. These are removed from the panel by depressing the plunger on the switch and sliding them out of the retainer. Transferred the wires over to the new switches one for one. Re-assembled. Dispenser works.
Parts Used:

-
Kevin from FLORENCE, KY
-
Difficulty Level:Very Easy
-
Total Repair Time:15 - 30 mins
-
Tools:Socket set
3 of 3 people
found this instruction helpful.
Was this instruction helpful to you?
Thank you for voting!
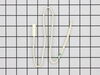
Defrost not working coil iced up
Removed back wall cover over coil. Defrost all ice with a hair dryer. Cut white wires and replaced Temperature Sensor. It has been working for a week and no trouble at this time. If you have this system on your GE refrigerator do this before replacing the motherboard. I must admit I was thinking that was the trouble. Motherboard was replaced after 5 years old now 5 years later my thinking is this a 5 year problem. So try the Temperature Sensor.
Parts Used:
-
charles from SCOTTSDALE, AZ
-
Difficulty Level:Very Easy
-
Total Repair Time:30 - 60 mins
-
Tools:Nutdriver
3 of 3 people
found this instruction helpful.
Was this instruction helpful to you?
Thank you for voting!
refriderator not cooling consistetly
1 opened door 2. pryed cover off from cieling 3.cut and stripped wires on 4. sodered wires from old wires to new sensor. 5 insulated conection.6 put cover back on. This did not fix the problem it was the control moduel.
Parts Used:
-
randall from coopersville, MI
-
Difficulty Level:Easy
-
Total Repair Time:Less than 15 mins
-
Tools:Pliers, Screw drivers
4 of 6 people
found this instruction helpful.
Was this instruction helpful to you?
Thank you for voting!
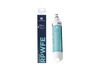
Refrigerator water filter replacement.
I followed the directions included with the water filter and it was simple. The only problem I had was not being strong enough to easily remove the old filter. I did accomplish that after a few tries and the rest is history.
Parts Used:
-
Sheryl from SAINT LOUIS, MO
-
Difficulty Level:Really Easy
-
Total Repair Time:30 - 60 mins
3 of 4 people
found this instruction helpful.
Was this instruction helpful to you?
Thank you for voting!
condenser icing refrigerator warm freezer ok
follow the easy instructions replace 3 temperature sensors cut the wires and crimp them with new sensor and it works like new
Parts Used:
-
Rene from HEBER, CA
-
Difficulty Level:Really Easy
-
Total Repair Time:30 - 60 mins
-
Tools:Pliers
3 of 4 people
found this instruction helpful.
Was this instruction helpful to you?
Thank you for voting!
switchlight on my refrigerator was not working
I found instructions on the web about how to do this repair, so I ordered the part with confidence. But the instructions simply said "pull out the old switchlight". That was actually somewhat difficult as the clip on the side intended to hold the part in was stubborn. I eventually used a utility to slice off the clip. From that point, it was just a matter of plugging in the new switchlight , which was very simple.
Parts Used:
-
Eileen from Coto de Caza, CA
-
Difficulty Level:A Bit Difficult
-
Total Repair Time:30 - 60 mins
-
Tools:Pliers
5 of 10 people
found this instruction helpful.
Was this instruction helpful to you?
Thank you for voting!
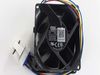
Bottom Drawers started to freeze
-
scott from Reseda, CA
-
Difficulty Level:Really Easy
-
Total Repair Time:30 - 60 mins
-
Tools:Nutdriver, Screw drivers
2 of 2 people
found this instruction helpful.
Was this instruction helpful to you?
Thank you for voting!
Door alarm going off even with the doors closed.
Pulled the instructions up on U-tube and followed them. With the socket removed 5 small bolts. Took the old switches ( I replaced both switches being I had it apart), put the new switches in and then put the 5 bolts back in.
Parts Used:
-
KENNETH from BRANDON, SD
-
Difficulty Level:Really Easy
-
Total Repair Time:15 - 30 mins
-
Tools:Socket set
2 of 2 people
found this instruction helpful.
Was this instruction helpful to you?
Thank you for voting!
both freezer and refigerator were warm.
I watched the video online and it said there were three sensors in the refrigerator, two in the freezer and one in the refrigerator. I only ordered one sensor and was going to try the one in the refrigerator first. He said the upper one in the freezer is the most difficult, but is usually the problem. So, I replaced the upper sensor and tried restarting the unit. Everything went well and it fixed the problem.
Parts Used:
-
Harry from DURYEA, PA
-
Difficulty Level:Easy
-
Total Repair Time:15 - 30 mins
-
Tools:Nutdriver
2 of 2 people
found this instruction helpful.
Was this instruction helpful to you?
Thank you for voting!
My light always stayed on and the icemaker stopped working.
I diagnosed the sensors in my refrigerator by holding the sensor in and seeing if I could trick the sensor it partially worked. I then used a multimeter and did an ohm test on both sensors multiple times open and closed the switch to verify which switch failed because it worked a couple times but not always. It ended up being the switch on the left hand door with 3 terminals on it and after the replacement it has worked great for weeks now no issue. best 15 dollars and 25 minutes spent!
Parts Used:
-
Jeremy from BYRON, MN
-
Difficulty Level:Really Easy
-
Total Repair Time:15 - 30 mins
-
Tools:Nutdriver
2 of 2 people
found this instruction helpful.
Was this instruction helpful to you?
Thank you for voting!
LED (5) light system are in a series. 1 goes out, other 4 go dim.
Locate the light that is completely out, remove the assembly. Unplug the wire harness in the back. Plug in the new assembly and snap into place in the cabinet.
Parts Used:
-
Robert from Liberty Hill, TX
-
Difficulty Level:Very Easy
-
Total Repair Time:Less than 15 mins
2 of 3 people
found this instruction helpful.
Was this instruction helpful to you?
Thank you for voting!