




















CSX22DLD Hotpoint Refrigerator - Instructions
Keep searches simple. Use keywords, e.g. "leaking", "pump", "broken" or "fit".
Fridge door stopped closing.
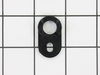
The plastic door closing cams had broken after 17 years of use. It was tricky figuring out how the new cams fit as the old ones had disintegrated. Also you need 2 cams - not one. I first ordered only one. A detailed parts diagram would have helped. First unscrew the top door mount cover and then the top door mount. The fridge door then lifts up and off the lower door mount. Next is the hardest part - drilling off the old pop rivet which held the lower cam. The lower door mount had to be removed to get at the underneath of the pop rivet, and a bench vise was handy to hold it as I drilled off the old rivet. Then you need small stainless steel nut and bolt and split washer or lock nut to replace the rivet. Next unscrew the old upper cam from the underneath of the fridge door and replace. The large hole in the cam goes through the door hinge pins. The two plastic cams should interlock in a way that makes the door swing close. Anyway, now the door works fine.
Parts Used:
-
Peter from Woodland Hills, CA
-
Difficulty Level:A Bit Difficult
-
Total Repair Time:30 - 60 mins
-
Tools:Screw drivers, Socket set, Wrench (Adjustable)
1 person
found this instruction helpful.
Was this instruction helpful to you?
Thank you for voting!
door didn't close on its own..
Removed door off hinge , remove bottom hinge, drill out rivet, lift off old cam & replace with new cam ,add new 1/4' BOLT(NOT SUPPLIED) to location where rivet was, reinstall bottom hinge & door ,check alignment, works perfect.
Thanks
Thanks
Parts Used:
-
George from Hawthorne, NY
-
Difficulty Level:A Bit Difficult
-
Total Repair Time:30 - 60 mins
-
Tools:Screw drivers, Wrench set
1 person
found this instruction helpful.
Was this instruction helpful to you?
Thank you for voting!
Refrigerator door was not closing by itself
Please note that I did this repair 2 times before and it was very easy, it took me longer to get the stuff out of the refrigerator door.
But this time the existing upper and lower cams broke, and the lower part of the door was making contact with the screw that holds the lower cam to the lower support bracket damaging the head of the screw.
Now I could not use a screw driver and I had to use a wrench and a vise grip to hold the round screw head (not easy), and then replace the screw and nut.
I had to insert 2 flat washers under the lower support, to separate the door an additional 1/32 from the ref. base to accomodate the fact that the door gasket had lost its regular shape in the lower part of the door (I discover this when I dismounted the door).
Then I removed the damaged cams, replace them with the new ones and now it is working ok.
Manny
But this time the existing upper and lower cams broke, and the lower part of the door was making contact with the screw that holds the lower cam to the lower support bracket damaging the head of the screw.
Now I could not use a screw driver and I had to use a wrench and a vise grip to hold the round screw head (not easy), and then replace the screw and nut.
I had to insert 2 flat washers under the lower support, to separate the door an additional 1/32 from the ref. base to accomodate the fact that the door gasket had lost its regular shape in the lower part of the door (I discover this when I dismounted the door).
Then I removed the damaged cams, replace them with the new ones and now it is working ok.
Manny
Parts Used:
-
MANUEL from PHILADELPHIA, PA
-
Difficulty Level:A Bit Difficult
-
Total Repair Time:30 - 60 mins
-
Tools:Pliers, Screw drivers, Socket set
1 of 2 people
found this instruction helpful.
Was this instruction helpful to you?
Thank you for voting!
Both door Cams broken even though I could see only one.
I learned from previous descriptions. Most important is there are two cams so order two. Second is that the door can be blocked from the bottom so the door doesn't have to be unloaded if you are careful. Remove the vent cover. Raise the door as high as possible while closed then block it from dropping down. I used wooden blocks. Remove the lower hinge and bracket on the bottom of the door. Put everythng back and you're back in business. A kit with both cams, spacers, and screws with diagram would have been nice to have.
Parts Used:
-
Tom from Ammon, ID
-
Difficulty Level:A Bit Difficult
-
Total Repair Time:30 - 60 mins
-
Tools:Socket set
1 of 2 people
found this instruction helpful.
Was this instruction helpful to you?
Thank you for voting!
Change bulb

-
Louis from LEAGUE CITY, TX
-
Difficulty Level:Really Easy
-
Total Repair Time:30 - 60 mins
-
Tools:Nutdriver
3 of 8 people
found this instruction helpful.
Was this instruction helpful to you?
Thank you for voting!
not closing. part broke.
-
Clinton from Melbourne, FL
-
Difficulty Level:Really Easy
-
Total Repair Time:15 - 30 mins
-
Tools:Screw drivers, Wrench set
1 of 2 people
found this instruction helpful.
Was this instruction helpful to you?
Thank you for voting!
ice maker pump and water line leaking
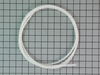
I replaced both the punp and water line. the website depicting the repair parts was the best i ever worked with. The parts were high quality delivered on time and easy to install. Total job cost $30 as opposed the cost of of a service man or a new refrig.
Parts Used:
-
Edward from Jenks, AL
-
Difficulty Level:Really Easy
-
Total Repair Time:15 - 30 mins
-
Tools:Nutdriver, Screw drivers
2 of 5 people
found this instruction helpful.
Was this instruction helpful to you?
Thank you for voting!
door wouldn't close all the way.
There was what seemed to be a half chewed up washer under the refig. door. The door wasn't closing all the way. DING!! Something was wrong!!
I looked up your schematic for the refrig door and decided what piece might have broken. It was a good guess and the part showed up a few days later.
I wedged up the refrig door to take the tension off the lower bracket. Then, just took off the bracket and replaced the broken door closing cam.
I looked up your schematic for the refrig door and decided what piece might have broken. It was a good guess and the part showed up a few days later.
I wedged up the refrig door to take the tension off the lower bracket. Then, just took off the bracket and replaced the broken door closing cam.
Parts Used:
-
Thomas from Las Vegas, NV
-
Difficulty Level:Really Easy
-
Total Repair Time:15 - 30 mins
-
Tools:Socket set
1 of 3 people
found this instruction helpful.
Was this instruction helpful to you?
Thank you for voting!
Refrigerator door wouldn't close properly due to broken cams.
Thanks to the stories on PartSelect my wife and I knew what to expect. The biggest hassle was sawing off the rivet that's on the hinge on the refrigerator (my wife volunteered for that job). When we got everything back together the door worked a lot better, but still wouldn't close without a little push. In frustration and running out of time, we put the stuff back inside the refrigerator door and that did the trick! The weight was enough to allow the door to close on its own.
Parts Used:
-
Timothy from Rockville, MD
-
Difficulty Level:Easy
-
Total Repair Time:1- 2 hours
-
Tools:Pliers, Screw drivers, Socket set
1 of 3 people
found this instruction helpful.
Was this instruction helpful to you?
Thank you for voting!
Door does not shut on its own
I used a block of wood to hold up the door. Then unbolted the lower hinge from the fridge. That is when I found out that it was fine and it was the upper half of the hinge that was broken (worn).
So I unbolted the upper hinge (mounted on the bottom of door) It uses the same part. So I installed the part on the upper half of the hinge.
I wish somebody would have told me that you need 2 of these for each hinge. The bottom one was in good shape, lucky for me.
So I unbolted the upper hinge (mounted on the bottom of door) It uses the same part. So I installed the part on the upper half of the hinge.
I wish somebody would have told me that you need 2 of these for each hinge. The bottom one was in good shape, lucky for me.
Parts Used:
-
Gary from Sandy Hook, CT
-
Difficulty Level:Easy
-
Total Repair Time:15 - 30 mins
-
Tools:Nutdriver
1 of 3 people
found this instruction helpful.
Was this instruction helpful to you?
Thank you for voting!
Door Cam And Cam On Refridgerator Were Damaged
I did not realize I needed 2 cams to complete repair. Door cam was riveted in. I had to drill out rivet and replace with nut and bolt. Otherwise it went quite sommothly. At first I just replaced the cam on bottom of refridgerator but door was not quite right when closing. Further inspection showed the door had the other half of cam that also needed replacement. Needed 2 orders. Paid for 2 shippings.
Parts Used:
-
Robin from North Plainfield, NJ
-
Difficulty Level:A Bit Difficult
-
Total Repair Time:15 - 30 mins
0 of 1 people
found this instruction helpful.
Was this instruction helpful to you?
Thank you for voting!
Broken cam riser
Thought I would only need one when I looked at the picture of the parts. Decided to order two just in case and after taking it apart both were broken. Needed two.
Took the top door bracket off and lifted the door off of the bottom bracket. Re-assembled cams, put a little white grease on all moving parts, placed the door into bottom bracket and installed top bracket. Adjusted top bracket to make door line up with edge of refrigerator and all is well.
Took the top door bracket off and lifted the door off of the bottom bracket. Re-assembled cams, put a little white grease on all moving parts, placed the door into bottom bracket and installed top bracket. Adjusted top bracket to make door line up with edge of refrigerator and all is well.
Parts Used:
-
Robert from Ipava, IL
-
Difficulty Level:A Bit Difficult
-
Total Repair Time:15 - 30 mins
-
Tools:Screw drivers, Socket set
0 of 1 people
found this instruction helpful.
Was this instruction helpful to you?
Thank you for voting!
Door closing cams were both broken
Remove screw at hinge cover, top of door.
Remove two screw/nuts at hinge and remove hinge while holding door in place.
Lift door off of lower hinge
remove two nut/screws at bottom of door and replace closing cam. Be sure the pivot pin hole in the cam is lined up with the hole in door.
Next drill out rivet holding cam to lower hinge on the refer. Install cam with a pan head screw and nut (to replace rivet). It will help if you remove the plastic grille cover at the bottom of the frige.
Set door back on the lower pin and shut so the the magnetic strip holds the door in place. Re-install the upper hinge loosely. Adjust the door for an even gap and tighten the screw/nuts. Re-install the cover.
A very easy fix.
Remove two screw/nuts at hinge and remove hinge while holding door in place.
Lift door off of lower hinge
remove two nut/screws at bottom of door and replace closing cam. Be sure the pivot pin hole in the cam is lined up with the hole in door.
Next drill out rivet holding cam to lower hinge on the refer. Install cam with a pan head screw and nut (to replace rivet). It will help if you remove the plastic grille cover at the bottom of the frige.
Set door back on the lower pin and shut so the the magnetic strip holds the door in place. Re-install the upper hinge loosely. Adjust the door for an even gap and tighten the screw/nuts. Re-install the cover.
A very easy fix.
Parts Used:
-
Michael from Portland, OR
-
Difficulty Level:Easy
-
Total Repair Time:15 - 30 mins
-
Tools:Screw drivers, Socket set
0 of 1 people
found this instruction helpful.
Was this instruction helpful to you?
Thank you for voting!
Cam wore out and the door would drop down. To close the door I had to lift it up and close it.
First of all, It was Christmas and no extra money to pay a repairman.
i got on the computer and started looking for a parts breakdown for an older GE side by side.
I finally found it and located the part I thought we needed.
I looked at several parts dealers and yours had the best price.
anyway it arrived in just 2 days. My son helped me remove the door and we put the new part on and I just saved the cost of a service call.
Thank You
i got on the computer and started looking for a parts breakdown for an older GE side by side.
I finally found it and located the part I thought we needed.
I looked at several parts dealers and yours had the best price.
anyway it arrived in just 2 days. My son helped me remove the door and we put the new part on and I just saved the cost of a service call.
Thank You
Parts Used:
-
Shirley from Toccoa, GA
-
Difficulty Level:Easy
-
Total Repair Time:15 - 30 mins
-
Tools:Nutdriver, Wrench (Adjustable)
0 of 1 people
found this instruction helpful.
Was this instruction helpful to you?
Thank you for voting!
doors were not aligned in height so door was not closing proper and lossing lots of cold air from refrigerator
Door needed to be supported before hinge assembly was removed. After replacing broken cam doors aligned and doors closing properly.
Parts Used:
-
Pradip from Maperville, IL
-
Difficulty Level:Easy
-
Total Repair Time:15 - 30 mins
-
Tools:Socket set
0 of 1 people
found this instruction helpful.
Was this instruction helpful to you?
Thank you for voting!