




















CRE7600BDW Maytag Range - Instructions
Keep searches simple. Use keywords, e.g. "leaking", "pump", "broken" or "fit".
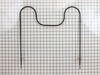
BurntBaking Element Element
Turn Off the BREAKER!!!
Unplug the stove/oven
Opened the oven door
Unscrewed the baking element for the oven
Pulled the old element out about 3"
Disconnected the wire clip on both sides
Plugged the element into the clips
Screwed element back into place
Plugged oven in ,turned on breaker
PRESTO DONE
Unplug the stove/oven
Opened the oven door
Unscrewed the baking element for the oven
Pulled the old element out about 3"
Disconnected the wire clip on both sides
Plugged the element into the clips
Screwed element back into place
Plugged oven in ,turned on breaker
PRESTO DONE
Parts Used:
-
Matt from Lewisburg, TN
-
Difficulty Level:Really Easy
-
Total Repair Time:Less than 15 mins
-
Tools:Screw drivers
1 person
found this instruction helpful.
Was this instruction helpful to you?
Thank you for voting!
My oven sparked, then wasn't working, so I turned to the internet.
I received the new element on the third day, followed simple directions, and voila! I'm baking again.
First I unplugged the stove. Important!. Then with a phillips head screwdriver I removed the two screws at the back of the oven. The transition from busted to new was easy because there was a slide-in connection to the wires, not screws. The best advice was sticking duct tape on the wires so they wouldn't go back into the inner sanctum before I was able to attach the new element. Hey, I'm a 72-year-old grandma, and it was easy!
First I unplugged the stove. Important!. Then with a phillips head screwdriver I removed the two screws at the back of the oven. The transition from busted to new was easy because there was a slide-in connection to the wires, not screws. The best advice was sticking duct tape on the wires so they wouldn't go back into the inner sanctum before I was able to attach the new element. Hey, I'm a 72-year-old grandma, and it was easy!
Parts Used:
-
Joan from Medford, OR
-
Difficulty Level:Really Easy
-
Total Repair Time:Less than 15 mins
-
Tools:Screw drivers
1 person
found this instruction helpful.
Was this instruction helpful to you?
Thank you for voting!
fireworks in the oven. Burned completely in two.
My husband has moved out of state for his job. I am left here with the children until the house sells. This is the first time I have ever had to do any oven repair. I had excellent and fast service - my part came right away. I took out the 2 screws holding the element in place, pulled the element out, disconnected the old element, connected the new one, pushed it back in, and replaced the screws. No problem at all. I was a little nervous turning it all back on, but it is working perfectly!
Parts Used:
-
Shelly from Allentown, PA
-
Difficulty Level:Really Easy
-
Total Repair Time:Less than 15 mins
-
Tools:Screw drivers
1 person
found this instruction helpful.
Was this instruction helpful to you?
Thank you for voting!
bottom bake element broken and burned
First throw the breaker on the stove. Remove two screws in back of oven then slowly pull out loosen the wire attachements ......got new part in 2 days just as simple reverse the removal directions.,,,I am over 60 female and it was simple.
Parts Used:
-
Carolyn S from white oak, NC
-
Difficulty Level:Really Easy
-
Total Repair Time:Less than 15 mins
-
Tools:Screw drivers
1 person
found this instruction helpful.
Was this instruction helpful to you?
Thank you for voting!
The bake element burst.
Removed the two screws that held the element in place and then pulled off the element from the connectors. Slipped the new connectors on. Tested the oven - Baked some blackberry cobbler!
Parts Used:
-
Diane from Littleton, CO
-
Difficulty Level:Easy
-
Total Repair Time:30 - 60 mins
-
Tools:Screw drivers
1 person
found this instruction helpful.
Was this instruction helpful to you?
Thank you for voting!
Wife said stove was on fire - Oven element shorted.
Removed the old element by removing 2 screws and disconnecting two solderless connectors. One solderless connector was melted in two. I had to remove the rear panel and cut the old connector off and crimped on a new solderless connector. The time required was lengthened due to trip to the hardware store to get a new connector. While I was fixing the oven element my wife replaced the oven light.
Parts Used:

-
James from Hoyt Lakes, MN
-
Difficulty Level:Easy
-
Total Repair Time:30 - 60 mins
-
Tools:Screw drivers
1 person
found this instruction helpful.
Was this instruction helpful to you?
Thank you for voting!
original fixture required bulb - this fixture (all-in-one) was great
Pulled range out from cabinet-wall to get to back side, everthing was clearly exposed tlhen. Just a matter of installing new fixture, putting back on, reconnected power source - put range back in proper place.
Parts Used:

-
wesley from ODENVILLE, AL
-
Difficulty Level:Really Easy
-
Total Repair Time:30 - 60 mins
-
Tools:Pliers, Screw drivers
1 person
found this instruction helpful.
Was this instruction helpful to you?
Thank you for voting!
Replace the lower oven element
Unplug the 220 cord..remove rear metal back ( 7-8 Ph/screws)... disconnect the red & yellow connectors from the back of the lower element. Remove-the-lift-off Oven door. Remove the two Ph/screws (one on either end of the element) At the very rear of the oven. Install the new element and reverse the about to reassemble.
Parts Used:
-
Tom from ROCKTON, IL
-
Difficulty Level:Really Easy
-
Total Repair Time:30 - 60 mins
-
Tools:Screw drivers
1 person
found this instruction helpful.
Was this instruction helpful to you?
Thank you for voting!
Bottom Element Burned out
Turned off all power to range.
Removed two Philip head screws
Gentle pulled unit Element forward
Removed two push on connectors
(Do not let wires fall back into oven holes)
Reversed the process.
Removed two Philip head screws
Gentle pulled unit Element forward
Removed two push on connectors
(Do not let wires fall back into oven holes)
Reversed the process.
Parts Used:
-
Robert from Jacksonville, FL
-
Difficulty Level:Easy
-
Total Repair Time:15 - 30 mins
-
Tools:Screw drivers
1 person
found this instruction helpful.
Was this instruction helpful to you?
Thank you for voting!
Lower burner not heating:
Ordered element and recieved in two days(yea). Removed back cover from unit. Removed two wire slide on wire clips. Then went inside oven cavity and removed two screws holding element intact. The element slid out. Installed element, re-installed two screws to hold element intact. Attached wire clips back on to element, re-attached back cover. Plugged unit back in and it worked perfectly. Eazy-peezy lemon squeezy.
John
Johnny on the Spot Home Repairs
Fishers, Indiana 317-997-3600
John
Johnny on the Spot Home Repairs
Fishers, Indiana 317-997-3600
Parts Used:
-
John from Fishers, IN
-
Difficulty Level:Easy
-
Total Repair Time:15 - 30 mins
-
Tools:Screw drivers
1 person
found this instruction helpful.
Was this instruction helpful to you?
Thank you for voting!
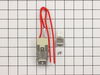
Jennair cooktop with coils lost one of its coil guides.
We bought the replacement Ceramic plug and wires, and opened up the jennair cooktop piece and rewired the NEW coil guide into the system. It works great.
Parts Used:
-
Bruce from SOUTHBURY, CT
-
Difficulty Level:Really Easy
-
Total Repair Time:30 - 60 mins
-
Tools:Socket set
1 person
found this instruction helpful.
Was this instruction helpful to you?
Thank you for voting!
Oven baking coil had burned out
Removed two screws from back of oven ,pulled apart old coil from wires, inserted new coil into the small metal pieces, pushed back and screws replaced. Really easy , anyone can do. Oh, I am 70 years old so probably people younger could do more quickly.
Parts Used:
-
Marie from Fredericksburg, VA
-
Difficulty Level:Really Easy
-
Total Repair Time:30 - 60 mins
-
Tools:Screw drivers
1 person
found this instruction helpful.
Was this instruction helpful to you?
Thank you for voting!
Replaced upper over light and assembly
I had to pull out the oven and balance the oven on two patio tables. Remove the back of the oven. Pull out the light assembly which was burnt. I was unable to remove the casing around the light, so I destroyed it with a pliers. Reinstalling the new light and assembly was easy. What made this job difficult, I could not remove the light assembly from the front of the oven and had to go in from the back.
Parts Used:
-
Thomas from SAN DIEGO, CA
-
Difficulty Level:Very Difficult
-
Total Repair Time:More than 2 hours
-
Tools:Pliers, Screw drivers
1 person
found this instruction helpful.
Was this instruction helpful to you?
Thank you for voting!
Bake element burned out
Removed the failed bake element per the video linked in the Partselect email. Unlike the video on YouTube the PartSelect video shows that the bake element can easily be replaced through the oven door and it is not necessary to slide the range out and remove a rear panel.
Parts Used:
-
Richard from BOULDER, CO
-
Difficulty Level:Very Easy
-
Total Repair Time:Less than 15 mins
-
Tools:Pliers, Screw drivers
1 person
found this instruction helpful.
Was this instruction helpful to you?
Thank you for voting!
The Baking Element won't heat to bake.
I had the problem before and had to call in a Tech to repair the baking element in my oven. It cost me $150.00 for the repair. This time I decided to do the repair myself, so I went online and found this site The instruction video made it very easy. I am very proud of what I was able to do without calling a Tech. My oven works like new, It only cost less than $40.00 for the total repair. I am so glad this site were there when I needed them.. Thanks a Lot..
Parts Used:
-
Kiara from JACKSONVILLE, FL
-
Difficulty Level:Very Easy
-
Total Repair Time:Less than 15 mins
-
Tools:Screw drivers
1 person
found this instruction helpful.
Was this instruction helpful to you?
Thank you for voting!