




















CGT8000AQ0 Whirlpool Washer Dryer Combo - Instructions
Keep searches simple. Use keywords, e.g. "leaking", "pump", "broken" or "fit".
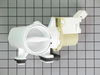
water would not pump (drain) out of machine
My husband removed the bottom panel of the washer and removed the old pump with two screws, then removed the water hose coming into the pump and unplugged the electrical push in type plug from the side of the pump. Simple reversed the process to instal the new one and replaced the front panel. Simple really...far more so than calling a repair man.
Parts Used:
-
Pamela from Greenville, OK
-
Difficulty Level:Easy
-
Total Repair Time:15 - 30 mins
-
Tools:Nutdriver, Wrench (Adjustable)
9 of 15 people
found this instruction helpful.
Was this instruction helpful to you?
Thank you for voting!
Broken striker
Remove two star screws. Remove broken striker. Installed new striker. Took two mins.
Parts Used:
-
KERRY from CLYDE, TX
-
Difficulty Level:Very Easy
-
Total Repair Time:Less than 15 mins
-
Tools:Screw drivers
6 of 6 people
found this instruction helpful.
Was this instruction helpful to you?
Thank you for voting!
Lens melted because paper got behind the lens and was heated by the lamp.
-
Chris from Valley Stream, NY
-
Difficulty Level:Really Easy
-
Total Repair Time:Less than 15 mins
-
Tools:Screw drivers
6 of 6 people
found this instruction helpful.
Was this instruction helpful to you?
Thank you for voting!
My dryer conked. Would not turn on, but before that happened it was taking way too long to dry the clothes and the dryer would stop in the middle of a cycle.
Went on this website and found a story that was similar. I ordered the parts which arrived quickly and I replaced the Thermal Fuse and heating element and it was fixed! The whole repair cost me $24.88! Way cheaper than calling a repair man.
Heater thing was part # 3387134
and the fuse was 3392519
Heater thing was part # 3387134
and the fuse was 3392519
Parts Used:
-
brenda from Newman Lake, WA
-
Difficulty Level:Really Easy
-
Total Repair Time:15 - 30 mins
-
Tools:Screw drivers, Wrench (Adjustable)
7 of 9 people
found this instruction helpful.
Was this instruction helpful to you?
Thank you for voting!
No Heat
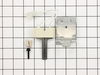
Thermal fuse was blown so I replaced it. Still no heat. Hi-Limit thermostat and Cycling Thermo. had continuity as did flame sensor. Igniter tested 66ohms. I placed a wire jumper across the Hi-Limit and the igniter glowed, solenoids opened and gas came on. I orderd the Hi-Limit and since both "overheating" limiters were defective I decided to order the cycling thermo just in case. The Hi-Limit was received in 2 days but the Cycling Thermo was backordered. In the meantime my wife got antsy so I went ahead and installed the Hi-Limit and put her back in service... ...for one load. I wasn't certain if I had fried the "limiters" again but since they had continuity and I could measure continuity all the way to the Igniter I decided that it HAD to be the cause. I ignored the flame sensor since it never came into play without the igniter glowing... The igniter arrived and measured 56ohms. Hmmm... After installing the problem was solved. Word of advice: If the thermal fuse is blown and even if all else in the circuit SEEMS ok, go ahead and order the Fuse, Hi-Limit and Cycling Thermos, and the Igniter. It will take you about 30 minutes to install and you'll reduce your out-of-service time! Good luck!
Parts Used:
-
Ken from Bixby, OK
-
Difficulty Level:Easy
-
Total Repair Time:More than 2 hours
-
Tools:Nutdriver, Screw drivers, Socket set
7 of 9 people
found this instruction helpful.
Was this instruction helpful to you?
Thank you for voting!
The door will not latch tightly.
I replaced both the door strike and the female portion. The door still does not close tightly. Heavy, wet items also knock the door open.
Parts Used:
-
John from Syracuse, NY
-
Difficulty Level:Really Easy
-
Total Repair Time:Less than 15 mins
-
Tools:Screw drivers
9 of 16 people
found this instruction helpful.
Was this instruction helpful to you?
Thank you for voting!
Dryer would not start.
Unplug dryer from mains. Remove the back of the dryer. Thermal fuse is located on the left hand side near the bottom as you face the back of the dryer. Remove fuse and connect new fuse. Never repaired an appliance before and this was so easy!
Parts Used:
-
Rebecca from Scarsdale, NY
-
Difficulty Level:Really Easy
-
Total Repair Time:15 - 30 mins
-
Tools:Screw drivers
7 of 10 people
found this instruction helpful.
Was this instruction helpful to you?
Thank you for voting!
not heat
For the Ignitor - As involved as taking the dryer completely apart sounded, it was super easy. 1-take out the lint trap and remove the two screws there. 2-Pop open the top with a screw driver and swing the top completely over/back. 3- remove the two screws holding in the front panel and remove the panel. 4- loosen the belt by pushing on the tension roller under the drum on the right and remove the drum (its super light) use the belt as a handle. 5- remove the screw holding in the ignitor and replace it with the new one. Be careful to not touch the new ignitor. Then go backwards putting it back together.
Parts Used:
-
Sarah from Merrimac, MA
-
Difficulty Level:Really Easy
-
Total Repair Time:15 - 30 mins
-
Tools:Screw drivers, Socket set
7 of 10 people
found this instruction helpful.
Was this instruction helpful to you?
Thank you for voting!
Dryer got hot then heat would shut off
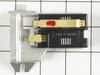
Sensor is in the front lower left. Gas off, electicity off. Removed two screws for the filter, pry/lifted the top up and taped it too the overhead cabinet, removed two screws inside top of front panel, lifted pandel with door closed staight off. Two screws to remove the flame sensor braket. unplug the old sensor install the new one and reverse everything. With others suggestions I purchased temperature switches etc. but the radiant flame sensor was the problem. I now have some spare switches for future. Excellent company and very quick service. Oh, Sears wanted 200.00 just for the service call, I live rural.
Parts Used:
-
Douglas from Fernley, NV
-
Difficulty Level:Really Easy
-
Total Repair Time:30 - 60 mins
-
Tools:Nutdriver, Socket set
6 of 7 people
found this instruction helpful.
Was this instruction helpful to you?
Thank you for voting!
Drum was out of balance
Easy fix,
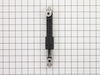
I remove the front lower panel and the shocks where right in front of you , with a little twist with an adjustable wrench the cam right off . I removed and the replaced and it the same when you remove the back panel.
P.S when installing the shocks start by connecting to the bottom and then connect to the drum it will make it lot easier.
Good luck on your repair
I remove the front lower panel and the shocks where right in front of you , with a little twist with an adjustable wrench the cam right off . I removed and the replaced and it the same when you remove the back panel.
P.S when installing the shocks start by connecting to the bottom and then connect to the drum it will make it lot easier.
Good luck on your repair
Parts Used:
-
wilfredo vega from STRATFORD, CT
-
Difficulty Level:Really Easy
-
Total Repair Time:30 - 60 mins
-
Tools:Nutdriver, Pliers, Wrench (Adjustable)
5 of 5 people
found this instruction helpful.
Was this instruction helpful to you?
Thank you for voting!
Hot water valve did not always shut-off

-
Ronald from Bismarck, ND
-
Difficulty Level:Really Easy
-
Total Repair Time:30 - 60 mins
-
Tools:Nutdriver, Pliers, Screw drivers
5 of 5 people
found this instruction helpful.
Was this instruction helpful to you?
Thank you for voting!
No heat, would not light because igniter burnt out
Unplug dryer. Remove the front bottom panel of dryer 2 screws, then unplug wire connector to the old igniter then unscrew one screw holding ignitor then wiggle out. Open new igniter wiggle back in place insert screw tighten, (getting this screw back in is a little hard) replug wire connector to new igniter replace front panel with two screws. Plug in dryer and there you go drying clothes again. Wife all happy again.
Parts Used:
-
anthony from Port Arthur, TX
-
Difficulty Level:A Bit Difficult
-
Total Repair Time:15 - 30 mins
-
Tools:Nutdriver, Screw drivers
6 of 8 people
found this instruction helpful.
Was this instruction helpful to you?
Thank you for voting!
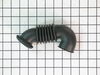
Washing machine leaked.
Couldn’t see exactly where it was coming from. Checked the bellow and it looked ok. Took this hose off and it was kinda chewed up a bit where it connects to the tub. Not bad but enough to make it leak. Ordered the new one. Took forever to get here thru fed ex smart post. Repair takes longer to get the panels off than it does to put new hose on. Hope this helps someone out there.
Parts Used:
-
Tyler from OGDEN, IL
-
Difficulty Level:A Bit Difficult
-
Total Repair Time:30 - 60 mins
-
Tools:Nutdriver, Pliers, Socket set, Wrench (Adjustable)
5 of 5 people
found this instruction helpful.
Was this instruction helpful to you?
Thank you for voting!
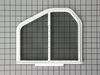
Old lint filter was broken
-
Earl from Santa Ana, CA
-
Difficulty Level:Really Easy
-
Total Repair Time:Less than 15 mins
8 of 14 people
found this instruction helpful.
Was this instruction helpful to you?
Thank you for voting!
Dryer had no heat at all. This is an older gas dryer.
Cleaned out years of fuzz behind lower access panel and noticed where the igniter sits there is a metal tube about 1 inch in diameter. It had rust on the end and was starting to flake away. Found some helpful hints about how to test the igniter. Very easy, just used an ohmeter. Unplugged the 2 pin wire connector and checked for continuity. 1 lead on 1 pin and the other on the other pin., igniter side not the harness side from the dryer. A good igniter should read less than 5 ohms. I don't know the spec. exacttly, but it should not read open or infinite resistance. My meter read an open circuit. Removed the tube and igniter assembly, mine only 2 small bolts. I found the igniter element cracked. Ordered and installed igniter and tube assembly. This was a very easy install. 20 year old dryer works great and it's better than spending $500.00+ on a new one.
Parts Used:

-
todd from MILFORD, PA
-
Difficulty Level:Really Easy
-
Total Repair Time:Less than 15 mins
-
Tools:Wrench set
5 of 5 people
found this instruction helpful.
Was this instruction helpful to you?
Thank you for voting!