




















CFEF3043RSD Frigidaire Range - Instructions
Keep searches simple. Use keywords, e.g. "leaking", "pump", "broken" or "fit".
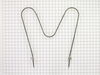
Bottom element burned up
I am 78 years old and I watched the how to video twice and then did it so if I can do it anyone can,oh and I am a woman
Parts Used:
-
Peggy from PORTLAND, OR
-
Difficulty Level:Easy
-
Total Repair Time:30 - 60 mins
-
Tools:Pliers, Screw drivers
3 of 3 people
found this instruction helpful.
Was this instruction helpful to you?
Thank you for voting!
Right rear burner not working properly
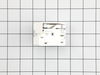
After a brief discussion with CS about the electric stove part was shipped it arrived and I proceeded to install I found it needed to be installed sideways not up & down like the old one. The terminals did not line up so I put the black lead first and the purple lead last in doing that I burned out the switch??? was not easy to install as the video showed his switch matched each wire? My installation was sideways??
Parts Used:
-
Dante from SOUTHOLD, NY
-
Difficulty Level:Difficult
-
Total Repair Time:30 - 60 mins
-
Tools:Nutdriver, Pliers, Screw drivers
3 of 3 people
found this instruction helpful.
Was this instruction helpful to you?
Thank you for voting!
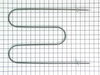
Broiler broke apart in pieces. Also we found an round honeycomb part
in the bottom of the oven when I was looking to see what was going on. My husband did the repair just as the video described. I suspect this part honeycomb round maybe ceramic piece goes over where the heat is vented from the oven. Where do I get another one of these and how does it attach in the oven-under the burner. HELP I tried to look on the schematics and did not see anything. The repair went fine, except when we turned everything back on it did not work. Then my husband remembered he forgot to plug the new part IN. Once plugged in it is working fine. Thanks
Parts Used:
-
Betty from KNIGHTDALE, NC
-
Difficulty Level:Really Easy
-
Total Repair Time:30 - 60 mins
3 of 4 people
found this instruction helpful.
Was this instruction helpful to you?
Thank you for voting!
Change on e of the inside glass
removed the screws holding the front part of the door and from there worked my way, untill the third glass.
It took a couple hours, my first time,. Overall easy,
It took a couple hours, my first time,. Overall easy,
Parts Used:

-
Ronald from Ozone Park, NY
-
Difficulty Level:Easy
-
Total Repair Time:1- 2 hours
-
Tools:Screw drivers
4 of 7 people
found this instruction helpful.
Was this instruction helpful to you?
Thank you for voting!
Burner switch work sometime.
-
junius from WICOMICO, VA
-
Difficulty Level:Really Easy
-
Total Repair Time:1- 2 hours
-
Tools:Nutdriver
3 of 4 people
found this instruction helpful.
Was this instruction helpful to you?
Thank you for voting!
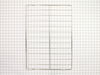
I forgot to remove something I had saved in the oven, planning to remove it before using the range.
Very simple. Removed oven rack that had melted residue on it and replaced it with the new one from your company. I want to tell you that the delivery service I received was just geat. Took less than 48 hours to arrive at my home from the time I placed the order on line. Keep up the good work and I will be happy to share my experience with those in need of you services. Thanks. Marilyn Kasson
Parts Used:
-
Marilyn from Clearwater, FL
-
Difficulty Level:Easy
-
Total Repair Time:Less than 15 mins
3 of 4 people
found this instruction helpful.
Was this instruction helpful to you?
Thank you for voting!
N/A
I had open back cover and remove the switch than replace new switch. Makesure cable conection.
Parts Used:

-
Dineshbhai from Rincon HWY21, GA
-
Difficulty Level:A Bit Difficult
-
Total Repair Time:Less than 15 mins
-
Tools:Screw drivers
4 of 7 people
found this instruction helpful.
Was this instruction helpful to you?
Thank you for voting!
Burner not controlable
Removed rear panal, removed screws from of switch. Unplued wires and installed new switch and put back together. Very easy.
Parts Used:
-
Royce from KEENE, TX
-
Difficulty Level:Very Easy
-
Total Repair Time:Less than 15 mins
-
Tools:Screw drivers
2 of 2 people
found this instruction helpful.
Was this instruction helpful to you?
Thank you for voting!
Oven and broiler didn't work.
I followed the video instruction. It was super easy and quick. It took no more than 10 minutes.
Parts Used:
-
Dennis from NEW PRT RCHY, FL
-
Difficulty Level:Very Easy
-
Total Repair Time:Less than 15 mins
-
Tools:Pliers, Socket set
2 of 2 people
found this instruction helpful.
Was this instruction helpful to you?
Thank you for voting!
oven would not turn off, and temperature was inconsistent
Removed 8 screws from back, took out timer and replaced. Simple. $112 fix versus replacing with a $600 oven. Good for another 5 years!
Parts Used:
-
Aaron from Royal Center, IN
-
Difficulty Level:Really Easy
-
Total Repair Time:Less than 15 mins
-
Tools:Nutdriver
3 of 5 people
found this instruction helpful.
Was this instruction helpful to you?
Thank you for voting!
Oven was not working
I changed the clock , it was very easy ! I changed wire for wire then put the clock in . Simple task but, make sure power if off. You can take a picture of wires with your phone, if you like .
I have to say Parts Select is one of the best companies that I've ever done business with . They help troubleshoot the problem send you the parts on time and make refunds as easy as 123.
I am not easy to please because, of so much incompetence where ever you go these days. That's the reason I took the time to write all this .These folks are the real deal. Kenny G . In Louisiana !
I have to say Parts Select is one of the best companies that I've ever done business with . They help troubleshoot the problem send you the parts on time and make refunds as easy as 123.
I am not easy to please because, of so much incompetence where ever you go these days. That's the reason I took the time to write all this .These folks are the real deal. Kenny G . In Louisiana !
Parts Used:
-
kenneth from GRETNA, LA
-
Difficulty Level:Very Easy
-
Total Repair Time:Less than 15 mins
-
Tools:Nutdriver, Pliers
2 of 2 people
found this instruction helpful.
Was this instruction helpful to you?
Thank you for voting!
The range element was not coming on
After settling that it was the Surface Element Switch, ordering and securing the switch, the first step was to disconnect the power to the Oven/Range. Next pull out the Range and remove the back and disconnect the switch from the top of the Range. Using the new switch I removed the wire connectors from the old switch and reconnected them to the new switch in the same spot that they came from. After connections were secure I reattached the switch to the back of the Range and reattached the back of the Range. When everything was back in place the power source was reconnected and that was it.
Parts Used:
-
William from BENTON, IL
-
Difficulty Level:Really Easy
-
Total Repair Time:15 - 30 mins
-
Tools:Socket set
2 of 2 people
found this instruction helpful.
Was this instruction helpful to you?
Thank you for voting!
burners 1 would not do anything burned out 2 when from normal to out of control heat would not keep a constance heat
turned off breaker 3 Phil screws open door and on inside range top I would reconmend a board to hold top up square tip for cross bar and pliers to pull wires off fit perfect works really nice
Parts Used:
-
rick from Delta, OH
-
Difficulty Level:Really Easy
-
Total Repair Time:15 - 30 mins
-
Tools:Pliers, Screw drivers
2 of 2 people
found this instruction helpful.
Was this instruction helpful to you?
Thank you for voting!
Stove was dropped and had broken, bent frame and adjuster feet
New ones fit perfectly. Take a minute to bend the frame straight. Then and I used oversize screws on the replacement parts as the drop had stripped out the screw holes of the frame.
Parts Used:

-
Paul from PORT ORANGE, FL
-
Difficulty Level:Really Easy
-
Total Repair Time:15 - 30 mins
-
Tools:Screw drivers
2 of 2 people
found this instruction helpful.
Was this instruction helpful to you?
Thank you for voting!
The part I ordered has 5 connections and the part to be replaced has 7 connections. I had to ask a friend who is expert in electrical wiring to help.
My friend used a tester to determine where each wire was supposed to connect to. I'm not sure what he did with the extra connections.
Bottom line is this part should work but you need an expert to do it for you because it's, like I said, not exactly like the one to be replaced.
Bottom line is this part should work but you need an expert to do it for you because it's, like I said, not exactly like the one to be replaced.
Parts Used:
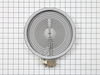
-
Phin from HARRISBURG, PA
-
Difficulty Level:Difficult
-
Total Repair Time:1- 2 hours
-
Tools:Pliers, Screw drivers
2 of 2 people
found this instruction helpful.
Was this instruction helpful to you?
Thank you for voting!