




















CFEF3043RSC Frigidaire Range - Instructions
Keep searches simple. Use keywords, e.g. "leaking", "pump", "broken" or "fit".
Never received parts from PartSelect!!!
It went easy, I ordered the part from another vendor, received it in 3 days and it only took about 20 minutes to install.
I do not recommend ordering from PartSelect!
I do not recommend ordering from PartSelect!
Parts Used:
-
Ralph from SULLIGENT, AL
-
Difficulty Level:Really Easy
-
Total Repair Time:30 - 60 mins
3 of 3 people
found this instruction helpful.
Was this instruction helpful to you?
Thank you for voting!
my burners would just heat up solid red even when i had controls turned down to 2 or 3. i would have to turn controls off and back on, then they still would just go back to glowing red
This was my first time ever working with electrical issues. My husband is not physically able to do repairs now. Very easy fix. Just viewed video repair instructions and it went exactly as instructed. Within 45 minutes, I had my stove repaired and cleaned and back in working order!! Great results. My range is working perfectly again and Mama is happy!!
Parts Used:

-
Leota from AUXVASSE, MO
-
Difficulty Level:Really Easy
-
Total Repair Time:30 - 60 mins
-
Tools:Nutdriver, Pliers, Screw drivers
3 of 3 people
found this instruction helpful.
Was this instruction helpful to you?
Thank you for voting!
Repaired Oven Range Light Bulb
The bulb has a plastic clear cover. That cover can just be carefully removed using a screwdriver. It's held in by a metal bracket. After you remove the cover. You'll just need to replace the bulb and then re-install the cover and bracket.
Parts Used:

-
Alan from SAN MATEO, CA
-
Difficulty Level:Very Easy
-
Total Repair Time:Less than 15 mins
-
Tools:Screw drivers
3 of 3 people
found this instruction helpful.
Was this instruction helpful to you?
Thank you for voting!
Oven wouldn't heat
Removed the backing, removed the old part and disconnected the wires (after taking a quick photo so we knew where to reconnect them on the new part). Removed clock/timer facing and placed on new part. Reconnected the wires to the new part and screwed it back in. Oven now works great without spending the $300 we were quoted by the repair man!!
Parts Used:
-
Lanette from Raytown, MO
-
Difficulty Level:Really Easy
-
Total Repair Time:Less than 15 mins
-
Tools:Nutdriver, Screw drivers
5 of 9 people
found this instruction helpful.
Was this instruction helpful to you?
Thank you for voting!
The LR surface burner and the oven were inoperable.
After receiving the parts in only two days, I first turned off the circuit breaker. Then I pulled the stove out from the wall. I used the nutdriver to remove the upper rear panel. Using the screw driver I removed the defective clock timer and used a pocket knife to carefully remove the clock timer face. I positioned the clock timer face on the new clock timer and installed same in the stove panel. (I had made a list of the wires and their colors to insure the proper placement on the new clock timer). Installed the four screws and on to the burner switch. Two front panel screws removed and the defective burner switch was out. Installed the new burner switch, connected the wires, installed the two screws, pushed on the knob and I was ready to go. Re-installed the reap panel, pushed stove back in, turned on the circuit breaker and tested the burner and oven. All worked correctly. A very easy repair!
Parts Used:
-
THEODORE from WAXAHACHIE, TX
-
Difficulty Level:Really Easy
-
Total Repair Time:15 - 30 mins
-
Tools:Nutdriver, Screw drivers
3 of 3 people
found this instruction helpful.
Was this instruction helpful to you?
Thank you for voting!
I forgot to remove something I had saved in the oven, planning to remove it before using the range.
Very simple. Removed oven rack that had melted residue on it and replaced it with the new one from your company. I want to tell you that the delivery service I received was just geat. Took less than 48 hours to arrive at my home from the time I placed the order on line. Keep up the good work and I will be happy to share my experience with those in need of you services. Thanks. Marilyn Kasson
Parts Used:
-
Marilyn from Clearwater, FL
-
Difficulty Level:Easy
-
Total Repair Time:Less than 15 mins
3 of 4 people
found this instruction helpful.
Was this instruction helpful to you?
Thank you for voting!
N/A
I had open back cover and remove the switch than replace new switch. Makesure cable conection.
Parts Used:
-
Dineshbhai from Rincon HWY21, GA
-
Difficulty Level:A Bit Difficult
-
Total Repair Time:Less than 15 mins
-
Tools:Screw drivers
4 of 7 people
found this instruction helpful.
Was this instruction helpful to you?
Thank you for voting!
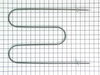
Broiler broke apart in pieces. Also we found an round honeycomb part
in the bottom of the oven when I was looking to see what was going on. My husband did the repair just as the video described. I suspect this part honeycomb round maybe ceramic piece goes over where the heat is vented from the oven. Where do I get another one of these and how does it attach in the oven-under the burner. HELP I tried to look on the schematics and did not see anything. The repair went fine, except when we turned everything back on it did not work. Then my husband remembered he forgot to plug the new part IN. Once plugged in it is working fine. Thanks
Parts Used:
-
Betty from KNIGHTDALE, NC
-
Difficulty Level:Really Easy
-
Total Repair Time:30 - 60 mins
3 of 4 people
found this instruction helpful.
Was this instruction helpful to you?
Thank you for voting!
Burner switch work sometime.
-
junius from WICOMICO, VA
-
Difficulty Level:Really Easy
-
Total Repair Time:1- 2 hours
-
Tools:Nutdriver
3 of 4 people
found this instruction helpful.
Was this instruction helpful to you?
Thank you for voting!
Change on e of the inside glass
removed the screws holding the front part of the door and from there worked my way, untill the third glass.
It took a couple hours, my first time,. Overall easy,
It took a couple hours, my first time,. Overall easy,
Parts Used:

-
Ronald from Ozone Park, NY
-
Difficulty Level:Easy
-
Total Repair Time:1- 2 hours
-
Tools:Screw drivers
4 of 7 people
found this instruction helpful.
Was this instruction helpful to you?
Thank you for voting!
Element and broiler stopped working
The repair was very easy take the back off, pull the wires from the old and put on the new that's it. Carefully peel the old face plate off and stick on the new one your done out the cover back on and cook.
Parts Used:
-
Mark from LE ROY, NY
-
Difficulty Level:Really Easy
-
Total Repair Time:30 - 60 mins
-
Tools:Nutdriver
2 of 2 people
found this instruction helpful.
Was this instruction helpful to you?
Thank you for voting!
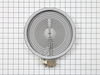
The part I ordered has 5 connections and the part to be replaced has 7 connections. I had to ask a friend who is expert in electrical wiring to help.
My friend used a tester to determine where each wire was supposed to connect to. I'm not sure what he did with the extra connections.
Bottom line is this part should work but you need an expert to do it for you because it's, like I said, not exactly like the one to be replaced.
Bottom line is this part should work but you need an expert to do it for you because it's, like I said, not exactly like the one to be replaced.
Parts Used:
-
Phin from HARRISBURG, PA
-
Difficulty Level:Difficult
-
Total Repair Time:1- 2 hours
-
Tools:Pliers, Screw drivers
2 of 2 people
found this instruction helpful.
Was this instruction helpful to you?
Thank you for voting!
Control shorted out
Removed back panel made note of all connections, remove 4corner screws and connections and re-install in reverse order.
Parts Used:
-
David from ELLIJAY, GA
-
Difficulty Level:Really Easy
-
Total Repair Time:30 - 60 mins
2 of 2 people
found this instruction helpful.
Was this instruction helpful to you?
Thank you for voting!
No problems.
I followed the instructions I remembered from the video when I ordered the clock timer. Had no problem at all. I am enjoying my oven again.
Parts Used:
-
silas from CARTHAGE, MS
-
Difficulty Level:Really Easy
-
Total Repair Time:30 - 60 mins
-
Tools:Nutdriver
2 of 2 people
found this instruction helpful.
Was this instruction helpful to you?
Thank you for voting!
Old part was replaced by mfg’r. Wiring different. No drawings or any info was included to show wiring.
I was forced to call in a pro repairman. Will cost me at least $150 for part and repairman. I could have done job if instructions on how to rewire had been included.
Parts Used:
-
Nelson from FRUITHURST, AL
-
Difficulty Level:Difficult
-
Total Repair Time:30 - 60 mins
-
Tools:Nutdriver, Screw drivers, Socket set
2 of 2 people
found this instruction helpful.
Was this instruction helpful to you?
Thank you for voting!