




















CFE28USHCSS General Electric Refrigerator - Instructions
Keep searches simple. Use keywords, e.g. "leaking", "pump", "broken" or "fit".
switch wouldn't come out anymore and turn light on
Gently pry out switch in door jam with screwdriver and pull both connectors off and put connectors on new switch then push switch back into the hole. Looked it up on the internet and video showed how to and also had link to new part, ordered and less than a week later the fridge is bright again. I have an older freezer also and it seems that they all use the same switches. Very Very easy
Parts Used:

-
Cynthia from Seatac, WA
-
Difficulty Level:Really Easy
-
Total Repair Time:Less than 15 mins
-
Tools:Screw drivers
Was this instruction helpful to you?
Thank you for voting!
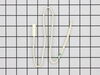
Refrigerator freezing.
Temp. Sensor was under an egg shaped cover on the left side wall in the refrigerator. Remove the cover, cut the two wires to the old sensor and remove it. Connect the new sensor to the two wires using butt connectors. Replace cover and done.
Parts Used:
-
Wayne from Rancho Cordova, CA
-
Difficulty Level:Really Easy
-
Total Repair Time:Less than 15 mins
Was this instruction helpful to you?
Thank you for voting!
refrige ws too cold
-
Jeffrey from Saint Charles, IL
-
Difficulty Level:Really Easy
-
Total Repair Time:Less than 15 mins
-
Tools:Nutdriver, Pliers
Was this instruction helpful to you?
Thank you for voting!
no light in freezer
-
christopher from collegeville, PA
-
Difficulty Level:Really Easy
-
Total Repair Time:Less than 15 mins
Was this instruction helpful to you?
Thank you for voting!
extreme frost build up inside in back of freezer,also veggies were freezing in the fridge draw
no brainer,watched the video,worst thing was to thaw the freezer,it was realy frosted,works like new,very happy thank you.
Parts Used:
-
larry from lisbon, ME
-
Difficulty Level:Really Easy
-
Total Repair Time:15 - 30 mins
-
Tools:Screw drivers
Was this instruction helpful to you?
Thank you for voting!
Food section of fridge always warm
Located temperature sensor on condenser in the freezer section( as per instructional video ). Cut off bad sensor with wire cutter then soldered on the new sensor and sealed with electrical shrink wrap.
Parts Used:
-
Troy from Dacula, GA
-
Difficulty Level:Easy
-
Total Repair Time:15 - 30 mins
-
Tools:Pliers, Socket set
Was this instruction helpful to you?
Thank you for voting!
freezer no cold enought
as per video- follow all of the videos and u r going to save a lot of money tx partselect im glad I found u guys ps only order from partselect.com they only ship the correct parts remember look at the video select the symptom and buy as per video tx again problemsolved
Parts Used:
-
John J. from Deland, FL
-
Difficulty Level:Really Easy
-
Total Repair Time:15 - 30 mins
-
Tools:Nutdriver, Pliers
Was this instruction helpful to you?
Thank you for voting!
coil frosting up and refridgerator section was not cooling
took out shelves and removed the back plate my removing 2 screws with a nutdriver.removed the old defrost timer and defrost heater which was really easy.then installed the new ones.the video i watched on the website was really helpfull.
Parts Used:
-
Vernon from Harmony, NC
-
Difficulty Level:Really Easy
-
Total Repair Time:15 - 30 mins
-
Tools:Nutdriver, Screw drivers
Was this instruction helpful to you?
Thank you for voting!
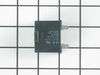
Starter/overload assembly and run capacitor were bad
Removed rer cover, unplugged starter assembly from side of compressor and replaced unit with a new one. Plugged fridge in and it works good.
Parts Used:
-
Colby from Blanding, UT
-
Difficulty Level:Really Easy
-
Total Repair Time:15 - 30 mins
-
Tools:Screw drivers
Was this instruction helpful to you?
Thank you for voting!