




















CDE7500KB0 Crosley Dryer - Instructions
Keep searches simple. Use keywords, e.g. "leaking", "pump", "broken" or "fit".
no problem
-
David from Mayfield, KY
-
Difficulty Level:Really Easy
-
Total Repair Time:Less than 15 mins
Was this instruction helpful to you?
Thank you for voting!
I shut the door too hard, and the old latch fell down into the inside of the dryer.
-
Bret from Tampa, FL
-
Difficulty Level:Really Easy
-
Total Repair Time:Less than 15 mins
Was this instruction helpful to you?
Thank you for voting!
Dryer was not drying completly.
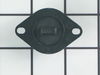
I replaced the Control Thermistor (part # PS1149368) by removing the two screws on the bottom of the lower panel below the door. You will see the Control Thermistor just below and to the left of the discharge chute. Remove the two screws holding the Control Thermistor in place. Disconnect the two wire and reconnect to new Control Thermistor. Replace screws in reverse order of above.
Parts Used:
-
Scott from Otsego, MN
-
Difficulty Level:Easy
-
Total Repair Time:15 - 30 mins
-
Tools:Screw drivers
Was this instruction helpful to you?
Thank you for voting!
Shreking noise when turning on, then loud noise from dryer, after a few minutes it would not be so loud but louder than normal.
Replaced everything on the dryer till I got the right problem, seriously, I now have a new dryer in an old body, still came out alot cheaper than buying a new one. I listened to every sound on youtube but none sounded like my dryer.
Parts Used:
-
joan from Roanoke, AL
-
Difficulty Level:Easy
-
Total Repair Time:15 - 30 mins
-
Tools:Screw drivers
Was this instruction helpful to you?
Thank you for voting!