




















CC3531XRA Crosley Range - Instructions
Keep searches simple. Use keywords, e.g. "leaking", "pump", "broken" or "fit".
lens light was broken and missing.
Removed the cooktop using screwdriver. Pushed lens-light into cooktop hole.It was difficult to do and was where I spent most of my time. Next time I will spray bottom of lens- light with silicon so it goes in easier. I stood cooktop up on its side and inserted the red light assembly onto the lens-light. Reinstalled cooktop
and turned electrical power on.
and turned electrical power on.
Parts Used:

-
Allan from Rolla, MO
-
Difficulty Level:A Bit Difficult
-
Total Repair Time:15 - 30 mins
-
Tools:Screw drivers
1 person
found this instruction helpful.
Was this instruction helpful to you?
Thank you for voting!
Replaced upper over light and assembly
I had to pull out the oven and balance the oven on two patio tables. Remove the back of the oven. Pull out the light assembly which was burnt. I was unable to remove the casing around the light, so I destroyed it with a pliers. Reinstalling the new light and assembly was easy. What made this job difficult, I could not remove the light assembly from the front of the oven and had to go in from the back.
Parts Used:

-
Thomas from SAN DIEGO, CA
-
Difficulty Level:Very Difficult
-
Total Repair Time:More than 2 hours
-
Tools:Pliers, Screw drivers
1 person
found this instruction helpful.
Was this instruction helpful to you?
Thank you for voting!
selector switch not smooth and no heat on element
un-plug device from outlet for safety first and then remover all top panel after screws lower two side small screws. actually is not selector problem. It was burner switch problem for 6 inches element.
Parts Used:
-
TUONG from ALBANY, NY
-
Difficulty Level:Really Easy
-
Total Repair Time:30 - 60 mins
-
Tools:Pliers, Screw drivers
1 person
found this instruction helpful.
Was this instruction helpful to you?
Thank you for voting!
original fixture required bulb - this fixture (all-in-one) was great
Pulled range out from cabinet-wall to get to back side, everthing was clearly exposed tlhen. Just a matter of installing new fixture, putting back on, reconnected power source - put range back in proper place.
Parts Used:
-
wesley from ODENVILLE, AL
-
Difficulty Level:Really Easy
-
Total Repair Time:30 - 60 mins
-
Tools:Pliers, Screw drivers
1 person
found this instruction helpful.
Was this instruction helpful to you?
Thank you for voting!
Oven baking coil had burned out
Removed two screws from back of oven ,pulled apart old coil from wires, inserted new coil into the small metal pieces, pushed back and screws replaced. Really easy , anyone can do. Oh, I am 70 years old so probably people younger could do more quickly.
Parts Used:
-
Marie from Fredericksburg, VA
-
Difficulty Level:Really Easy
-
Total Repair Time:30 - 60 mins
-
Tools:Screw drivers
1 person
found this instruction helpful.
Was this instruction helpful to you?
Thank you for voting!
Jennair cooktop with coils lost one of its coil guides.
We bought the replacement Ceramic plug and wires, and opened up the jennair cooktop piece and rewired the NEW coil guide into the system. It works great.
Parts Used:
-
Bruce from SOUTHBURY, CT
-
Difficulty Level:Really Easy
-
Total Repair Time:30 - 60 mins
-
Tools:Socket set
1 person
found this instruction helpful.
Was this instruction helpful to you?
Thank you for voting!
Bake element burned out
Removed the failed bake element per the video linked in the Partselect email. Unlike the video on YouTube the PartSelect video shows that the bake element can easily be replaced through the oven door and it is not necessary to slide the range out and remove a rear panel.
Parts Used:
-
Richard from BOULDER, CO
-
Difficulty Level:Very Easy
-
Total Repair Time:Less than 15 mins
-
Tools:Pliers, Screw drivers
1 person
found this instruction helpful.
Was this instruction helpful to you?
Thank you for voting!
Old seal breaking off oven door. Oven not baking food well, wasting heat and fuel.
Used pliers to remove clips and old seal. Snap in new seal. DONE! Less than 5 mins.
Parts Used:
-
Mz from COLUMBIA, ME
-
Difficulty Level:Very Easy
-
Total Repair Time:Less than 15 mins
-
Tools:Pliers
1 person
found this instruction helpful.
Was this instruction helpful to you?
Thank you for voting!
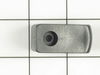
One of the broiler drawer guides broke
All I had to do was pull the drawer out and screw on the new part! Awesome experience...and it was so easy to find the part on the website, everything is very clear and with pictures to ensure where the part belongs...who could ask for more?
Parts Used:
-
Jeri from NEW RICHMOND, OH
-
Difficulty Level:Very Easy
-
Total Repair Time:Less than 15 mins
-
Tools:Screw drivers
1 person
found this instruction helpful.
Was this instruction helpful to you?
Thank you for voting!
The oven heating element burned out like a lit fuse!
Removed 2 phillips screws, unplugged 2 wires, threw away old element. Installation of the new element was just as easy but in reverse order. Piece of cake!
Parts Used:
-
Herbert from Neenah, WI
-
Difficulty Level:Really Easy
-
Total Repair Time:Less than 15 mins
-
Tools:Screw drivers
1 person
found this instruction helpful.
Was this instruction helpful to you?
Thank you for voting!
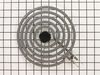
The heating element on the left front burner was out
Pulled the old one out and plugged the new one in. It was that simple!
Parts Used:
-
Julie from Salt Lake City, UT
-
Difficulty Level:Really Easy
-
Total Repair Time:Less than 15 mins
2 of 4 people
found this instruction helpful.
Was this instruction helpful to you?
Thank you for voting!
Bake element burned out
Very simple fix--unpugged two fittings in the back of oven plugged in the new element and it was done.The Best part was that the element burned out on a Sunday and I ordered the part that day and it shipped on Monday and received part on Wed AM.This is the second time I've had to replace the element and by ordering through Part Select I saved $24.00 versus buying it from an appliance store.
Don Samuelson
Don Samuelson
Parts Used:
-
Donald from Tomahawk, WI
-
Difficulty Level:Really Easy
-
Total Repair Time:15 - 30 mins
1 person
found this instruction helpful.
Was this instruction helpful to you?
Thank you for voting!
No Bake, only Broil
POWER OFF! Unplugged oven from wall.
(Note: I found it easier to disconnect the wires from the element by removing the rear cover. Fumbling around inside the oven was getting me nowhere.)
Removed rear cover.
Disconnected old element.
Unscrewed the old element from inside the oven, removed, and installed the new element. Screwed the new element in place.
Reconnected wires in back, installed the back cover.
Connected power.
Tested. Good as new.
(Note: I found it easier to disconnect the wires from the element by removing the rear cover. Fumbling around inside the oven was getting me nowhere.)
Removed rear cover.
Disconnected old element.
Unscrewed the old element from inside the oven, removed, and installed the new element. Screwed the new element in place.
Reconnected wires in back, installed the back cover.
Connected power.
Tested. Good as new.
Parts Used:
-
Edward from Adamstown, MD
-
Difficulty Level:Really Easy
-
Total Repair Time:15 - 30 mins
-
Tools:Pliers, Screw drivers
1 person
found this instruction helpful.
Was this instruction helpful to you?
Thank you for voting!
Element didn't heat at all
Removed 2 screws, disconnected wires, attached wires to new element, put screws back. Turned oven on. Perfect.
Parts Used:
-
Roger from PATERSON, NJ
-
Difficulty Level:Very Easy
-
Total Repair Time:Less than 15 mins
-
Tools:Pliers, Screw drivers
1 person
found this instruction helpful.
Was this instruction helpful to you?
Thank you for voting!
The Baking Element won't heat to bake.
I had the problem before and had to call in a Tech to repair the baking element in my oven. It cost me $150.00 for the repair. This time I decided to do the repair myself, so I went online and found this site The instruction video made it very easy. I am very proud of what I was able to do without calling a Tech. My oven works like new, It only cost less than $40.00 for the total repair. I am so glad this site were there when I needed them.. Thanks a Lot..
Parts Used:
-
Kiara from JACKSONVILLE, FL
-
Difficulty Level:Very Easy
-
Total Repair Time:Less than 15 mins
-
Tools:Screw drivers
1 person
found this instruction helpful.
Was this instruction helpful to you?
Thank you for voting!