




















CC3520SRA Crosley Range - Instructions
Keep searches simple. Use keywords, e.g. "leaking", "pump", "broken" or "fit".
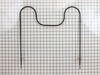
Baking element burned out while I was baking
I Unscrewed the attachment plates located at the back of the over. Pulled the element out so that I could "unhook" the prongs. Replaced the new element by clipping on the prong attachement (you will see where the electrical wires are). Screwed the plates back on and Vola! I'm baking again.
Parts Used:
-
Hurline from Cedar Park, TX
-
Difficulty Level:Really Easy
-
Total Repair Time:Less than 15 mins
-
Tools:Screw drivers
1 of 2 people
found this instruction helpful.
Was this instruction helpful to you?
Thank you for voting!
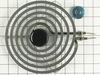
old element broke into
-
Janet from Paul, ID
-
Difficulty Level:Really Easy
-
Total Repair Time:Less than 15 mins
1 of 2 people
found this instruction helpful.
Was this instruction helpful to you?
Thank you for voting!
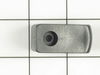
One of the broiler drawer support broke
Piece of cake. Removed the Phillips screw with screwdriver, placed new one on the slide and used old screw to screw it in place. Drawer does not lean to one side anymore.
Parts Used:
-
Jay from Charleston, SC
-
Difficulty Level:Really Easy
-
Total Repair Time:Less than 15 mins
-
Tools:Screw drivers
1 of 2 people
found this instruction helpful.
Was this instruction helpful to you?
Thank you for voting!
Oven wouldn't heat
First I removed the two screws that hold the element in place. I then pulled the element out about three inches and disconnected the two wires, being careful not to pull the plugs off. I then inserted the new element and reattached holders. It was very easy and took less than five minutes. The part arrived amazingly quickly. The stove works great now.
Parts Used:
-
James from Jasonville, IN
-
Difficulty Level:Really Easy
-
Total Repair Time:Less than 15 mins
-
Tools:Screw drivers
1 of 2 people
found this instruction helpful.
Was this instruction helpful to you?
Thank you for voting!
Oven wouldn't heat.
My wife detected the problem Wednesday evening before Thanksgiving. We've had the heating element break before, so we knew right away what the problem was. We ordered the part that night, and even though we weren't able to cook Tom for Thanksgiving, the part shipped on Friday and arrived the next Thursday.
First, I turned off the power to the stove at the circuit breaker.
Then, I removed the two screws that hold the element in place. They are on the top of the flange and partially concealed by the convection element that juts out.
I pulled out the heating element, disconnected the electrical leads, and installed the new one.
I attempted to put the screws back in, but they were a little tough to line up. I decided to leave them out, knowing that I will probably be doing this repair again in a couple of years.
Hopefully, next time it won't be the day before Thanksgiving.
First, I turned off the power to the stove at the circuit breaker.
Then, I removed the two screws that hold the element in place. They are on the top of the flange and partially concealed by the convection element that juts out.
I pulled out the heating element, disconnected the electrical leads, and installed the new one.
I attempted to put the screws back in, but they were a little tough to line up. I decided to leave them out, knowing that I will probably be doing this repair again in a couple of years.
Hopefully, next time it won't be the day before Thanksgiving.
Parts Used:
-
James from Dallas, OR
-
Difficulty Level:Really Easy
-
Total Repair Time:Less than 15 mins
-
Tools:Screw drivers
1 of 2 people
found this instruction helpful.
Was this instruction helpful to you?
Thank you for voting!
I had a hole burned threw the heating element.
First I removed the two screws that hold the element in place. I then pulled the element out about 3 inches and disconnected the two wires.
Rehooked up wires on new element, Slid the element in place. Replaced the two screws. Done, very easy.
Rehooked up wires on new element, Slid the element in place. Replaced the two screws. Done, very easy.
Parts Used:
-
jeff from clinton, OH
-
Difficulty Level:Really Easy
-
Total Repair Time:Less than 15 mins
-
Tools:Pliers, Screw drivers
1 of 2 people
found this instruction helpful.
Was this instruction helpful to you?
Thank you for voting!
Original element burned up.
My husband removed the screws holding the damaged element and removed it before the new one arrived. When we received the replacement part, it took only about 10 minutes for him to repair the oven, inserting the new element.
Parts Used:
-
Karen from Jensen Beach, FL
-
Difficulty Level:Easy
-
Total Repair Time:Less than 15 mins
-
Tools:Screw drivers
1 of 2 people
found this instruction helpful.
Was this instruction helpful to you?
Thank you for voting!
Lower element in stove burnt out.
Called repairman, he never called back for a week. Gave up and found your website, ordered the part. You said it would take 3-5 business days. You lied, it was there the next day. Taking old element out starts with shutting off the juice. Remove trays, pans, etc. Unscrew two screws, pull out elements ends, unclip from wires, reverse the process with new one. You need a light to do this.
Parts Used:
-
Dale from Petersburg, IL
-
Difficulty Level:Easy
-
Total Repair Time:Less than 15 mins
-
Tools:Pliers, Screw drivers
1 of 3 people
found this instruction helpful.
Was this instruction helpful to you?
Thank you for voting!
broiler drawer supports broken
removed drawer from track replaced supports on track and one on the drawer.
Parts Used:
-
Clarence from Yorktown, VA
-
Difficulty Level:Really Easy
-
Total Repair Time:Less than 15 mins
-
Tools:Screw drivers
1 of 3 people
found this instruction helpful.
Was this instruction helpful to you?
Thank you for voting!
The broiler drawer support broke while removing the drawer for cleaning. Order part through Part-Select, arrived within 4 days, replaced broken part same day.
Broken part was already removed, so I used the screw from the broken support and installed the new support. Very simple, easy, and painless.
Parts Used:
-
Stanley from Brunswick, OH
-
Difficulty Level:Really Easy
-
Total Repair Time:Less than 15 mins
-
Tools:Screw drivers
1 of 3 people
found this instruction helpful.
Was this instruction helpful to you?
Thank you for voting!
elements busted
the new elements were super easy to replace. the old ones just pulled out and the new ones easily pushed in. the top one was a little more difficult only because it had brackets that had to be slid of and then slid onto the new one.
Parts Used:

-
shanon from kyle, TX
-
Difficulty Level:Really Easy
-
Total Repair Time:Less than 15 mins
2 of 6 people
found this instruction helpful.
Was this instruction helpful to you?
Thank you for voting!
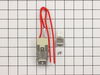
Receptacle had become bad poor connection.
First I disconnect the breaker. I removed the defected receptacle and cut the wires. I connected the new receptacle with parts with the new part. Turned the breaker back on and everthing worked fine.
Parts Used:
-
JAMES from Harrodsburg, KY
-
Difficulty Level:Really Easy
-
Total Repair Time:Less than 15 mins
-
Tools:Pliers, Screw drivers
1 of 3 people
found this instruction helpful.
Was this instruction helpful to you?
Thank you for voting!
The burner was shortening out and would work sometime. The first time I replace the burner but the new one shorted out quickly.
I unplugged the stove. Took out the burner and removed receptacle by pulling it out of the bracket and clipping the wires. One thing you want to make sure is that when you clip the wires from the receptacle you're replacing you leave enough wire so that you can connect them to the wires on the new receptacle when it is in place on the stove. I had just enough but would have liked more. The bracket I received didn't match the one on the stove so I used the one on the stove since the receptacle itself was the same as the one I was replacing.
Parts Used:
-
shawn from Vancouver, WA
-
Difficulty Level:Really Easy
-
Total Repair Time:Less than 15 mins
-
Tools:Pliers
1 of 3 people
found this instruction helpful.
Was this instruction helpful to you?
Thank you for voting!
Element burned out
-
Tom from Crystal, MN
-
Difficulty Level:Really Easy
-
Total Repair Time:Less than 15 mins
-
Tools:Screw drivers
0 of 1 people
found this instruction helpful.
Was this instruction helpful to you?
Thank you for voting!
Baking element fried!
Not really much of a repair story to tell. While using the oven one evening the baking element began sparking and appeared as someone was using an arc welder inside my oven. I went to the computer and did a search for Magic Chef parts and found the Part Select web site. There I entered the model number of my range which brought up the schematics allowing me to locate the part I needed, the baking element. On that parts page I also found a very short, concise video illustrating "how to" change out the element. I ordered the part and received it rather quickly (a matter of days.) Following the directions on the video I had the baking element swapped out in about the same amount of time as it took in the video. Could not have been any easier.
Parts Used:
-
Ed from Quitman, TX
-
Difficulty Level:Really Easy
-
Total Repair Time:Less than 15 mins
-
Tools:Pliers, Screw drivers
0 of 1 people
found this instruction helpful.
Was this instruction helpful to you?
Thank you for voting!