




















CAV2050AWW Magic Chef Washer - Instructions
Keep searches simple. Use keywords, e.g. "leaking", "pump", "broken" or "fit".
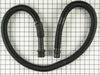
Cracked hose AGAIN!
Hired someone. Note: I purchased two (2) hoses and (2) clamps -- this is the third time I am replacing a cracked hose. The manufacturer needs to use better quality and more flexible material for hoses.
Parts Used:

-
BLANCHE from OSSINING, NY
-
Difficulty Level:Easy
-
Total Repair Time:Less than 15 mins
9 of 21 people
found this instruction helpful.
Was this instruction helpful to you?
Thank you for voting!
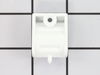
washer lid was no longer connected
Pulled up the top of the washer and removed the lid hinge with a star tip screw driver. Realized that I also needed the hinge pins and had to reorder those. They should come as a kit.
Parts Used:
-
linda from granada hills, CA
-
Difficulty Level:Easy
-
Total Repair Time:Less than 15 mins
3 of 3 people
found this instruction helpful.
Was this instruction helpful to you?
Thank you for voting!
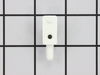
My Washer's lid hinges broke while it was being moved.
I obtained the parts on line and began to install these. I was surprised that the ease of my installation was great. Each part was held by one screw. I used a phillips driver and found the under screws easy to get to by pushing the inside clothes drum to the side. A total of four screws was required for the replacement. This repair was so easy that a normal non-trained person can accomplish it. Thanks Admiral.
Parts Used:
-
Gary from Mesa, AZ
-
Difficulty Level:Really Easy
-
Total Repair Time:15 - 30 mins
-
Tools:Screw drivers
3 of 3 people
found this instruction helpful.
Was this instruction helpful to you?
Thank you for voting!
lid hinge broken
I'm a 69 year old female. My husband isn't very handy so I decided to order the parts and do it myself. I didn't know how to take the machine apart so I just moved the washer part so I could unscrew the screw. I dropped the screwdriver between the adj. and side of the washer. I guess you won't be telling this story. I did get the parts on and the lid is working and so is the machine. Valerie Guyot
Parts Used:
-
VALERIE from PARKER, CO
-
Difficulty Level:A Bit Difficult
-
Total Repair Time:30 - 60 mins
-
Tools:Screw drivers
3 of 3 people
found this instruction helpful.
Was this instruction helpful to you?
Thank you for voting!
weak suspension springs
Removed front panel also right side panel to get to the springs. Used vise grips to extend springs and used coins to keep springs open for replacing.
Parts Used:

-
Edward from Exeter, NH
-
Difficulty Level:A Bit Difficult
-
Total Repair Time:1- 2 hours
-
Tools:Nutdriver, Pliers, Screw drivers
3 of 3 people
found this instruction helpful.
Was this instruction helpful to you?
Thank you for voting!
White fluffy residue appeared under washer. Unbalanced banging during spin cycle
Parts needed: Snubber Ring and 6 Springs (don't put the old springs back)
Unlug the AC cord, open the top from the front it snaps open with a little force and hinges on the back, remove the 2 screws on the front cover and take it off, tip the washer and remove the belt, take off the pump hose from the back It was not necessary to remove the back cover. Remove the little hose going to the basket from the control module. Remove the 6 springs and lift the complete drum out of the waser and turn it upside down. You can see the plastic snubber ring that is worn, loosen the 6 screws just enough to get the old ring out and the new one in. WARNING: DO NOT TAKE THE SCREWS ALL THE WAY OUT OR THE BRAKE ASSEMBLY WILL RELEASE AND A SPECIAL TOOL IS NEEDED TO PUT IT BACK. Seriously! Install the new ring, center and tighten the screws. Put the tub back in. I found it handy to support the tub with a 2x3 to get the springs back in. Connect hoses back up. It really isn’t that bad, a couple of scraped knuckles.
Unlug the AC cord, open the top from the front it snaps open with a little force and hinges on the back, remove the 2 screws on the front cover and take it off, tip the washer and remove the belt, take off the pump hose from the back It was not necessary to remove the back cover. Remove the little hose going to the basket from the control module. Remove the 6 springs and lift the complete drum out of the waser and turn it upside down. You can see the plastic snubber ring that is worn, loosen the 6 screws just enough to get the old ring out and the new one in. WARNING: DO NOT TAKE THE SCREWS ALL THE WAY OUT OR THE BRAKE ASSEMBLY WILL RELEASE AND A SPECIAL TOOL IS NEEDED TO PUT IT BACK. Seriously! Install the new ring, center and tighten the screws. Put the tub back in. I found it handy to support the tub with a 2x3 to get the springs back in. Connect hoses back up. It really isn’t that bad, a couple of scraped knuckles.
Parts Used:

-
John from Blue Bell, PA
-
Difficulty Level:A Bit Difficult
-
Total Repair Time:1- 2 hours
-
Tools:Nutdriver, Pliers, Screw drivers
4 of 6 people
found this instruction helpful.
Was this instruction helpful to you?
Thank you for voting!
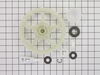
Washer was making a squeak during spin cycle & then just stopped spinning
I watched the video of the repair on this website and followed it. Was really easy & THANK GOD because this was my first repair. This has been a great machine and it looks like it will continue to be for a little while longer! Thanks for the video help and friendly navigation of your site!
Parts Used:
-
Eleanor from PALATKA, FL
-
Difficulty Level:Really Easy
-
Total Repair Time:30 - 60 mins
-
Tools:Pliers, Screw drivers
3 of 3 people
found this instruction helpful.
Was this instruction helpful to you?
Thank you for voting!
Leaking water inlet hoses.
-
Helen from NASHUA, NH
-
Difficulty Level:Really Easy
-
Total Repair Time:30 - 60 mins
4 of 6 people
found this instruction helpful.
Was this instruction helpful to you?
Thank you for voting!
Washer banging and moving during spin cycle
I watched the installation video. It was very helpful to see it done before doing the repair. I followed the video to take the old springs out and installed the new ones. Remember to check the snubbed ring and replace it too. The new springs and sunnier ring solved the banging and moving during the spin cycle. Now the washer is like new and the repair was less then $100. Thanks parts select, the help was greatly appreciated.
Parts Used:
-
Mike from Disney, OK
-
Difficulty Level:Really Easy
-
Total Repair Time:30 - 60 mins
-
Tools:Nutdriver, Pliers, Socket set
3 of 3 people
found this instruction helpful.
Was this instruction helpful to you?
Thank you for voting!
Smell from washer
Using nutdriver or screwdriver, remove metal panel from lower left side of back of washer to expose the pump. This is where the drain hose attaches to the washer. Use pliers to move the clamp off of the drain hose, then ease the hose off of the pump by wiggling it back and forth while pulling gently. Be careful to keep drain hose opening pointed upward until you can point it to a bucket, as there's likely to be quite a bit of water in it. Detach drain hose on other end as well (wiggling / pulling works well here; no clamp is used, so no pliers are required). Install new hose by reversing above steps.
Parts Used:
-
Patrick from PALO ALTO, CA
-
Difficulty Level:Really Easy
-
Total Repair Time:30 - 60 mins
-
Tools:Nutdriver, Pliers, Screw drivers
3 of 3 people
found this instruction helpful.
Was this instruction helpful to you?
Thank you for voting!
noisy washer and shaking
disconected water lines unplug power and took drain pipe off, used putty knife to open top of washer and pulled off front removed pannel off back pannel, disconnected water level tube,using vise grips took off springs and pulled tb out used 5/16 socket to loosen screws just enough to pull snubber ring out replaced with new one reversed prosses in putting it back to geather
Parts Used:
-
DWane from Waterford, PA
-
Difficulty Level:A Bit Difficult
-
Total Repair Time:1- 2 hours
-
Tools:Nutdriver, Pliers, Screw drivers
3 of 4 people
found this instruction helpful.
Was this instruction helpful to you?
Thank you for voting!
Washer Traveled and load would not be balanced. Washer would bang loudly.
Followed directions from video on your site. It was very helpful. The snubber ring fixed the problem.
Parts Used:
-
James from ELMORE, OH
-
Difficulty Level:A Bit Difficult
-
Total Repair Time:1- 2 hours
-
Tools:Pliers, Screw drivers, Socket set, Wrench (Adjustable)
4 of 7 people
found this instruction helpful.
Was this instruction helpful to you?
Thank you for voting!
Off balance walking & shaking in spin cycle
Unlike most videos, mine had a solid frame, no access panels. Following, is my disassembly & repair: I disconnected the water supply lines and drain hose. I slid the washer out into the center of the garage & removed the 9 base screws from the base plate. I slid the frame away from the base, leaving the working parts exposed. After pulling the working mechanisms from the outer frame, I turned it (drum, transmission & base) upside down. I used a pair of vise grips, pinched them onto each spring & removed them, using a downward motion it was a lot easier. I placed the base plate aside, removed 3 opposing screws holding the snubber ring & put 3 longer 8-32 screws in to hold the brake assembly. Then I removed the 3 remaining screws, lifted the plate & replaced the ring. Then I reversed the process, replacing the old springs with new ones & finished the job in about 2 hours.
Parts Used:
-
Steven from Kissimmee, FL
-
Difficulty Level:Easy
-
Total Repair Time:1- 2 hours
-
Tools:Nutdriver, Pliers, Socket set, Wrench (Adjustable)
2 of 2 people
found this instruction helpful.
Was this instruction helpful to you?
Thank you for voting!
washer would get off balance on spin cycle
-
sidney from JAX BCH, FL
-
Difficulty Level:Really Easy
-
Total Repair Time:30 - 60 mins
-
Tools:Nutdriver, Pliers, Socket set
2 of 2 people
found this instruction helpful.
Was this instruction helpful to you?
Thank you for voting!
Left hinge pin & hinge sheared
Hving read some of the tips in regards to this repair I set out with equal parts of confidence & apprehension. The advice of shifting the tub toward the hinge to be removed is in itself the key to the whole procedure. After having done so & wedging a dust pan handle between the tub & frame to first one side & then the other, I removed the entire lid with the hinge & hinge pin assys. attached as ther is not sufficient clearance to slide a servicable hinge pin from a hinge when only one hinge has beeen removed. With the lid completely removed access to the hinge pin(s) is straight forward. I suggest screwing & unscrewing the fastening screw into a new hinge assy before mounting the hinge onto the machine & also using an offset philips screwdriver or ,as I did, a 1/4" drv. ratchet with a #2 philips apex bit which allows for a better feel & more control over the upside down blind operation of removing & replacing the fastening screw into the hinge assy. Hope this helps. Tom
Parts Used:
-
Tom from Camp Verde, AZ
-
Difficulty Level:Easy
-
Total Repair Time:15 - 30 mins
-
Tools:Screw drivers, Socket set
2 of 2 people
found this instruction helpful.
Was this instruction helpful to you?
Thank you for voting!