




















C3882XRW Magic Chef Range - Instructions
Keep searches simple. Use keywords, e.g. "leaking", "pump", "broken" or "fit".
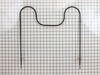
snapped element
switch off the range. undo the two screws & unplug the two tabs. Replace with new element, connect two tabs, screw back in place. done!
recieved my replacement part the next day after ordering
recieved my replacement part the next day after ordering
Parts Used:
-
Paul from Yukon, OK
-
Difficulty Level:Easy
-
Total Repair Time:Less than 15 mins
-
Tools:Screw drivers
1 person
found this instruction helpful.
Was this instruction helpful to you?
Thank you for voting!
fireworks in the oven. Burned completely in two.
My husband has moved out of state for his job. I am left here with the children until the house sells. This is the first time I have ever had to do any oven repair. I had excellent and fast service - my part came right away. I took out the 2 screws holding the element in place, pulled the element out, disconnected the old element, connected the new one, pushed it back in, and replaced the screws. No problem at all. I was a little nervous turning it all back on, but it is working perfectly!
Parts Used:
-
Shelly from Allentown, PA
-
Difficulty Level:Really Easy
-
Total Repair Time:Less than 15 mins
-
Tools:Screw drivers
1 person
found this instruction helpful.
Was this instruction helpful to you?
Thank you for voting!
The element was completely gone.
Turned off power, removed 2 screws, un-hooked the connections, them put in the new element in reverse order.
Parts Used:
-
Hudson from Cockeysville, MD
-
Difficulty Level:Really Easy
-
Total Repair Time:Less than 15 mins
-
Tools:Screw drivers
1 person
found this instruction helpful.
Was this instruction helpful to you?
Thank you for voting!
One of the broiler drawer guides broke
All I had to do was pull the drawer out and screw on the new part! Awesome experience...and it was so easy to find the part on the website, everything is very clear and with pictures to ensure where the part belongs...who could ask for more?
Parts Used:
-
Jeri from NEW RICHMOND, OH
-
Difficulty Level:Very Easy
-
Total Repair Time:Less than 15 mins
-
Tools:Screw drivers
1 person
found this instruction helpful.
Was this instruction helpful to you?
Thank you for voting!
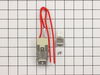
burner receptacle failed (stove over 30 years old)
Took out burner (pulls out) Took out one screw that holds recep. in, cut the two old wires and attached new wires with wire nuts included in the new package.
Parts Used:
-
BETH from COUNCE, TN
-
Difficulty Level:Really Easy
-
Total Repair Time:15 - 30 mins
-
Tools:Pliers, Screw drivers
1 person
found this instruction helpful.
Was this instruction helpful to you?
Thank you for voting!
The oven heating element burned out like a lit fuse!
Removed 2 phillips screws, unplugged 2 wires, threw away old element. Installation of the new element was just as easy but in reverse order. Piece of cake!
Parts Used:
-
Herbert from Neenah, WI
-
Difficulty Level:Really Easy
-
Total Repair Time:Less than 15 mins
-
Tools:Screw drivers
1 person
found this instruction helpful.
Was this instruction helpful to you?
Thank you for voting!
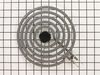
The heating element on the left front burner was out
Pulled the old one out and plugged the new one in. It was that simple!
Parts Used:
-
Julie from Salt Lake City, UT
-
Difficulty Level:Really Easy
-
Total Repair Time:Less than 15 mins
2 of 4 people
found this instruction helpful.
Was this instruction helpful to you?
Thank you for voting!
oven not heating to set temp. 100 degrees too cold
installed part,turned unit on-temp still cold. reset digital control, up 35 degrees, still cold. un-plugged unit,re-connect after 10 min. still cold.
Parts Used:

-
Robert from Funston, GA
-
Difficulty Level:Really Easy
-
Total Repair Time:Less than 15 mins
-
Tools:Screw drivers
2 of 4 people
found this instruction helpful.
Was this instruction helpful to you?
Thank you for voting!
bottom bake element broken and burned
First throw the breaker on the stove. Remove two screws in back of oven then slowly pull out loosen the wire attachements ......got new part in 2 days just as simple reverse the removal directions.,,,I am over 60 female and it was simple.
Parts Used:
-
Carolyn S from white oak, NC
-
Difficulty Level:Really Easy
-
Total Repair Time:Less than 15 mins
-
Tools:Screw drivers
1 person
found this instruction helpful.
Was this instruction helpful to you?
Thank you for voting!
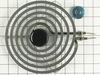
Just plugged the burner in and it was good to go.
The burner wouldn't work. I just plugged in the new one and all was done.
Parts Used:
-
Paola from High Bridge, NJ
-
Difficulty Level:Really Easy
-
Total Repair Time:Less than 15 mins
1 person
found this instruction helpful.
Was this instruction helpful to you?
Thank you for voting!
Element burned in half
Took two screws out unplugged the element and plugged the new one in and replaced the screws and turned the breaker back on. Works great...Piece of cake..jk
Parts Used:
-
James from Allyn, WA
-
Difficulty Level:Really Easy
-
Total Repair Time:Less than 15 mins
-
Tools:Screw drivers
1 person
found this instruction helpful.
Was this instruction helpful to you?
Thank you for voting!
"F3" error message and no oven heat
Unplugged the range, removed screws holding the old sensor. When I pulled it out, the wire connecting to the sensor was completely broken through,therefore I could not just pull the wire to get to the connector. Unscrewed one side of back panel to access the connector. Pushed the connector and wire of the new sensor through the hole ( and behind the insulation), disconnected the old sensor and connected the new one. Re screwed the new connector in place plus rescrewed the back panel. Plugged the range in and - Viola! Everything now works like a charm and I have my oven back. Easy-Peasy. Oh - I am an older female with very limited DYI experience. I just saved myself $650.00!
Parts Used:
-
Pat from PAYSON, AZ
-
Difficulty Level:Very Easy
-
Total Repair Time:15 - 30 mins
-
Tools:Screw drivers
1 person
found this instruction helpful.
Was this instruction helpful to you?
Thank you for voting!
original fixture required bulb - this fixture (all-in-one) was great
Pulled range out from cabinet-wall to get to back side, everthing was clearly exposed tlhen. Just a matter of installing new fixture, putting back on, reconnected power source - put range back in proper place.
Parts Used:

-
wesley from ODENVILLE, AL
-
Difficulty Level:Really Easy
-
Total Repair Time:30 - 60 mins
-
Tools:Pliers, Screw drivers
1 person
found this instruction helpful.
Was this instruction helpful to you?
Thank you for voting!
The bake oven element burned out
Removed two screws and disconnected the element. Reconnected the new element and reinstalled the screws
Parts Used:
-
Robert from LEXINGTON, MA
-
Difficulty Level:Very Easy
-
Total Repair Time:15 - 30 mins
-
Tools:Screw drivers
1 person
found this instruction helpful.
Was this instruction helpful to you?
Thank you for voting!
replace broken bake element
Unplugged the range. Took our the oven shelves. Unscrewed the bars holding the broken bake element to the back of the oven wall. Gently pulled out the wiring to which the bake element is attached. Slipped the ends of the broken bake element off the ending on the wiring. Then slipped the ends of the new bake element over the ends on the wiring. Then pushed the wiring with attached bake element back into their position behind the oven wall and attached the bars holding the bake element to the back of the oven wall. This is really easy because it is exactly like the on-line video, for I am a 75 year old female with little technical experience.
Parts Used:
-
Frances from MOREHEAD, KY
-
Difficulty Level:Very Easy
-
Total Repair Time:15 - 30 mins
-
Tools:Screw drivers
1 person
found this instruction helpful.
Was this instruction helpful to you?
Thank you for voting!