




















C3581XRW Magic Chef Range - Instructions
Keep searches simple. Use keywords, e.g. "leaking", "pump", "broken" or "fit".
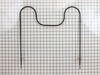
Bottom Element Burned out
Turned off all power to range.
Removed two Philip head screws
Gentle pulled unit Element forward
Removed two push on connectors
(Do not let wires fall back into oven holes)
Reversed the process.
Removed two Philip head screws
Gentle pulled unit Element forward
Removed two push on connectors
(Do not let wires fall back into oven holes)
Reversed the process.
Parts Used:
-
Robert from Jacksonville, FL
-
Difficulty Level:Easy
-
Total Repair Time:15 - 30 mins
-
Tools:Screw drivers
1 person
found this instruction helpful.
Was this instruction helpful to you?
Thank you for voting!
bake element disintegrated!
Seems every 5 years this bake element totally disintegrates, so we,re experienced! Pull the stove out and remove the back, remove the 2 screws that hold the element(now in 5 pieces), diconnect and discard. Place new element in and connect, replace the 2 screws holding the element in place. Replace stove back. Easy
Parts Used:
-
Susan from Grand Ledge, MI
-
Difficulty Level:Really Easy
-
Total Repair Time:15 - 30 mins
-
Tools:Screw drivers
1 person
found this instruction helpful.
Was this instruction helpful to you?
Thank you for voting!
Bake element burned out
Very simple fix--unpugged two fittings in the back of oven plugged in the new element and it was done.The Best part was that the element burned out on a Sunday and I ordered the part that day and it shipped on Monday and received part on Wed AM.This is the second time I've had to replace the element and by ordering through Part Select I saved $24.00 versus buying it from an appliance store.
Don Samuelson
Don Samuelson
Parts Used:
-
Donald from Tomahawk, WI
-
Difficulty Level:Really Easy
-
Total Repair Time:15 - 30 mins
1 person
found this instruction helpful.
Was this instruction helpful to you?
Thank you for voting!
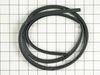
Old seal breaking off oven door. Oven not baking food well, wasting heat and fuel.
Used pliers to remove clips and old seal. Snap in new seal. DONE! Less than 5 mins.
Parts Used:
-
Mz from COLUMBIA, ME
-
Difficulty Level:Very Easy
-
Total Repair Time:Less than 15 mins
-
Tools:Pliers
1 person
found this instruction helpful.
Was this instruction helpful to you?
Thank you for voting!
One of the broiler drawer guides broke
All I had to do was pull the drawer out and screw on the new part! Awesome experience...and it was so easy to find the part on the website, everything is very clear and with pictures to ensure where the part belongs...who could ask for more?
Parts Used:
-
Jeri from NEW RICHMOND, OH
-
Difficulty Level:Very Easy
-
Total Repair Time:Less than 15 mins
-
Tools:Screw drivers
1 person
found this instruction helpful.
Was this instruction helpful to you?
Thank you for voting!
lens light was broken and missing.
Removed the cooktop using screwdriver. Pushed lens-light into cooktop hole.It was difficult to do and was where I spent most of my time. Next time I will spray bottom of lens- light with silicon so it goes in easier. I stood cooktop up on its side and inserted the red light assembly onto the lens-light. Reinstalled cooktop
and turned electrical power on.
and turned electrical power on.
Parts Used:
-
Allan from Rolla, MO
-
Difficulty Level:A Bit Difficult
-
Total Repair Time:15 - 30 mins
-
Tools:Screw drivers
1 person
found this instruction helpful.
Was this instruction helpful to you?
Thank you for voting!
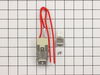
burner receptacle failed (stove over 30 years old)
Took out burner (pulls out) Took out one screw that holds recep. in, cut the two old wires and attached new wires with wire nuts included in the new package.
Parts Used:
-
BETH from COUNCE, TN
-
Difficulty Level:Really Easy
-
Total Repair Time:15 - 30 mins
-
Tools:Pliers, Screw drivers
1 person
found this instruction helpful.
Was this instruction helpful to you?
Thank you for voting!
element burnt into.
The part came quick and packed very well. I moved the stove out and un pluged it. opened oven door and took a philips screwdriver and took the screws out at the back of element..Slid it out with the two wires attached and unpluged the conectors. pluged the conectors on to the new element and slid it back in. Had a chocolate cake in 35 minuts.
Thanks, John in Texas
Thanks, John in Texas
Parts Used:
-
John from Overton, TX
-
Difficulty Level:Really Easy
-
Total Repair Time:Less than 15 mins
-
Tools:Pliers, Screw drivers
1 person
found this instruction helpful.
Was this instruction helpful to you?
Thank you for voting!
Bake Element broke
****Threw the breaker switch for the oven to the 'off' position****. Opened the oven. Unscrewed the phillips head screws at the back of the old element. Removed the connecting wire, taping them to the stove so that they wouldn't recede into the hole. Securely attached the connecting wires to the new element. Pushed the wires back into the holes in the stove. Removed the tape from the oven. Screwed the element into place. ****Threw the breaker switch back to the 'on' position****. Process took under 10 minutes.
DO NOT FORGET TO UNPLUG OR TURN OFF BREAKER BEFORE DOING ANYTHING WITH THE WIRES. Don't forget to turn it back on again when you are done.
DO NOT FORGET TO UNPLUG OR TURN OFF BREAKER BEFORE DOING ANYTHING WITH THE WIRES. Don't forget to turn it back on again when you are done.
Parts Used:
-
Joseph from Warwick, RI
-
Difficulty Level:Really Easy
-
Total Repair Time:Less than 15 mins
-
Tools:Screw drivers
1 person
found this instruction helpful.
Was this instruction helpful to you?
Thank you for voting!
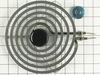
Our original surface element caught fire!
Old surface element was removed simply by pulling it out of the electrical contacts. The, the new one was inserted.
Parts Used:
-
Paulo from Cambridge Springs, PA
-
Difficulty Level:Really Easy
-
Total Repair Time:Less than 15 mins
1 person
found this instruction helpful.
Was this instruction helpful to you?
Thank you for voting!
hot spot in center of bake element appeared suggesting failure was imminent
pulled breaker,removed oven door,removed 2 screws,pulled bake element out 3 inches,pulled connections off,pushed connectors on new element,pushed new element back and replaced screws,replaced oven door ,pushed breaker back and turned on oven and let it heat up to 350 degrees.
Total time 10 minutes,even a caveman could do it.
Total time 10 minutes,even a caveman could do it.
Parts Used:
-
burton from prides crossing, MA
-
Difficulty Level:Really Easy
-
Total Repair Time:Less than 15 mins
-
Tools:Screw drivers
1 person
found this instruction helpful.
Was this instruction helpful to you?
Thank you for voting!
BurntBaking Element Element
Turn Off the BREAKER!!!
Unplug the stove/oven
Opened the oven door
Unscrewed the baking element for the oven
Pulled the old element out about 3"
Disconnected the wire clip on both sides
Plugged the element into the clips
Screwed element back into place
Plugged oven in ,turned on breaker
PRESTO DONE
Unplug the stove/oven
Opened the oven door
Unscrewed the baking element for the oven
Pulled the old element out about 3"
Disconnected the wire clip on both sides
Plugged the element into the clips
Screwed element back into place
Plugged oven in ,turned on breaker
PRESTO DONE
Parts Used:
-
Matt from Lewisburg, TN
-
Difficulty Level:Really Easy
-
Total Repair Time:Less than 15 mins
-
Tools:Screw drivers
1 person
found this instruction helpful.
Was this instruction helpful to you?
Thank you for voting!
fireworks in the oven. Burned completely in two.
My husband has moved out of state for his job. I am left here with the children until the house sells. This is the first time I have ever had to do any oven repair. I had excellent and fast service - my part came right away. I took out the 2 screws holding the element in place, pulled the element out, disconnected the old element, connected the new one, pushed it back in, and replaced the screws. No problem at all. I was a little nervous turning it all back on, but it is working perfectly!
Parts Used:
-
Shelly from Allentown, PA
-
Difficulty Level:Really Easy
-
Total Repair Time:Less than 15 mins
-
Tools:Screw drivers
1 person
found this instruction helpful.
Was this instruction helpful to you?
Thank you for voting!
element had cracked
First I cut the power to the stove. Then I unscrewed the two screws. Pulled the element out a few inches. I had to use pliers to disconnect it from its wires. It was a very tight fit. Then I reconnected the new element. Cut the power back and and fired her up. Boy did she burn like fire.
Parts Used:
-
TONI from SALISBURY, NC
-
Difficulty Level:Really Easy
-
Total Repair Time:Less than 15 mins
-
Tools:Pliers, Screw drivers
1 person
found this instruction helpful.
Was this instruction helpful to you?
Thank you for voting!
Bake element had burnt in half.
Watched the video that was available and followed the instructions. Unplugged the stove first,removed the old element, and put the new one in. Video was very helpful and the installation was very easy. Was done in about 10 minutes.
Parts Used:
-
Joyce from ROCHESTER, IN
-
Difficulty Level:Really Easy
-
Total Repair Time:Less than 15 mins
-
Tools:Screw drivers
1 person
found this instruction helpful.
Was this instruction helpful to you?
Thank you for voting!