




















C201 Jenn-Air Cooktop - Instructions
Keep searches simple. Use keywords, e.g. "leaking", "pump", "broken" or "fit".
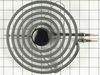
8 inch element not heating in cooktop
I removed the old element. I then plugged the new element in place. Simple repair, no tools required. Turned the cooktop element on to test for proper functioning. It heated properly. Repair completed.
Ordering the part was easy and it arrived within 2 days. Very happy with Parts Select service.
Ordering the part was easy and it arrived within 2 days. Very happy with Parts Select service.
Parts Used:
-
LouAnn from Maquoketa, IA
-
Difficulty Level:Really Easy
-
Total Repair Time:Less than 15 mins
1 of 2 people
found this instruction helpful.
Was this instruction helpful to you?
Thank you for voting!
Adaptor ring and drip bowl corroded over the years and the heating element was acting up.
I removed the old heating element, then the drip pan and then the adaptor ring. I cleaned the residue and buildup that was under the ring and on the surface below, I then snapped in to place the adaptor ring and then oriented and placed the drip bowl in place and finally oriented and pushed the heater element leads into their socket.
I turned the heating dial on and immediately felt the element warming up.
Checked Low temp and then Hi temp.
Everything is working and looking fine. The wife wants to replace the other ones, she says that it's easier than cleaning them.
I turned the heating dial on and immediately felt the element warming up.
Checked Low temp and then Hi temp.
Everything is working and looking fine. The wife wants to replace the other ones, she says that it's easier than cleaning them.
Parts Used:
-
John from Portsmouth, NH
-
Difficulty Level:Really Easy
-
Total Repair Time:Less than 15 mins
2 of 5 people
found this instruction helpful.
Was this instruction helpful to you?
Thank you for voting!
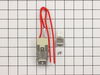
burner receptacle was broken
The repairs were very simple we just disconnected one screw then removed the old one and replace with new one. The left side took a little longer, because of the 8 screws we needed to remove to take the back panel off. But once we had it taken off the replacement was a snap. Nothing to it.
Parts Used:
-
Molly Grace from Victoria, TX
-
Difficulty Level:Really Easy
-
Total Repair Time:15 - 30 mins
-
Tools:Pliers, Screw drivers
1 of 2 people
found this instruction helpful.
Was this instruction helpful to you?
Thank you for voting!
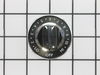
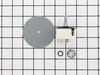
Could Not Use One Burner
Turned power to stove off. Removed two screws from cover - lifted cover up and pulled switch out and disconnected wires. Put new switch in and connected wires. Made sure that it was in correct position by placing knob on to make sure off position was correct - then placed plate in position and closed - put two screws back on plate and put new knob on. Turned power back on and turned knob and burner back in operation
Parts Used:
-
Anne from Bedford Hills,, NY
-
Difficulty Level:Really Easy
-
Total Repair Time:15 - 30 mins
-
Tools:Pliers, Screw drivers
1 of 2 people
found this instruction helpful.
Was this instruction helpful to you?
Thank you for voting!
Broken knob dhaft
-
Richard from THE WOODLANDS, TX
-
Difficulty Level:Really Easy
-
Total Repair Time:15 - 30 mins
-
Tools:Pliers
1 of 2 people
found this instruction helpful.
Was this instruction helpful to you?
Thank you for voting!
Old Stove Top
-
Robert A from Farmington `, CT
-
Difficulty Level:Really Easy
-
Total Repair Time:Less than 15 mins
1 of 2 people
found this instruction helpful.
Was this instruction helpful to you?
Thank you for voting!
Drip pans were in need of replacement
No brain surgery required. Removed electric burner, put in new drip pans. Voila! Good for many more years of service looking like new.
Parts Used:
-
JOANNE from MONKEY ISLAND, OK
-
Difficulty Level:Really Easy
-
Total Repair Time:Less than 15 mins
1 of 2 people
found this instruction helpful.
Was this instruction helpful to you?
Thank you for voting!
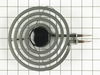
stove top burner would not heat
new element plugged into burner connection- an easy fix
Parts Used:
-
Marjorie from Indianapolis, IN
-
Difficulty Level:Really Easy
-
Total Repair Time:Less than 15 mins
1 of 2 people
found this instruction helpful.
Was this instruction helpful to you?
Thank you for voting!
My electric range burner was not heating.
All I had to do was remove the old burner and push the new burner into place. It couldn't have been easier.
Parts Used:
-
Joyce from Oceanside, CA
-
Difficulty Level:Really Easy
-
Total Repair Time:Less than 15 mins
1 of 2 people
found this instruction helpful.
Was this instruction helpful to you?
Thank you for voting!
Ring adapter was the original and was pretty well worn through.
Removed the old adapter and replaced it with the bright and shiny new one that fit perfectly.
Parts Used:
-
Edward from Brooksville, FL
-
Difficulty Level:Really Easy
-
Total Repair Time:Less than 15 mins
1 of 2 people
found this instruction helpful.
Was this instruction helpful to you?
Thank you for voting!
Drip pans were a mess
-
Chhristopher from Houston, TX
-
Difficulty Level:Really Easy
-
Total Repair Time:Less than 15 mins
1 of 2 people
found this instruction helpful.
Was this instruction helpful to you?
Thank you for voting!
Burned out burner
Pulled out the old burner and plugged in the new!
Parts Used:
-
Esther from Alexandria, VA
-
Difficulty Level:Really Easy
-
Total Repair Time:Less than 15 mins
1 of 2 people
found this instruction helpful.
Was this instruction helpful to you?
Thank you for voting!
broken sens
removeed the dial cover, paced the lens into the hole, slid the light and holder into place , 5 min job.
Parts Used:
-
Dennis from Mahomet, IL
-
Difficulty Level:Really Easy
-
Total Repair Time:Less than 15 mins
-
Tools:Screw drivers
1 of 2 people
found this instruction helpful.
Was this instruction helpful to you?
Thank you for voting!
The radiant ring element had broken
-
Martin from Alexandria, VA
-
Difficulty Level:Really Easy
-
Total Repair Time:Less than 15 mins
-
Tools:Screw drivers
1 of 2 people
found this instruction helpful.
Was this instruction helpful to you?
Thank you for voting!
The burner was shortening out and would work sometime. The first time I replace the burner but the new one shorted out quickly.
I unplugged the stove. Took out the burner and removed receptacle by pulling it out of the bracket and clipping the wires. One thing you want to make sure is that when you clip the wires from the receptacle you're replacing you leave enough wire so that you can connect them to the wires on the new receptacle when it is in place on the stove. I had just enough but would have liked more. The bracket I received didn't match the one on the stove so I used the one on the stove since the receptacle itself was the same as the one I was replacing.
Parts Used:
-
shawn from Vancouver, WA
-
Difficulty Level:Really Easy
-
Total Repair Time:Less than 15 mins
-
Tools:Pliers
1 of 3 people
found this instruction helpful.
Was this instruction helpful to you?
Thank you for voting!