




















C200 - Instructions
Keep searches simple. Use keywords, e.g. "leaking", "pump", "broken" or "fit".
knobs sloppy and discolored and filter bent
This has been a wonderful cooktop and I could only hope todays quality is equally as good but after 25 yrs. I doubt it especially after looking at new dishwashers in the last couple of days. too sad. but these repairs were minor and no trouble. what amazed me most was ordering one afternoon and the parts were here the following day ! great service
Parts Used:


-
Robert from Meredith, NH
-
Difficulty Level:Really Easy
-
Total Repair Time:Less than 15 mins
0 of 1 people
found this instruction helpful.
Was this instruction helpful to you?
Thank you for voting!
Knobs were worn and illegible
Removed the old ones and snapped on the new.
It was a snap and what a difference! Even though the cooktop is over 20 years old, it looks new again. Thanks to the knowledgeable support people at Part Select.Com we picked the right knobs the first time.
It was a snap and what a difference! Even though the cooktop is over 20 years old, it looks new again. Thanks to the knowledgeable support people at Part Select.Com we picked the right knobs the first time.
Parts Used:
-
Denise from Huntington, NY
-
Difficulty Level:Really Easy
-
Total Repair Time:Less than 15 mins
0 of 1 people
found this instruction helpful.
Was this instruction helpful to you?
Thank you for voting!
20 year old countertop - dials unreadable
Two dials available, chose the wrong one, PartSelect paid to have the wrong ones returned and issued credit, while helping to select the correct ones. Friendly, REAL people, who absolutely sealed the deal. I'll always check here first for parts, filters, anything. Thanks PartSelect
Parts Used:
-
Carolyn from Fulshear, TX
-
Difficulty Level:Really Easy
-
Total Repair Time:Less than 15 mins
0 of 1 people
found this instruction helpful.
Was this instruction helpful to you?
Thank you for voting!
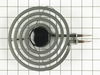
intermittent heat from burner
Pulled out electric heating element and replaced with new. I have had this frustrating problem for 2 years and after replacing the elements they now work like new! My only question, why did it take me so long to replace???
Parts Used:
-
Brian from Westport, CT
-
Difficulty Level:Really Easy
-
Total Repair Time:Less than 15 mins
0 of 1 people
found this instruction helpful.
Was this instruction helpful to you?
Thank you for voting!
easy as pie
Just remove the old ones and replace them with the new ones. no tools necessary.
Parts Used:


-
Michelle from College Station, TX
-
Difficulty Level:Really Easy
-
Total Repair Time:Less than 15 mins
0 of 1 people
found this instruction helpful.
Was this instruction helpful to you?
Thank you for voting!
Filter replacement.
-
Gerald from Maplefalls, WA
-
Difficulty Level:Really Easy
-
Total Repair Time:Less than 15 mins
0 of 1 people
found this instruction helpful.
Was this instruction helpful to you?
Thank you for voting!
old coil burners with one burned out
Our old Jenn-air cooktop was at least 28 years old.They looked bad.We didn't see the need to buy a whole cooktop when the rest of the stove, fan,etc. still worked great. So I got on the Partselect web site and found a black radiant cartridge. It came exactly the day the said it would. I took out the old coil cartridge and plugged the new one. Lo, my stove now looks modern. We also ordered a terminal block. With this my husband repaired the old burned out coil burner and in about 20 minutes I had a spare to use with my canner. I really like the new cartridge and plan to buy another one. It was a pleasure to do business with Partselect.
Parts Used:
-
Kenneth L. from Rush, KY
-
Difficulty Level:Really Easy
-
Total Repair Time:Less than 15 mins
0 of 1 people
found this instruction helpful.
Was this instruction helpful to you?
Thank you for voting!
burned drip pans
replaced drip pans--they fit perfectly and look great!
Parts Used:
-
Julie from Bloomfield Hills, MI
-
Difficulty Level:Really Easy
-
Total Repair Time:Less than 15 mins
0 of 1 people
found this instruction helpful.
Was this instruction helpful to you?
Thank you for voting!
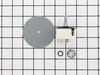
The switch didn't control the heat range
Took the front panel off by removing 4 screws. Then remove the switch by loosing the nut hold it. Then replace the wire on the new the way they were on the old switch. Put the panel back on.
Parts Used:
-
Samuel L. from Cardington, OH
-
Difficulty Level:Really Easy
-
Total Repair Time:Less than 15 mins
-
Tools:Pliers, Screw drivers
0 of 1 people
found this instruction helpful.
Was this instruction helpful to you?
Thank you for voting!
Filter needed replacement. Old one was falling apart.
Removed old filter, dropped in the new one.
(This really was not a "repair")
(This really was not a "repair")
Parts Used:
-
Sophie from Warrenton, VA
-
Difficulty Level:Really Easy
-
Total Repair Time:Less than 15 mins
0 of 1 people
found this instruction helpful.
Was this instruction helpful to you?
Thank you for voting!
Grease filter was torn and bent
-
Brent from Rancho Santa Fe, CA
-
Difficulty Level:Really Easy
-
Total Repair Time:Less than 15 mins
0 of 1 people
found this instruction helpful.
Was this instruction helpful to you?
Thank you for voting!
Old filter couldn't be cleaned
This was a no-brainer: old filter out, new filter in. In addition to replacing an old, greasy filter, I found that the exhaust fan now draws cooking fumes much more efficiently. So why did I wait the 6 years since we moved into this house to do this???
Parts Used:
-
William from Goshen, NY
-
Difficulty Level:Really Easy
-
Total Repair Time:Less than 15 mins
0 of 1 people
found this instruction helpful.
Was this instruction helpful to you?
Thank you for voting!
burner drip bowl was too soiled to clean
couldn't find replacement in our town, which is quite
small and no Maytag dealers. So, I ordered on line two drip bowls and saved one"just in case"
Mission accomplished. Thanks allot.
small and no Maytag dealers. So, I ordered on line two drip bowls and saved one"just in case"
Mission accomplished. Thanks allot.
Parts Used:
-
joyce from sequim, WA
-
Difficulty Level:Really Easy
-
Total Repair Time:Less than 15 mins
0 of 1 people
found this instruction helpful.
Was this instruction helpful to you?
Thank you for voting!
My drip pans had rusted and I had a hole in one of them.
I just pulled the electric element out of the slot and dropped the drip pan in place and slipped the electric element back in place and it was ready to go. It looks almost new. We built a new house in 95. It took 17 months to build it. I got the stainless steel cook top that you can have the grill on one side or you can pull the grill off and slip in the burners. It is only 4 burners but it is plenty to work with. It has a down draft.
Parts Used:
-
Bobby from Paragould, AR
-
Difficulty Level:Really Easy
-
Total Repair Time:Less than 15 mins
0 of 1 people
found this instruction helpful.
Was this instruction helpful to you?
Thank you for voting!
vent fan cloging up
old filter fell into from removing and cleaning,
removed cover pulled out filter ,replaced it with new one.
removed cover pulled out filter ,replaced it with new one.
Parts Used:
-
JAMES from McALESTER, OK
-
Difficulty Level:Really Easy
-
Total Repair Time:Less than 15 mins
0 of 1 people
found this instruction helpful.
Was this instruction helpful to you?
Thank you for voting!