




















BX521VE (P1325033W B) Amana Refrigerator - Instructions
Keep searches simple. Use keywords, e.g. "leaking", "pump", "broken" or "fit".
There was no light on in refrig area
Just replaced the switch, but unfortunately that was not the problem; nor was it the bulb....so I am back to square one.
But Parts Select is a great place to order from. Thank you.
But Parts Select is a great place to order from. Thank you.
Parts Used:

-
Lori from Chuluota, FL
-
Difficulty Level:Easy
-
Total Repair Time:Less than 15 mins
-
Tools:Screw drivers
12 of 19 people
found this instruction helpful.
Was this instruction helpful to you?
Thank you for voting!
light not working in fridge
It was so easy!
Thanks for the rush to my home on the part.
I just unscrewed the plate that locks in the light switch (screwdriver) and unplugged the old faulty part and plugged in the new switch, screwed the cover back on and I was done!
Easy!
And I am not Mr. Fix-it!
Thanks for the rush to my home on the part.
I just unscrewed the plate that locks in the light switch (screwdriver) and unplugged the old faulty part and plugged in the new switch, screwed the cover back on and I was done!
Easy!
And I am not Mr. Fix-it!
Parts Used:
-
Michael from East Meadow, NY
-
Difficulty Level:Really Easy
-
Total Repair Time:Less than 15 mins
-
Tools:Screw drivers
7 of 8 people
found this instruction helpful.
Was this instruction helpful to you?
Thank you for voting!
Broken Piece

-
anthony from georgetown, IL
-
Difficulty Level:A Bit Difficult
-
Total Repair Time:30 - 60 mins
-
Tools:Screw drivers
7 of 8 people
found this instruction helpful.
Was this instruction helpful to you?
Thank you for voting!
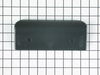
broken freezer Handle
-
lisa from sunrise, FL
-
Difficulty Level:Really Easy
-
Total Repair Time:Less than 15 mins
-
Tools:Screw drivers
7 of 9 people
found this instruction helpful.
Was this instruction helpful to you?
Thank you for voting!
All three lights are not working...lights are off but refrigerator still cooling. Also, the control box not lit up to show the temparture for freezer and refrigerator
Used a screw driver to pull old switch. Pulled one wire at a time, only two wires. After wires instlled to new switch push new one back in place where the old one was.
Parts Used:
-
Antonio from San Antonio, TX
-
Difficulty Level:Really Easy
-
Total Repair Time:Less than 15 mins
-
Tools:Screw drivers
7 of 10 people
found this instruction helpful.
Was this instruction helpful to you?
Thank you for voting!
The Switch Broke...Absolutely Fell Apart.
I simply removed the old switch using 2 small screwdrivers and the old switch case popped out. I then upluged the wires from the old switch and reversed the process. Didn't take longer than 5 minutes begining to end! Thank you for the great service! Duncan quaid
Parts Used:
-
Duncan from Metairie, LA
-
Difficulty Level:Really Easy
-
Total Repair Time:Less than 15 mins
-
Tools:Screw drivers
5 of 5 people
found this instruction helpful.
Was this instruction helpful to you?
Thank you for voting!
i lost the part and had to replace it
-
walter from chrlestown, MA
-
Difficulty Level:Really Easy
-
Total Repair Time:Less than 15 mins
4 of 4 people
found this instruction helpful.
Was this instruction helpful to you?
Thank you for voting!
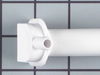
The water supply line to the ice maker kept popping off after I replaced the water filter because an "ice plug" had formed in the fill tube, unbeknownst to me.
1. Turn your water OFF and pull the refrigerator out from the wall so you can access the back.
2. Use pliers to remove tubing clamp.
3. Remove old water fill tube.
4. I used a putty knife to gently pry out the old fill tube from the back of the refrigerator. Once the fill tube pulls out about 1/4 to 1/2", then you can gently pull the remainder of the tube out by hand. Once I removed my "old" fill tube, that is when I saw the "ice plug" that was causing pressure in the water supply line and caused my water line to pop off.
5. Install new fill tube. The end that goes in first needs to go through a small "ring" inside the freezer (this "ring" is not encountered until the fill tube only has about one more inch to be inserted into the back of the refigerator. I could barely see this "ring" if I opened the freezer drawer and stuck my head in as far as I could. I had to gently rotate the new fill tube until it cleared the "ring". You will feel some resistance until it lines up properly.
6. Snugly push in the part that stays on the outside of the refrigerator until it looks like it is sealed.
7. Gently push up the water fill tube where it belongs in the new part and replace the tubing clamp.
8. Turn your water on and make sure there are no leaks (I left my refrigerator out for about an hour).
9. Push your refrigerator back in place.
2. Use pliers to remove tubing clamp.
3. Remove old water fill tube.
4. I used a putty knife to gently pry out the old fill tube from the back of the refrigerator. Once the fill tube pulls out about 1/4 to 1/2", then you can gently pull the remainder of the tube out by hand. Once I removed my "old" fill tube, that is when I saw the "ice plug" that was causing pressure in the water supply line and caused my water line to pop off.
5. Install new fill tube. The end that goes in first needs to go through a small "ring" inside the freezer (this "ring" is not encountered until the fill tube only has about one more inch to be inserted into the back of the refigerator. I could barely see this "ring" if I opened the freezer drawer and stuck my head in as far as I could. I had to gently rotate the new fill tube until it cleared the "ring". You will feel some resistance until it lines up properly.
6. Snugly push in the part that stays on the outside of the refrigerator until it looks like it is sealed.
7. Gently push up the water fill tube where it belongs in the new part and replace the tubing clamp.
8. Turn your water on and make sure there are no leaks (I left my refrigerator out for about an hour).
9. Push your refrigerator back in place.
Parts Used:
-
Michael from TAKOMA PARK, MD
-
Difficulty Level:Easy
-
Total Repair Time:30 - 60 mins
-
Tools:Nutdriver, Pliers
5 of 7 people
found this instruction helpful.
Was this instruction helpful to you?
Thank you for voting!
Water Fill Cup Broke
The Ice maker unit had to be removed and the shaft had to also be removed, which required dis-assembling the motor drive. The thickness of the shaft and the bearing fill cup prevents it from simply pushing it in place. Other than that I have Ice.
Parts Used:
-
Sam from Las Vegas, NV
-
Difficulty Level:A Bit Difficult
-
Total Repair Time:30 - 60 mins
-
Tools:Screw drivers
5 of 7 people
found this instruction helpful.
Was this instruction helpful to you?
Thank you for voting!
Refrigerator light would not stay on
Removed the 2 screws holding the light bulb shield, then the 4 uolding the metal panel. Unplugged the olw door switch and replaced.
reassembled the pieces.
reassembled the pieces.
Parts Used:
-
Dave from Manchester Center, VT
-
Difficulty Level:Easy
-
Total Repair Time:15 - 30 mins
-
Tools:Nutdriver, Socket set
4 of 4 people
found this instruction helpful.
Was this instruction helpful to you?
Thank you for voting!
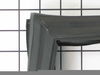
Failed gasket
Easy but time consuming. I followed the excellent video instructions on this site and read through all the user comments before starting. I am a handy 65 year old woman who did this alone. I put the gasket in the dryer for 15 minutes then laid it flat for 24 hours before starting. I used a kitchen spatula to release the failed gasket and the plastic panel from the freezer door. The old freezer gasket allowed moisture into the insulation behind the plastic panel on the inside of the freezer door. The insulation inside was frozen solid and took several hours to defrost before I could continue, so prepare for down time by unloading your freezer. I used spray foam insulation after removing the old insulation and cleaning the plastic panel. The foam expands 2x so don't overfill the crevices or you will have to carve it out later like I did. It's really messy so wear gloves and protect surfaces. Putting it back together is easy. I used a heat gun to smooth out the kinks in the gasket and used the spatula to slide the gasket in place. I learned the hard way that there are 4 oval shaped openings on the plastic panel (one on each side) that should be screwed in first to align the panel correctly before screwing in the rest of the screws. My 25+ old fridge is running like new again! It's quieter and the blower isn't running as often. Very happy.
Parts Used:
-
Janet from CARMEL, IN
-
Difficulty Level:Easy
-
Total Repair Time:More than 2 hours
-
Tools:Socket set
4 of 5 people
found this instruction helpful.
Was this instruction helpful to you?
Thank you for voting!
lights wouldn't come on/work in refrigerator
Referencing the info/schematics you have on your website, I unscrewed/unattached top-front panel (carefully), from behind the panel you have to detach the wires (2) from the switch, pushed "in" the switch to remove, put in new switch and attach wires to test BEFORE remounting panel. Tada!! Thank you PartSelect! You saved me at least $80...would have been at least $100 to have a repair person come to the house!
Parts Used:
-
Jane from Albuquerque, NM
-
Difficulty Level:Easy
-
Total Repair Time:15 - 30 mins
-
Tools:Pliers, Screw drivers, Socket set
4 of 6 people
found this instruction helpful.
Was this instruction helpful to you?
Thank you for voting!
Old fill tube was blocked
Cut old fill tube into pieces, removed and replaced with new tube. Extremely easy.
Parts Used:
-
David from VESTAL, NY
-
Difficulty Level:Very Easy
-
Total Repair Time:15 - 30 mins
-
Tools:Pliers
3 of 3 people
found this instruction helpful.
Was this instruction helpful to you?
Thank you for voting!
Cracked handle
-
cheryl from WANAQUE, NJ
-
Difficulty Level:Very Easy
-
Total Repair Time:Less than 15 mins
-
Tools:Screw drivers
3 of 3 people
found this instruction helpful.
Was this instruction helpful to you?
Thank you for voting!
freezer door handle was broken
removed the screws and removed the old handle and put the new handle in place and screwed the screws back in.
Parts Used:
-
James from BELLEVILLE, IL
-
Difficulty Level:Really Easy
-
Total Repair Time:Less than 15 mins
3 of 3 people
found this instruction helpful.
Was this instruction helpful to you?
Thank you for voting!