




















BLB14DRANA1 Whirlpool Dishwasher - Instructions
Keep searches simple. Use keywords, e.g. "leaking", "pump", "broken" or "fit".
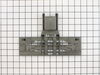
Replacing broken adjuster housing cover.
Take out the upper dishwasher rack. Place the adjuster towards the back of the upper each place attachment clips to secure adjuster and the adjuster clips to the back of the housing. Check to back sure adjuster move up and down and click back into place. Your installation is complete. Good luck!
Parts Used:

-
Cassie from RIVERDALE, CA
-
Difficulty Level:Really Easy
-
Total Repair Time:30 - 60 mins
3 of 5 people
found this instruction helpful.
Was this instruction helpful to you?
Thank you for voting!
The left side was drooping so couldn’t use the dishwasher
Removed the upper rack and replaced both side with new upper rack adjusters that are now metal and not plastic!
Parts Used:
-
Amy from Green Bay, WI
-
Difficulty Level:Easy
-
Total Repair Time:30 - 60 mins
-
Tools:Screw drivers
2 of 2 people
found this instruction helpful.
Was this instruction helpful to you?
Thank you for voting!
Dishwasher was leaking at the bottom edge of door.
Ordered the door gasket and replaced it. Worked perfect. The trick was to stretch the gasket a little as it went around the top curvatures. It would stick out some and not sit as flat as on the top and sides. This helped it to flatten down better.
Parts Used:

-
robert from SOUTH HADLEY, MA
-
Difficulty Level:Very Easy
-
Total Repair Time:30 - 60 mins
2 of 2 people
found this instruction helpful.
Was this instruction helpful to you?
Thank you for voting!
Dish rack slide arms losing ball bearings
Unscrewed mounting screws, pulled dishwasher out halfway, replaced arms, 4 screws each side .....very simple 30 min tops. Parts perfect and quick delivery!
Parts Used:
-
Royce from GREENSBORO, NC
-
Difficulty Level:Really Easy
-
Total Repair Time:30 - 60 mins
-
Tools:Screw drivers
2 of 2 people
found this instruction helpful.
Was this instruction helpful to you?
Thank you for voting!
We found pieces of glass in the drain pump
Our new drain pump arrived with 2 clips broken. So we switched the housing with the old pump and installed
Used youTube video for step by step instructions
Used youTube video for step by step instructions
Parts Used:

-
Kathleen from DUBLIN, CA
-
Difficulty Level:Really Easy
-
Total Repair Time:30 - 60 mins
-
Tools:Socket set
2 of 2 people
found this instruction helpful.
Was this instruction helpful to you?
Thank you for voting!
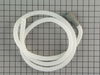
Dish washer was very smelly.
After replacing garbage disposal. I referred to you video you sent me when i received the new replacement hose. That made it look very easy to install. Thank you for all your help and support.
Parts Used:
-
Robert from Des Moines, IA
-
Difficulty Level:Really Easy
-
Total Repair Time:30 - 60 mins
-
Tools:Nutdriver, Pliers, Screw drivers, Wrench set
2 of 2 people
found this instruction helpful.
Was this instruction helpful to you?
Thank you for voting!
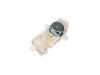
Leaking dishwasher
Turned the dishwasher in its side. Used the video step by step. This is why we purchased from this site
Parts Used:
-
Nancy from BLOOMINGTON, IN
-
Difficulty Level:Very Easy
-
Total Repair Time:30 - 60 mins
-
Tools:Nutdriver
2 of 2 people
found this instruction helpful.
Was this instruction helpful to you?
Thank you for voting!
The plate was missing at the time we purchased the house.
It was ok but screw holes were not in the right spot but we put one in and that is sufficient for now. It prevent thing from follow under it.
Parts Used:
-
Barbara from NEWPORT NEWS, VA
-
Difficulty Level:A Bit Difficult
-
Total Repair Time:1- 2 hours
-
Tools:Screw drivers
2 of 2 people
found this instruction helpful.
Was this instruction helpful to you?
Thank you for voting!
Develeoped a leak on the bottom.
Pulled dishwasher out of compartment, removed all parts underneath. removed inner parts, removed pump assembly. Installed new pump assembly and grommet. Reassembled in reverse order, test ran and unit was operating normal and no leaks.
Parts Used:
-
Eladio from LOGAN, OH
-
Difficulty Level:A Bit Difficult
-
Total Repair Time:1- 2 hours
-
Tools:Nutdriver, Screw drivers, Wrench (Adjustable)
3 of 5 people
found this instruction helpful.
Was this instruction helpful to you?
Thank you for voting!
Left-side rack adjuster broke, so upper rack couldn't be used properly.
Per suggestions from other reviews, I looked for You Tube videos for replacing this part. The video I used was completely necessary, but moved way too fast, so required lots of stopping, rewinding and starting again. But I managed to get the old rack adjuster removed and the new one installed without too much trouble.
Then I tried installing it in the pull-out rail. The front connector on the new adjuster would not fit into the appropriate slot. Initially I thought maybe the part was defective, but determined that the dimensions were as accurate as my eye and tape measure could evaluate. Finally, I settled on the expedient of filing away at least 1/16" from one edge of the slot so that the connector would drop into place.
Not sure why this discrepancy existed but the problem appears to be resolved.
Then I tried installing it in the pull-out rail. The front connector on the new adjuster would not fit into the appropriate slot. Initially I thought maybe the part was defective, but determined that the dimensions were as accurate as my eye and tape measure could evaluate. Finally, I settled on the expedient of filing away at least 1/16" from one edge of the slot so that the connector would drop into place.
Not sure why this discrepancy existed but the problem appears to be resolved.
Parts Used:
-
Thomas from PHOENIX, AZ
-
Difficulty Level:A Bit Difficult
-
Total Repair Time:1- 2 hours
-
Tools:Screw drivers
2 of 2 people
found this instruction helpful.
Was this instruction helpful to you?
Thank you for voting!
The Broan downdraft vent fan turned itself on at random times and ran continuously without input.
I could not effect a repair because the parts did not arrive on the promised date and after several calls I still do not know when they will arrive or even if they have been shipped.
Parts Used:
-
William from WESTFORD, MA
-
Difficulty Level:Very Difficult
-
Total Repair Time:30 - 60 mins
2 of 2 people
found this instruction helpful.
Was this instruction helpful to you?
Thank you for voting!
Top rack kept coming off the left slide track
I followed the video and even though my dishwasher was slightly different from the one shown, everything worked well. I was lucky that I had enough clearance to pull the dishwasher away from the countertop far enough to make the repair, without having to remove any dishwasher wiring below. I replaced both side tracks, even though only the left side was broken.
Parts Used:
-
Bob from WESTWOOD, MA
-
Difficulty Level:A Bit Difficult
-
Total Repair Time:More than 2 hours
-
Tools:Pliers, Screw drivers, Socket set, Wrench (Adjustable)
2 of 2 people
found this instruction helpful.
Was this instruction helpful to you?
Thank you for voting!
PartSelect Scammers
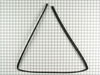
PartSelect intentionally shipped obsolete part that could not possibly fit a dishwasher. The part looked to be a rectangle door seal for a freezer/ref. You make it impossible to return the part. I find it interesting that you sent the correct install video and wrong part.
Suggestion: After you print a shipping label take a picture of the part and shipping label before it is boxed. The customer should not have to send you a picture of the wrong part and the serial number of the appliance for a refund. You did not need the serial number to ship it.
I will never use your company again William Dewberry
Suggestion: After you print a shipping label take a picture of the part and shipping label before it is boxed. The customer should not have to send you a picture of the wrong part and the serial number of the appliance for a refund. You did not need the serial number to ship it.
I will never use your company again William Dewberry
Parts Used:
-
William from DESOTO, TX
-
Difficulty Level:Very Difficult
-
Total Repair Time:More than 2 hours
3 of 5 people
found this instruction helpful.
Was this instruction helpful to you?
Thank you for voting!
Dishwasher door had lost springback
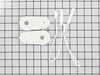
1) Pull out dishwasher from under counter. 2) Disconnect spring located at the bottom on each side of dishwasher. 3) Using socket remove pulley wheels from each side at bottom. 4) Install new pulleys on each side. 5) Wind pulley cord around both wheels and attach to one end of the spring on each side. 6) Using pliers extend other spring end to lower frame of dishwasher on each side. 7) Open and close dishwasher door to test. 8) Replacement complete
Parts Used:
-
Peter from BIRMINGHAM, MI
-
Difficulty Level:Easy
-
Total Repair Time:15 - 30 mins
-
Tools:Pliers, Socket set
2 of 2 people
found this instruction helpful.
Was this instruction helpful to you?
Thank you for voting!
Door falls when opened
Attached new link, then stretched the spring with pliers and routed link over the pulley. Replaced both links.
Parts Used:
-
JOSEPH from LAMBERTVILLE, NJ
-
Difficulty Level:Really Easy
-
Total Repair Time:15 - 30 mins
-
Tools:Pliers, Screw drivers
2 of 2 people
found this instruction helpful.
Was this instruction helpful to you?
Thank you for voting!