




















BKEF3048LSB Frigidaire Range - Instructions
Keep searches simple. Use keywords, e.g. "leaking", "pump", "broken" or "fit".
Repaired Oven Range Light Bulb
The bulb has a plastic clear cover. That cover can just be carefully removed using a screwdriver. It's held in by a metal bracket. After you remove the cover. You'll just need to replace the bulb and then re-install the cover and bracket.
Parts Used:

-
Alan from SAN MATEO, CA
-
Difficulty Level:Very Easy
-
Total Repair Time:Less than 15 mins
-
Tools:Screw drivers
3 of 3 people
found this instruction helpful.
Was this instruction helpful to you?
Thank you for voting!
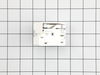
my burners would just heat up solid red even when i had controls turned down to 2 or 3. i would have to turn controls off and back on, then they still would just go back to glowing red
This was my first time ever working with electrical issues. My husband is not physically able to do repairs now. Very easy fix. Just viewed video repair instructions and it went exactly as instructed. Within 45 minutes, I had my stove repaired and cleaned and back in working order!! Great results. My range is working perfectly again and Mama is happy!!
Parts Used:

-
Leota from AUXVASSE, MO
-
Difficulty Level:Really Easy
-
Total Repair Time:30 - 60 mins
-
Tools:Nutdriver, Pliers, Screw drivers
3 of 3 people
found this instruction helpful.
Was this instruction helpful to you?
Thank you for voting!
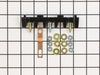
Oven wires arced and caused the terminal block to melt and become detached from the back of the range
Removed the wires that I could, then terminal block. Installing the new terminal block was very easy; however the wires that arced were fused to the terminal bock screws and needed to be cut and new connectors had to be put on the wires to allow them to be reattached to the block safely.
Once all was replaced and reinstalled the oven has worked great. The length of the repair was increased because of the melted parts and having to run to the store to get the new wire connectors big enough to fit on the wires. If we were simply replacing the block and had not encountered the melted ends, it would have been a very quick and easy repair.
Once all was replaced and reinstalled the oven has worked great. The length of the repair was increased because of the melted parts and having to run to the store to get the new wire connectors big enough to fit on the wires. If we were simply replacing the block and had not encountered the melted ends, it would have been a very quick and easy repair.
Parts Used:
-
Daniel from Falmouth, MA
-
Difficulty Level:A Bit Difficult
-
Total Repair Time:30 - 60 mins
-
Tools:Nutdriver, Pliers, Screw drivers, Wrench set
3 of 3 people
found this instruction helpful.
Was this instruction helpful to you?
Thank you for voting!
Right rear burner not working properly
After a brief discussion with CS about the electric stove part was shipped it arrived and I proceeded to install I found it needed to be installed sideways not up & down like the old one. The terminals did not line up so I put the black lead first and the purple lead last in doing that I burned out the switch??? was not easy to install as the video showed his switch matched each wire? My installation was sideways??
Parts Used:
-
Dante from SOUTHOLD, NY
-
Difficulty Level:Difficult
-
Total Repair Time:30 - 60 mins
-
Tools:Nutdriver, Pliers, Screw drivers
3 of 3 people
found this instruction helpful.
Was this instruction helpful to you?
Thank you for voting!
Lens cover for the oven light
-
Larry from COZAD, NE
-
Difficulty Level:Really Easy
-
Total Repair Time:30 - 60 mins
3 of 4 people
found this instruction helpful.
Was this instruction helpful to you?
Thank you for voting!
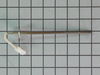
My five-year-old Frigidaire Gas stove was giving an F 10 code.
I looked up the problem on YouTube and it said it was the oven temperature probe was going out. So I ordered the probe and it was shipped out, received within two days. Took out a few screws on the back of the stove installed it, put it all back together and it’s working perfect.
Parts Used:
-
Tracy from Summerville, SC
-
Difficulty Level:Really Easy
-
Total Repair Time:30 - 60 mins
-
Tools:Screw drivers
4 of 7 people
found this instruction helpful.
Was this instruction helpful to you?
Thank you for voting!
Burnt E/CT
-
Luis from SEVIERVILLE, TN
-
Difficulty Level:Really Easy
-
Total Repair Time:30 - 60 mins
3 of 4 people
found this instruction helpful.
Was this instruction helpful to you?
Thank you for voting!
Oven was over heating. In bake mode broiler would glow red and didn’t cut off after preheat
Removed 4 screws on back cover removed 1 screw holding probe and unplugged the probe took it out and installed new probe.
Parts Used:
-
James from S CHESTERFLD, VA
-
Difficulty Level:Very Easy
-
Total Repair Time:15 - 30 mins
-
Tools:Nutdriver
3 of 4 people
found this instruction helpful.
Was this instruction helpful to you?
Thank you for voting!
Range not heating properly
The youtube video clearly described how to remove the back panel and how to replace the probe.
The repair took maybe 20 minutes to complete and 1/2 of that time was spent cleaning behind and underneath the range!
Range is working perfectly now!
The repair took maybe 20 minutes to complete and 1/2 of that time was spent cleaning behind and underneath the range!
Range is working perfectly now!
Parts Used:
-
Eloisa from SPOKANE VLY, WA
-
Difficulty Level:Very Easy
-
Total Repair Time:15 - 30 mins
-
Tools:Screw drivers
4 of 7 people
found this instruction helpful.
Was this instruction helpful to you?
Thank you for voting!
Oven did not heat after replacing element
First unplug range. Remove 6 screws on back of range( 1/4 socket). Remove 4 screws holding Clock/Timer (cross point driver). Peal off plastic front cover from old Clock/Timer and place on new Clock/Timer. Remove electrical connections from old unit and insert on new. Replace all screws and plug range in.
Parts Used:
-
Ron from ORLANDO, FL
-
Difficulty Level:Very Easy
-
Total Repair Time:Less than 15 mins
-
Tools:Nutdriver, Screw drivers
3 of 4 people
found this instruction helpful.
Was this instruction helpful to you?
Thank you for voting!
N/A
I had open back cover and remove the switch than replace new switch. Makesure cable conection.
Parts Used:
-
Dineshbhai from Rincon HWY21, GA
-
Difficulty Level:A Bit Difficult
-
Total Repair Time:Less than 15 mins
-
Tools:Screw drivers
4 of 7 people
found this instruction helpful.
Was this instruction helpful to you?
Thank you for voting!
Burner switch work sometime.
-
junius from WICOMICO, VA
-
Difficulty Level:Really Easy
-
Total Repair Time:1- 2 hours
-
Tools:Nutdriver
3 of 4 people
found this instruction helpful.
Was this instruction helpful to you?
Thank you for voting!
The part I ordered has 5 connections and the part to be replaced has 7 connections. I had to ask a friend who is expert in electrical wiring to help.
My friend used a tester to determine where each wire was supposed to connect to. I'm not sure what he did with the extra connections.
Bottom line is this part should work but you need an expert to do it for you because it's, like I said, not exactly like the one to be replaced.
Bottom line is this part should work but you need an expert to do it for you because it's, like I said, not exactly like the one to be replaced.
Parts Used:
-
Phin from HARRISBURG, PA
-
Difficulty Level:Difficult
-
Total Repair Time:1- 2 hours
-
Tools:Pliers, Screw drivers
2 of 2 people
found this instruction helpful.
Was this instruction helpful to you?
Thank you for voting!
Oven bottom panel rusted away
-
Ron from CINCINNATI, OH
-
Difficulty Level:Really Easy
-
Total Repair Time:Less than 15 mins
-
Tools:Screw drivers
2 of 2 people
found this instruction helpful.
Was this instruction helpful to you?
Thank you for voting!
Burner not controlable
Removed rear panal, removed screws from of switch. Unplued wires and installed new switch and put back together. Very easy.
Parts Used:
-
Royce from KEENE, TX
-
Difficulty Level:Very Easy
-
Total Repair Time:Less than 15 mins
-
Tools:Screw drivers
2 of 2 people
found this instruction helpful.
Was this instruction helpful to you?
Thank you for voting!